Step 1
A Step-by-Step Guide to Establish and Maintain a Botanical Method Aquarium
The Botanical Method Aquarium sits at the intersection of both Blackwater and Biotope aquariums—but with a more forgiving and flexible approach. It fuels the methods and restrictions of each unique replication of nature, which is why covering this method first makes the most sense. While we use natural materials like leaf litter, seed pods, and wood to replicate the rhythms of nature in a botanical method aquarium, we’re not bound to strict regional accuracy (biotopes) or rigid parameters (blackwater). That’s the beauty of this method: you can mix and match species and materials while still building a thriving, ecologically functional ecosystem.
A Botanical Method Aquarium is an ecological microcosm. Terrestrial (allochthonous) materials—leaves, bark, seed pods, wood, etc.—drive the natural processes within the aquarium. These materials shape the water chemistry, fuel microbial colonization, and promote nutrient cycling. They mimic the allochthonous inputs that occur in the wild—organic matter from outside the aquatic habitat, which falls from the forest canopy above, down into the streams and flooded forests, transforming them into biologically rich aquatic habitats.
This approach contrasts with traditional aquarium keeping, where the focus is often on crystal-clear water, pristine substrates, and aggressive mechanical/chemical filtration. In the botanical method, the aquarium itself becomes the largest filter. We embrace decomposition, detritus, biofilms, fungi, and microbial blooms as essential players in the ecosystem, not things to eliminate.
You’ll quickly realize this method challenges conventional thinking. It requires patience, observation, and trust in natural processes. You’ll see networks of fungi (aquatic hyphomycetes), rich biofilms, and detritus accumulation—all signs of a healthy, evolving system. Resist the urge to scrub it all away. Put the toothbrush down.
For a deeper dive into the philosophies behind this method, check out Ben’s Aquarium blog post on The Botanical Method Aquarium. However, this guide serves as your step-by-step roadmap—a practical, detailed walkthrough for building and maintaining your own Botanical Method Aquarium from scratch.
We’ll also be releasing guides on Blackwater Aquariums and Biotope Aquariums, each building on the foundational knowledge you’ll gain here.
Step 2
2. Choosing Your Aquarium: Size and Style
When it comes to choosing a glass box for your Botanical Method Aquarium, one guideline stands out:
Bigger is better. Especially when starting your first aquarium.
We don’t recommend aquariums smaller than 10 gallons for your first ecosystem. More water volume offers greater stability, forgiveness, and flexibility. It gives your ecosystem room to breathe—literally and biologically. It also means more space for fish, plants, and the micro-niches that form within a well-layered substrate and hardscape.
Small Tanks Can Be Tricky, Here's Why!
Smaller aquariums can be used successfully once you’ve gained experience, but they’re less forgiving. A missed water change in a 5-gallon tank has a greater impact—faster evaporation, more dramatic TDS shifts, and the risk of filters running dry. Adding botanicals to a smaller aquarium also creates sharper biological swings, which can stress livestock if you’re still learning how botanicals condition water and influence oxygen levels.
You Don't Need Expensive Gear
You don’t need low-iron, rimless, minimalist glass to succeed. Some of the best botanical method aquariums we’ve seen are built in standard rimmed aquariums—even secondhand tanks. But if you love the aesthetic of a crystal-clear, low-iron glass setup? That works too!
The key is to focus on footprint and surface area, not just volume.
A 20-gallon long tank provides more room for botanicals and greater surface contact with the atmosphere, which improves oxygen and CO₂ exchange. This also gives you space to play with spatial diversity—leaf litter on one side, stones or shallow roots on the other.
That said, shallow tanks may limit your plant choices, especially faster-growing stem plants that prefer deeper water columns. As always, it depends on your goals.
The Paludarium is an Ideal Replication of Nature
A Botanical Method Paludarium is one of the most compelling representations of nature you can build. It connects the canopy above with the aquatic zone below, just like in the wild. As allochthonous materials fall from above—leaves, twigs, insects—they transform the aquatic environment. The connection between land and water becomes not just visible, but functional.
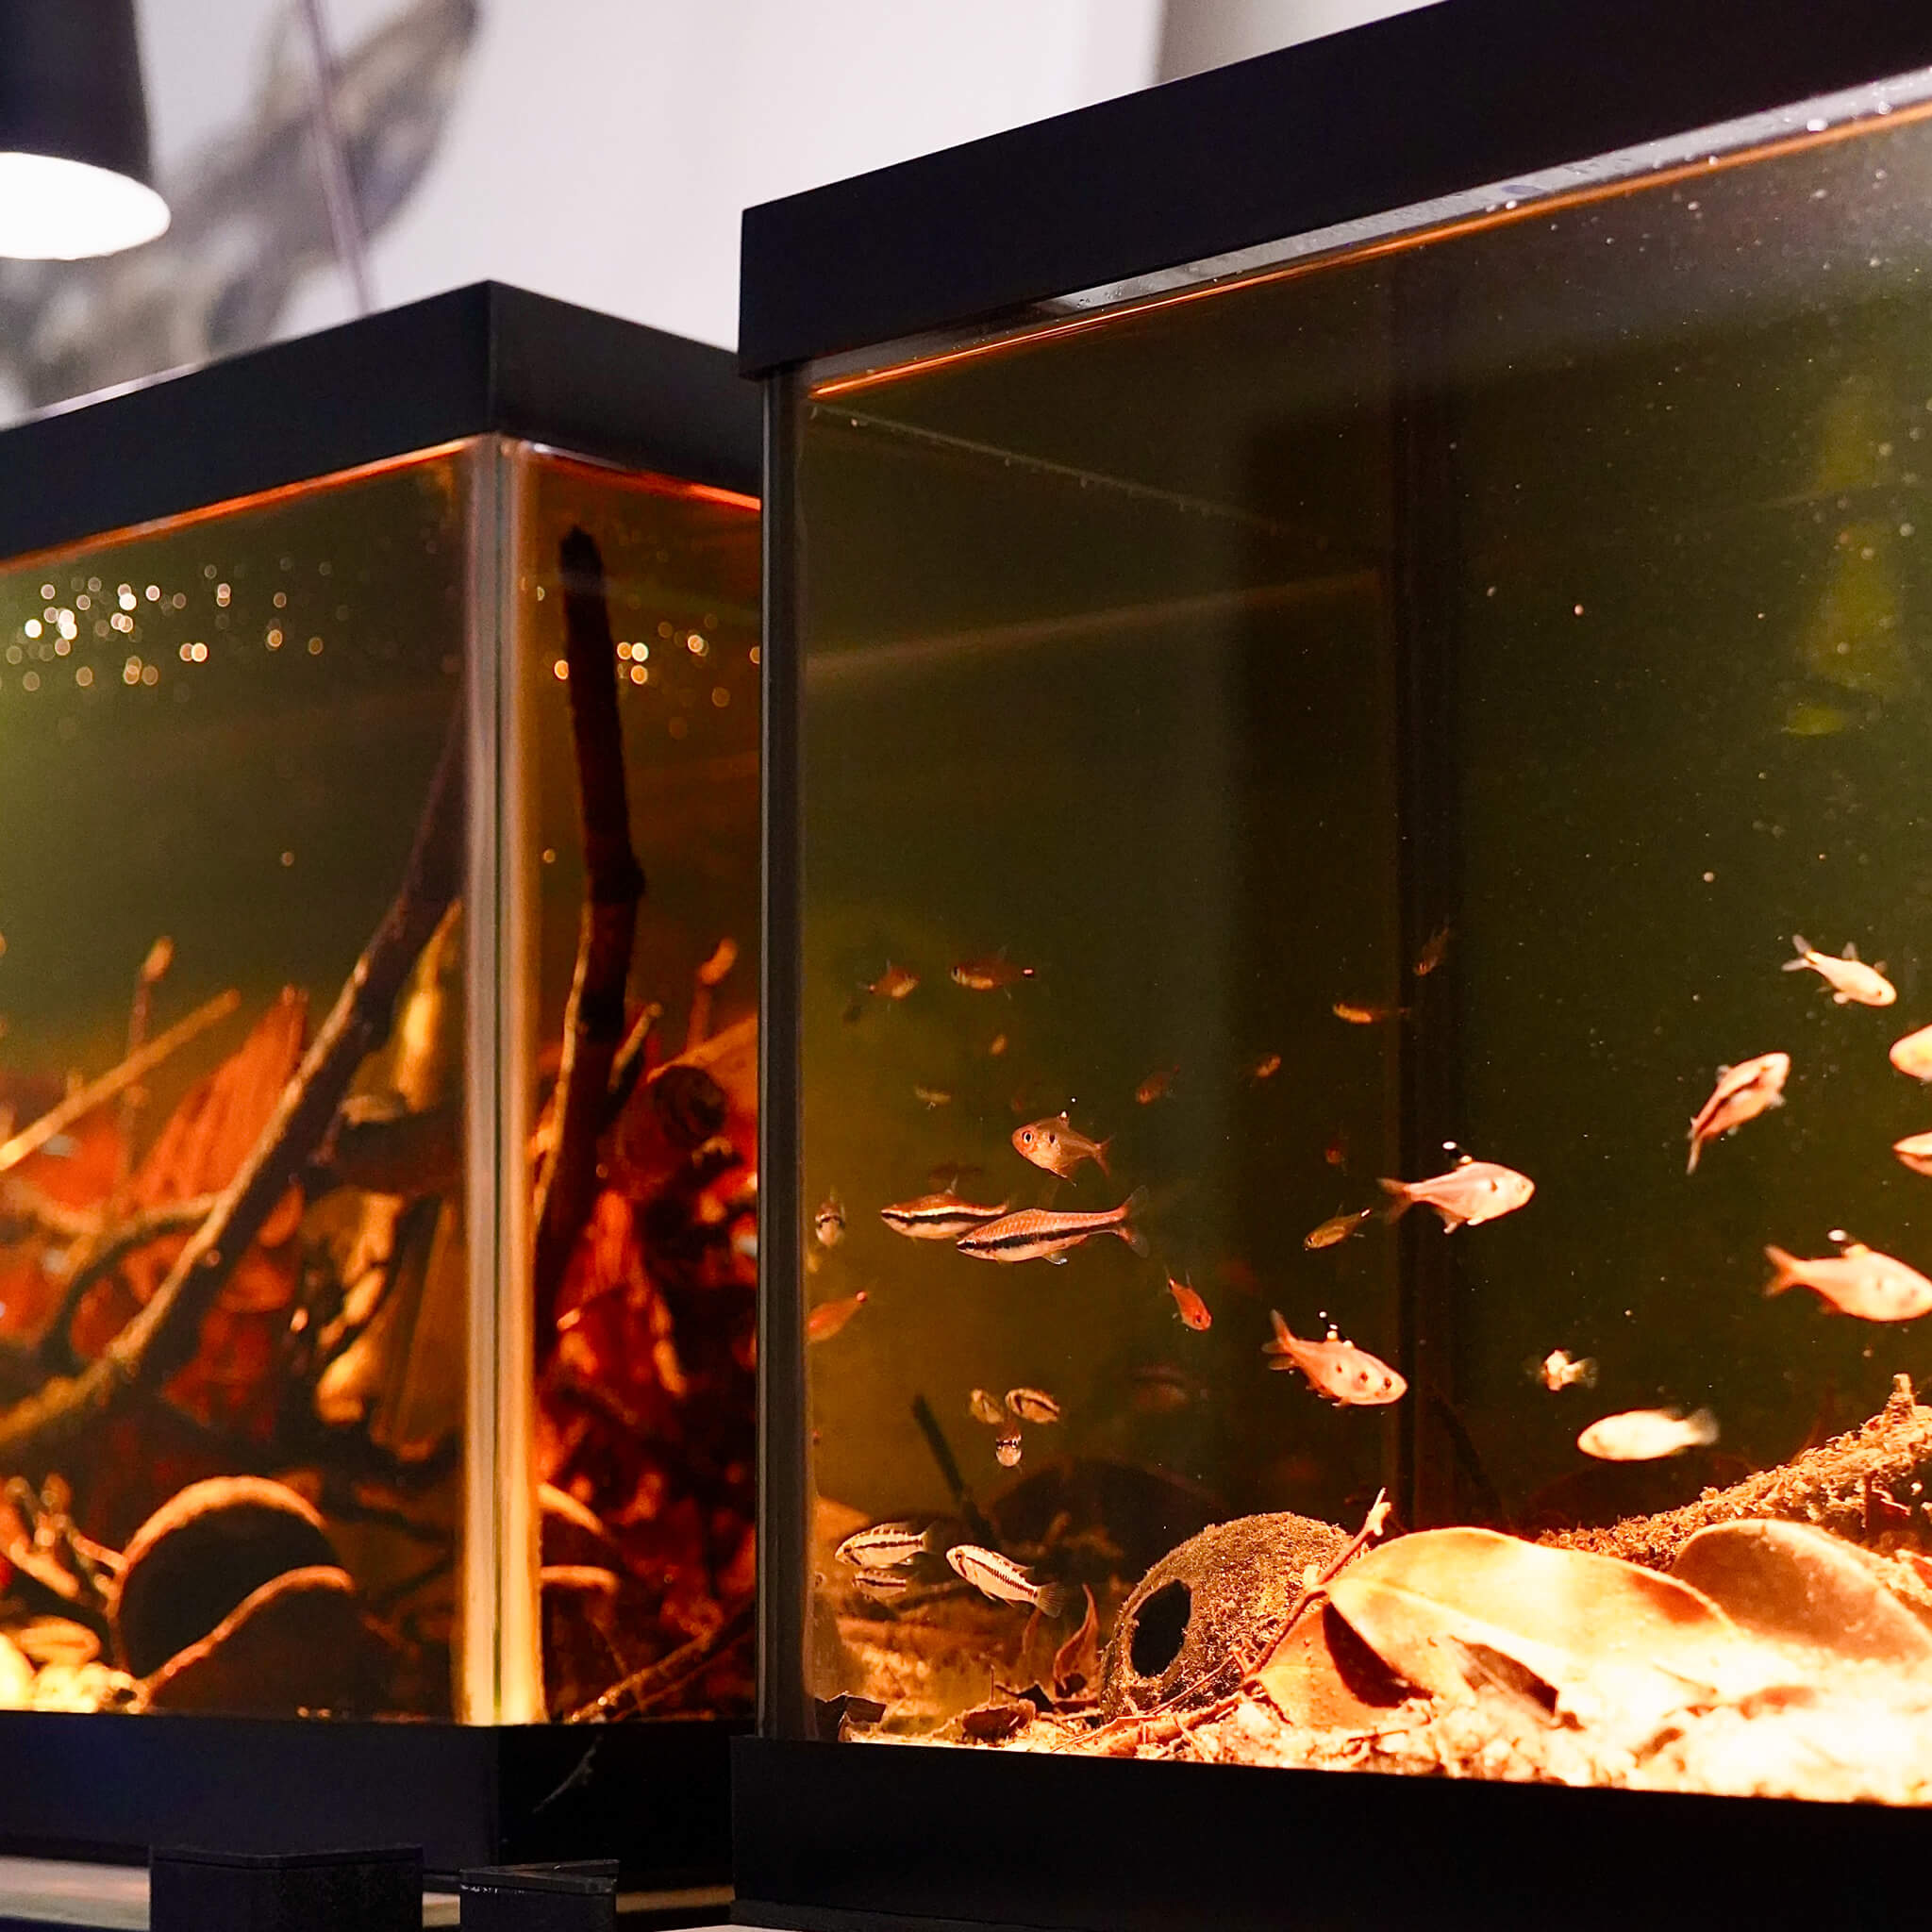
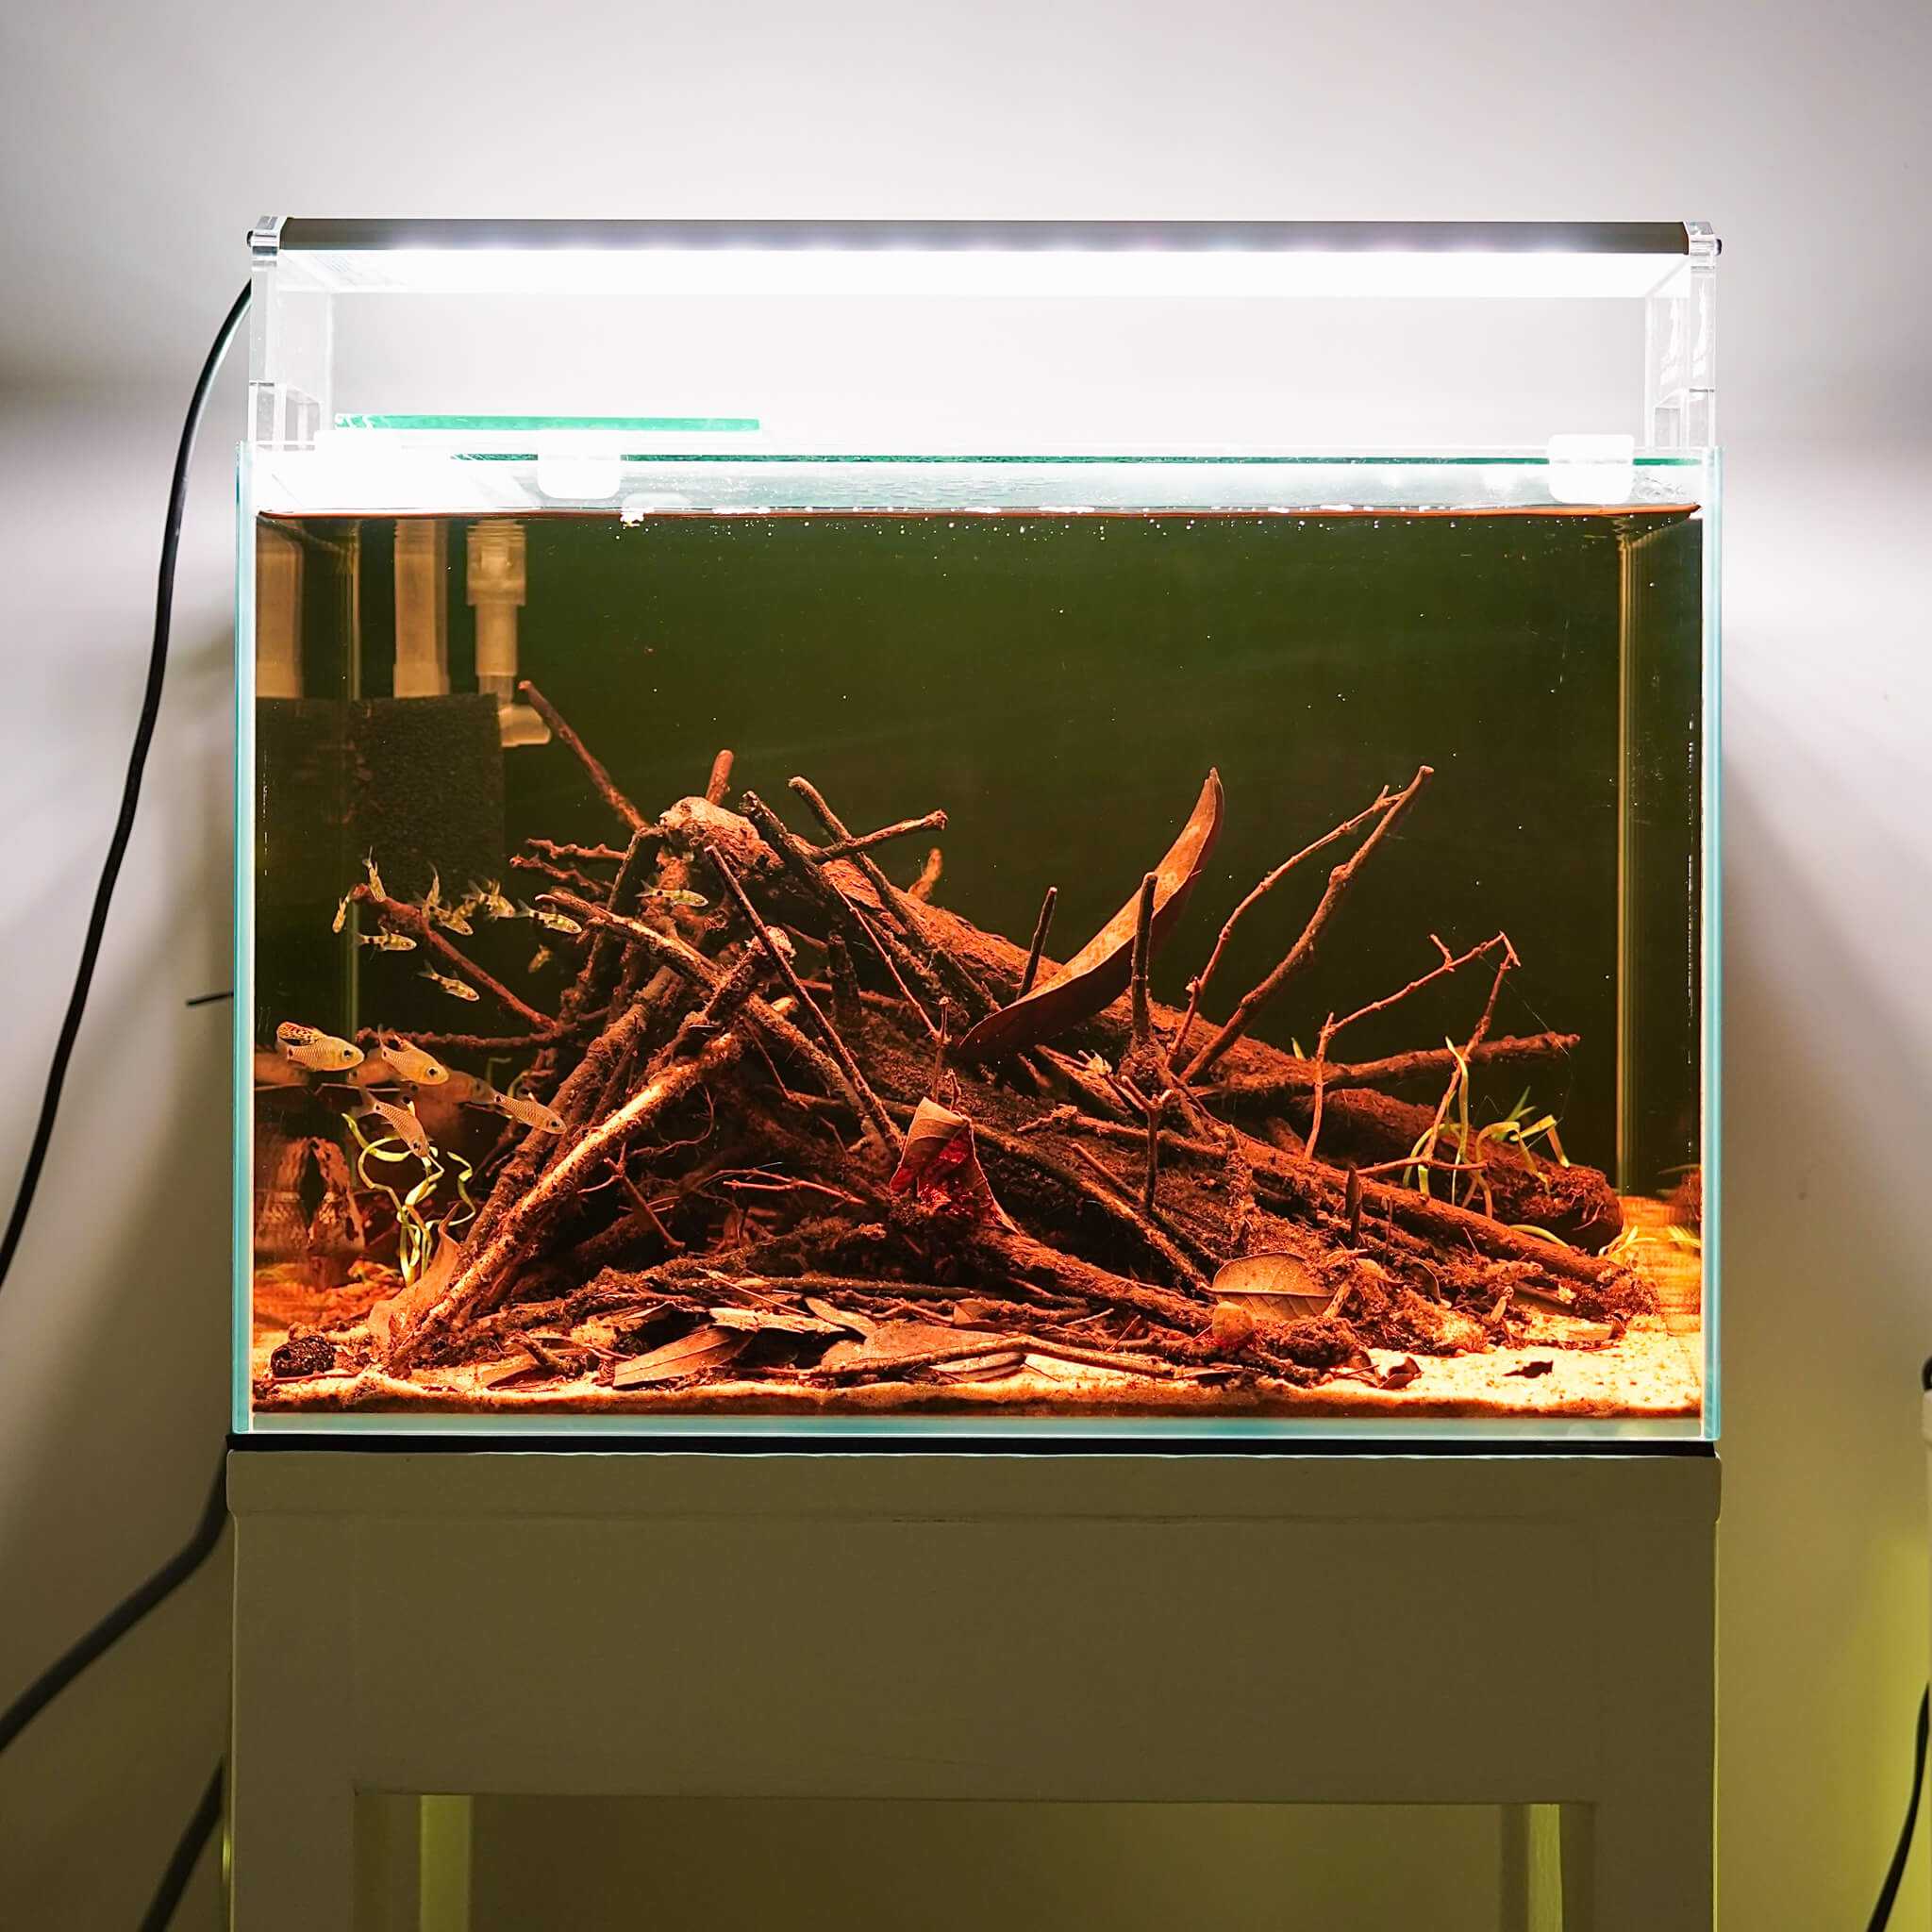
Examples of Botanical Method Aquariums
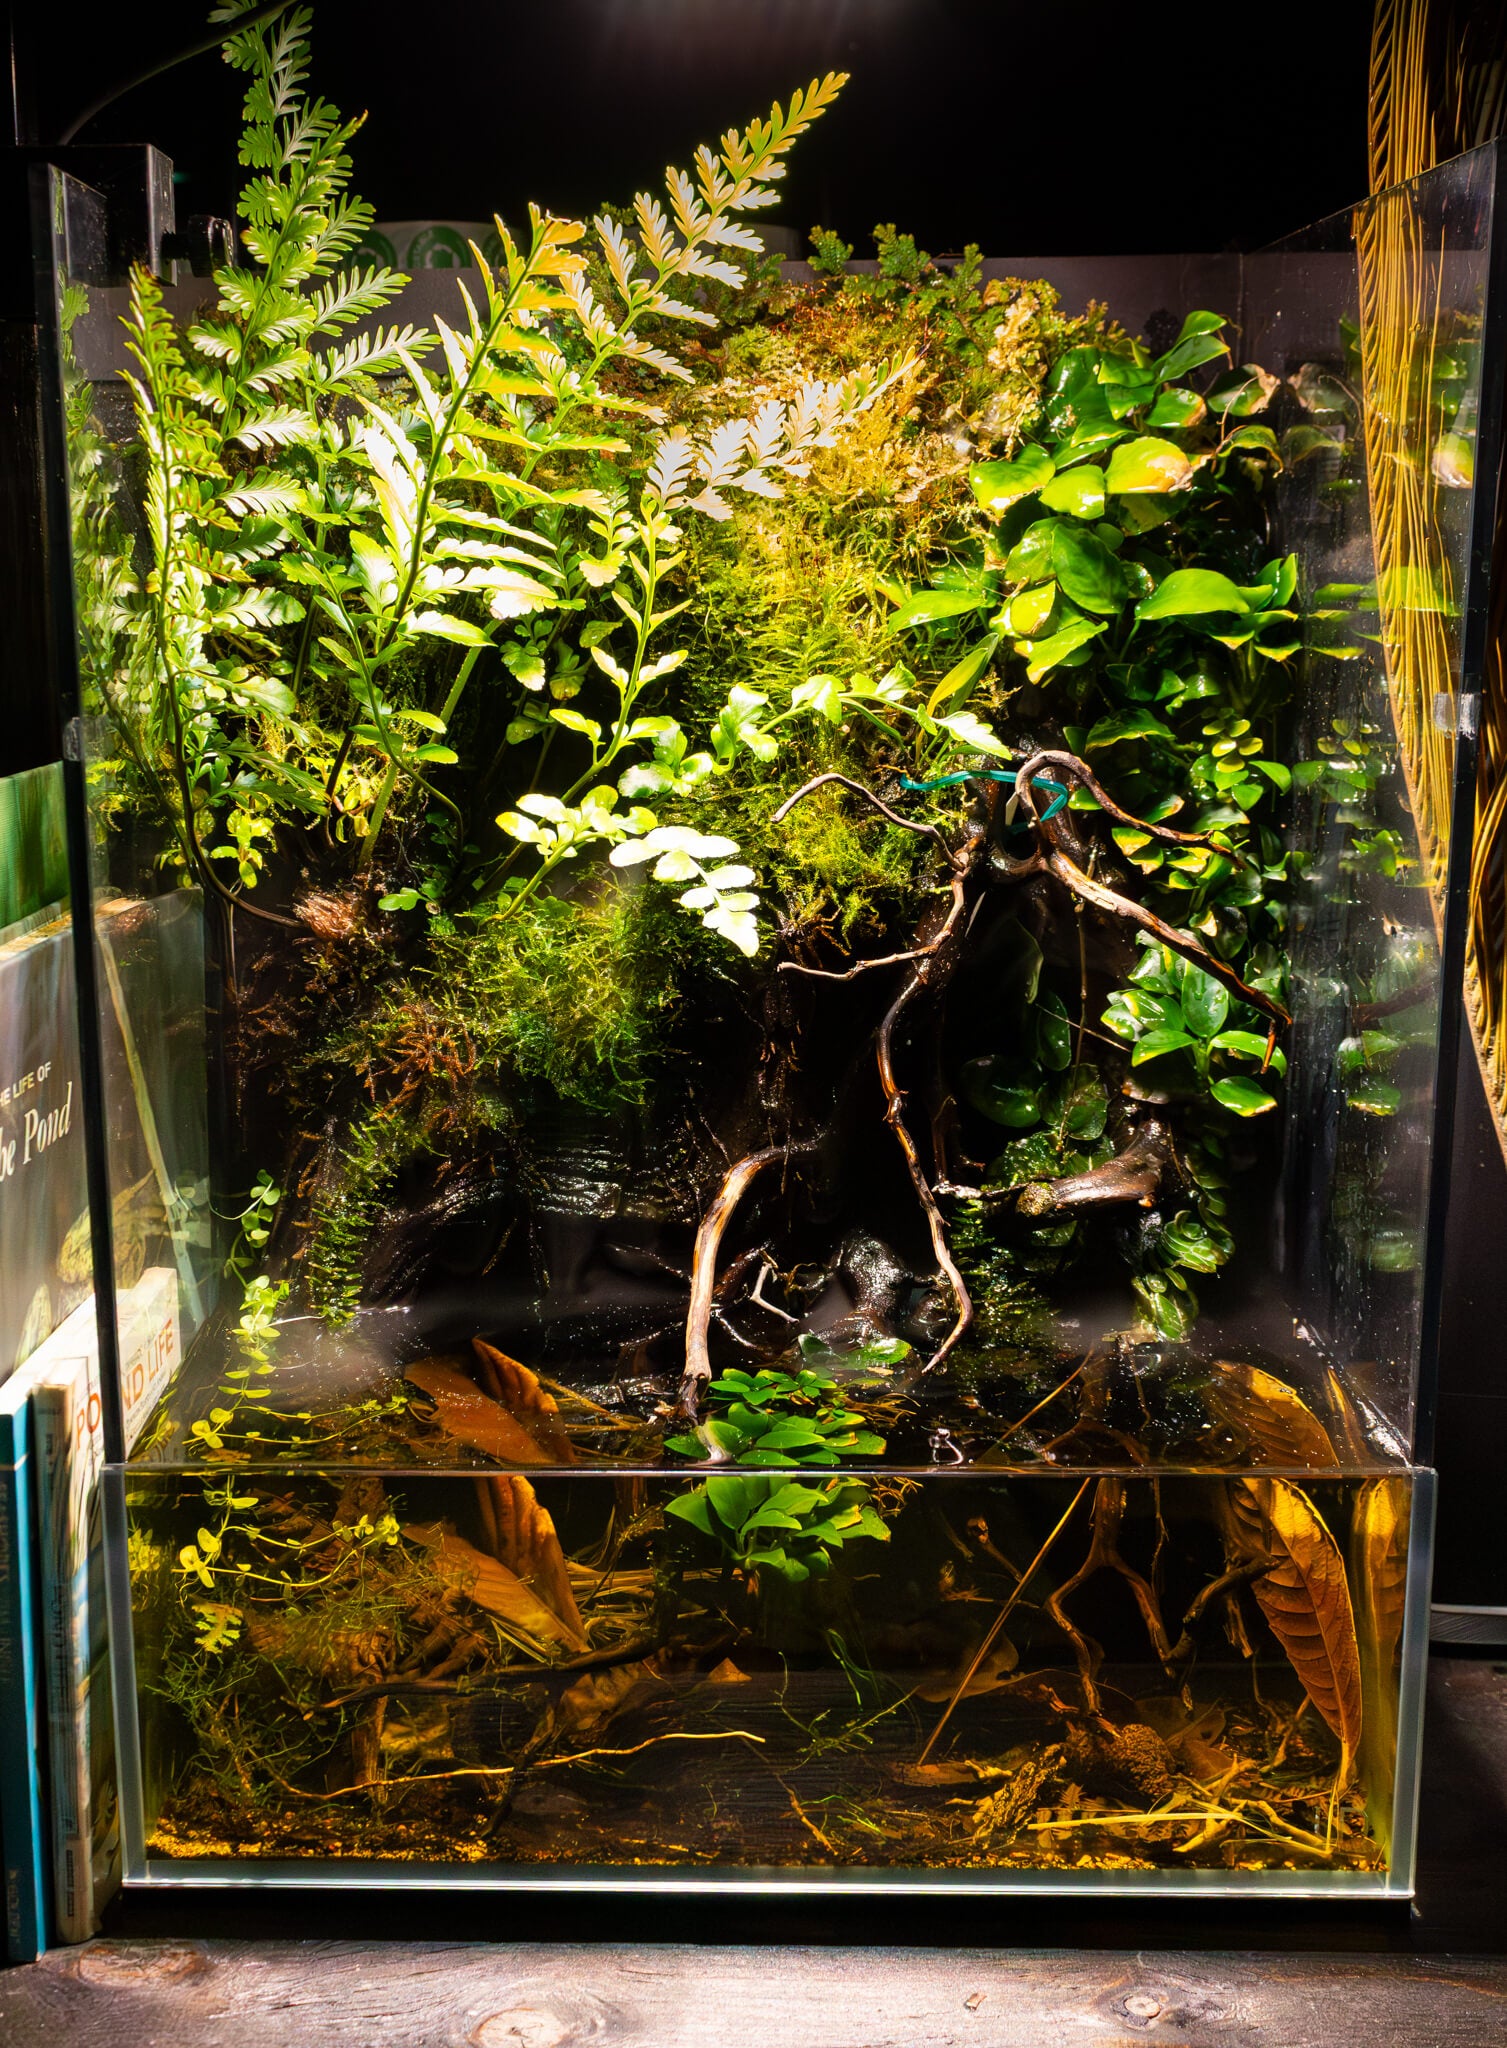
UNS Paludarium
A paludarium using the Botanical Method teaches the association of a forest canopy and an aquatic microcosm. Allochthonous materials from above find their way to the water below, influencing its diversity. Springtails in the plants fall into the water, serving as supplemental nutrition for the fish. Waste and excess nutrients cycle up to the plants, providing fertilizers. As leaves die off, they fall into the water, growing biofilms, fueling the microfaunal community, and creating habitat for aquatic life.
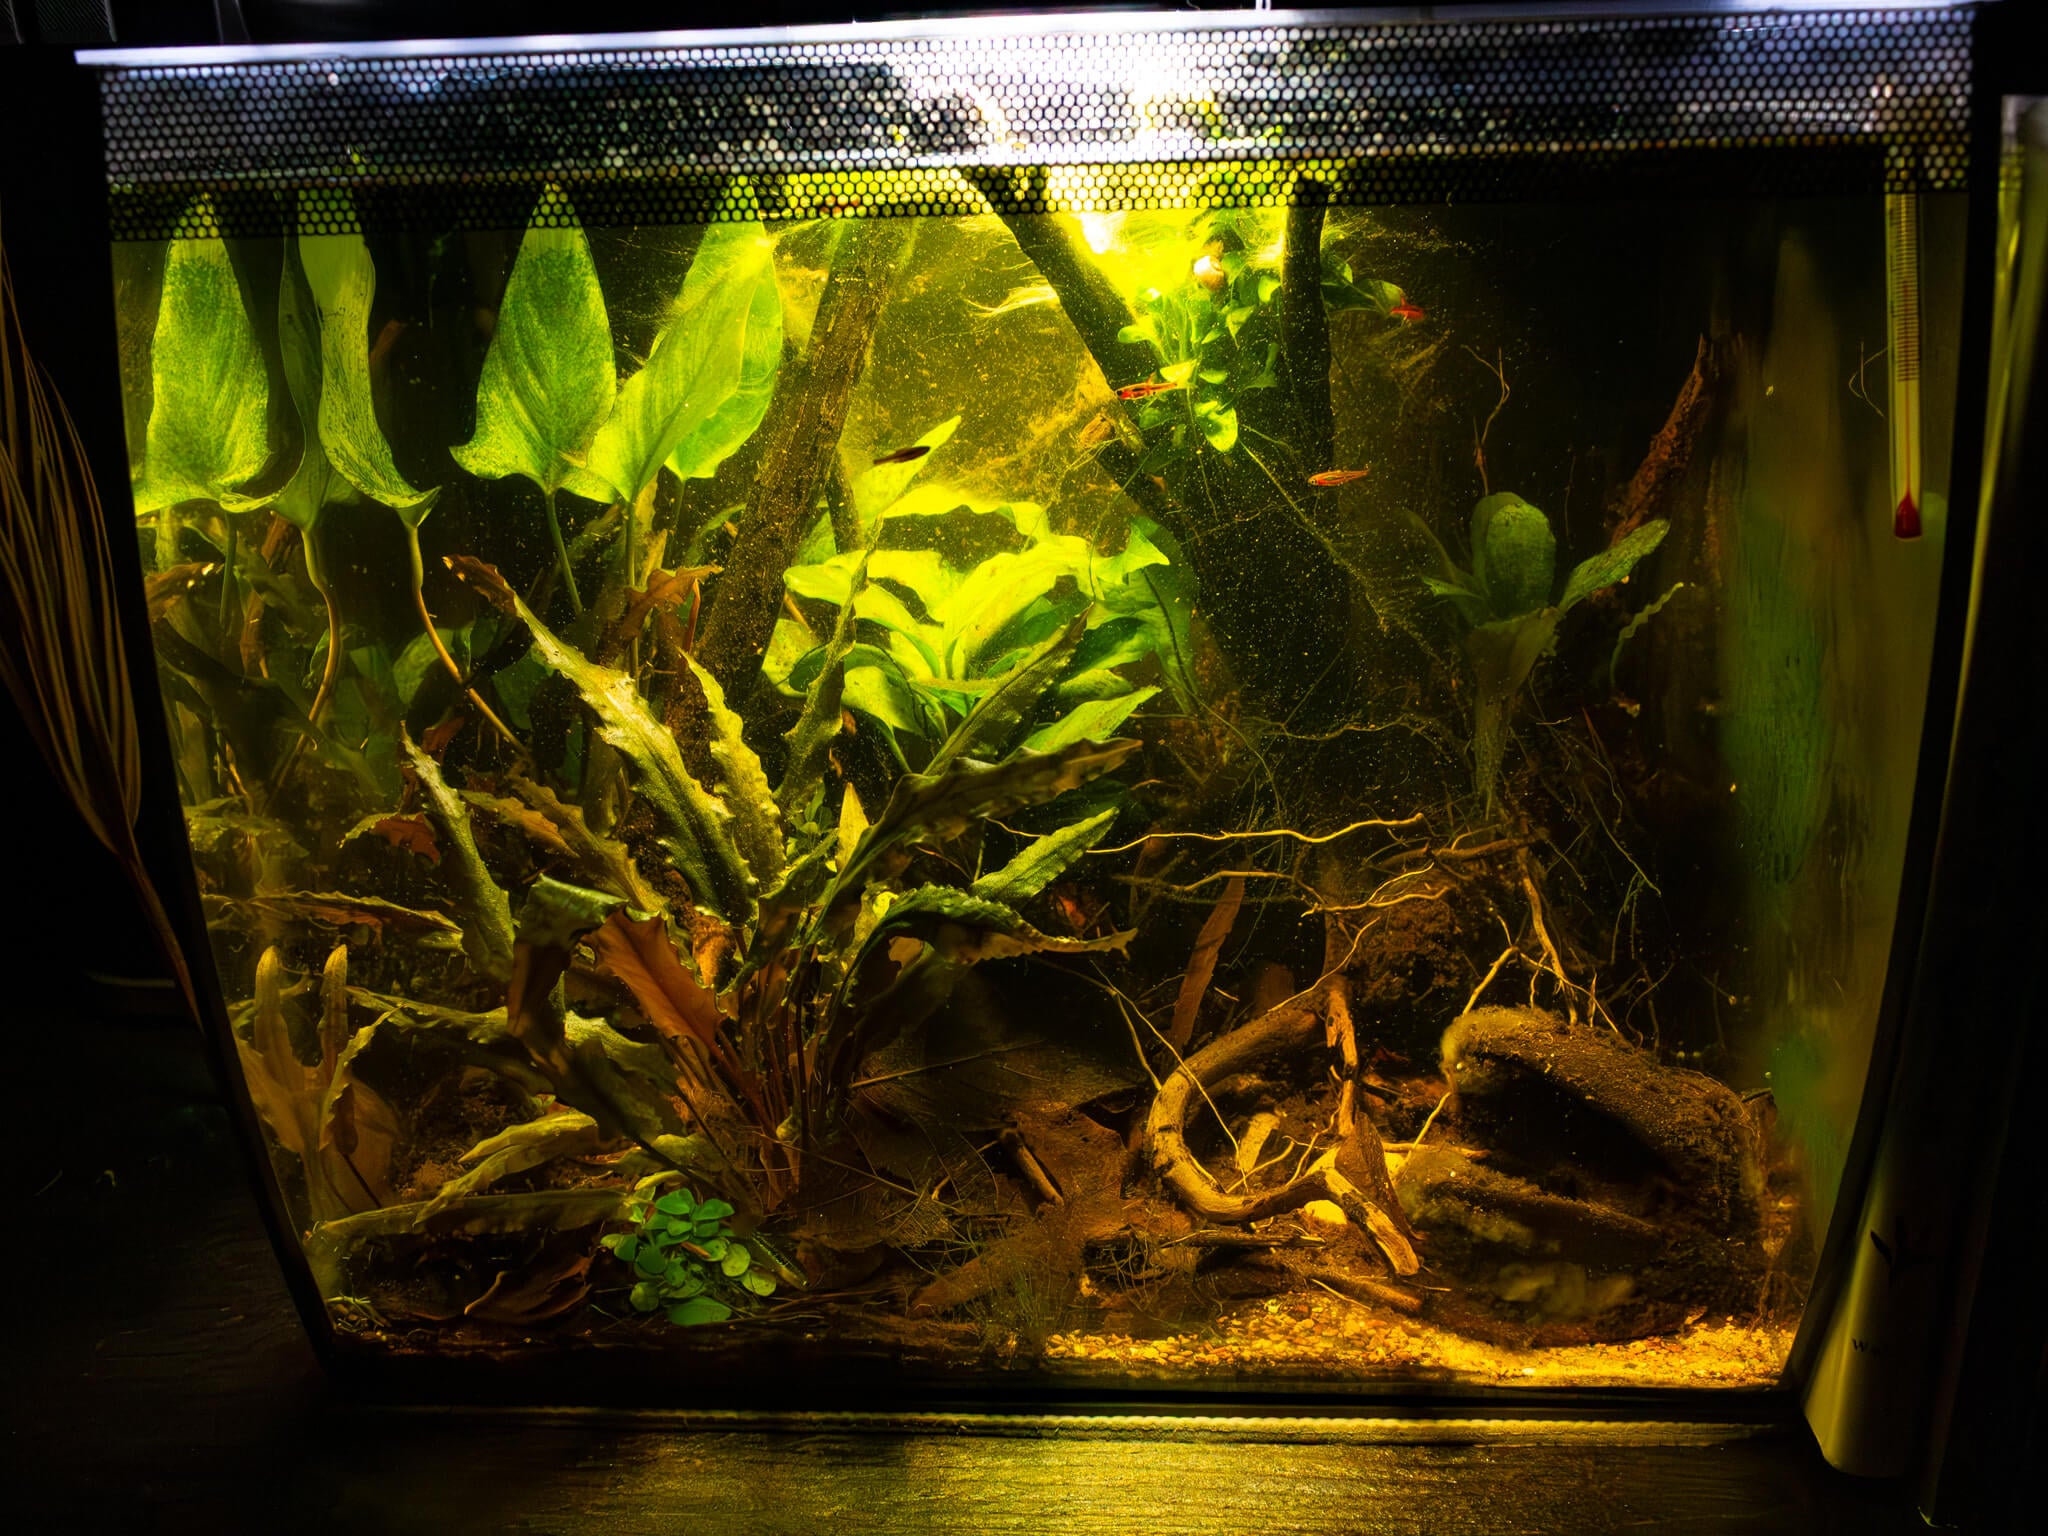
Fluval Flex 9 Gallon
A popular all-in-one aquarium kit for bettas and other nano fish, and with a few modifications, it can turn into an ideal botanical method aquarium in your living room, school classroom, or a kid's bedroom. We will discuss more below, but removing the stock carbon pads and phosphate sponges in preference for ceramic media is the only modification needed in this system. The stock light grows plants incredibly well, though opting for their Nano 3.0 is a good investment. A shallow sedimented substrate with deeper sections for plants such as cryptocorynes, dwarf sag, or a lily helps preserve the scale of this mid-size nano aquarium.
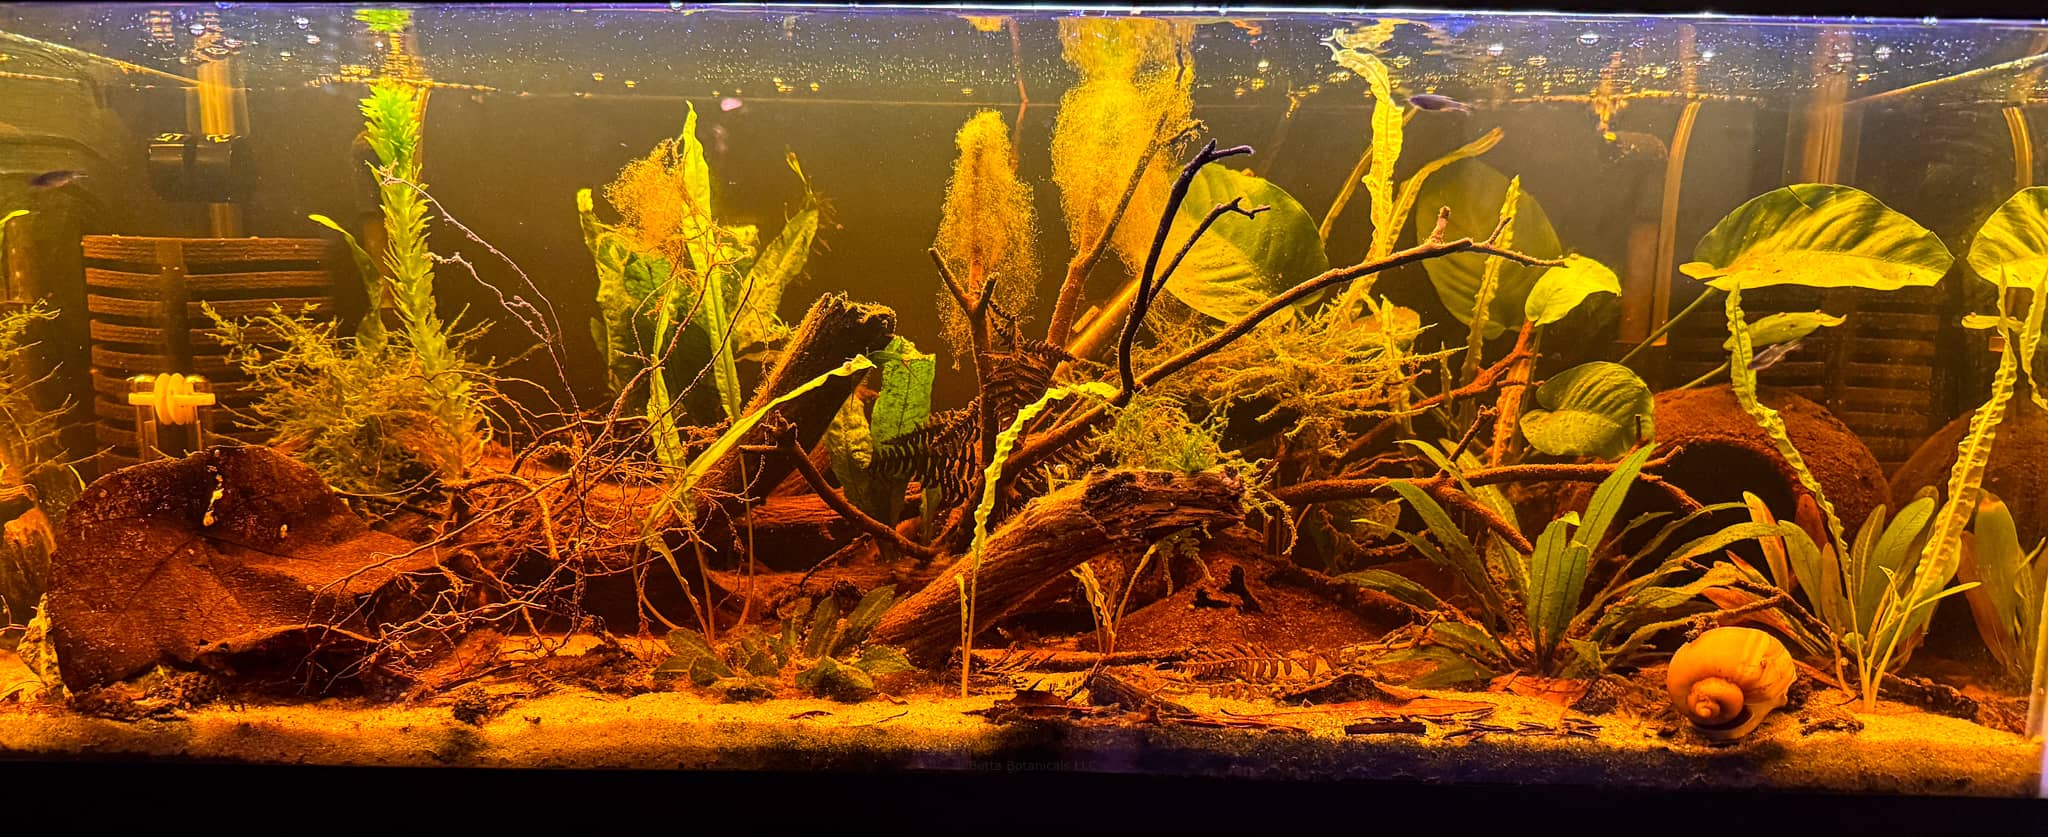
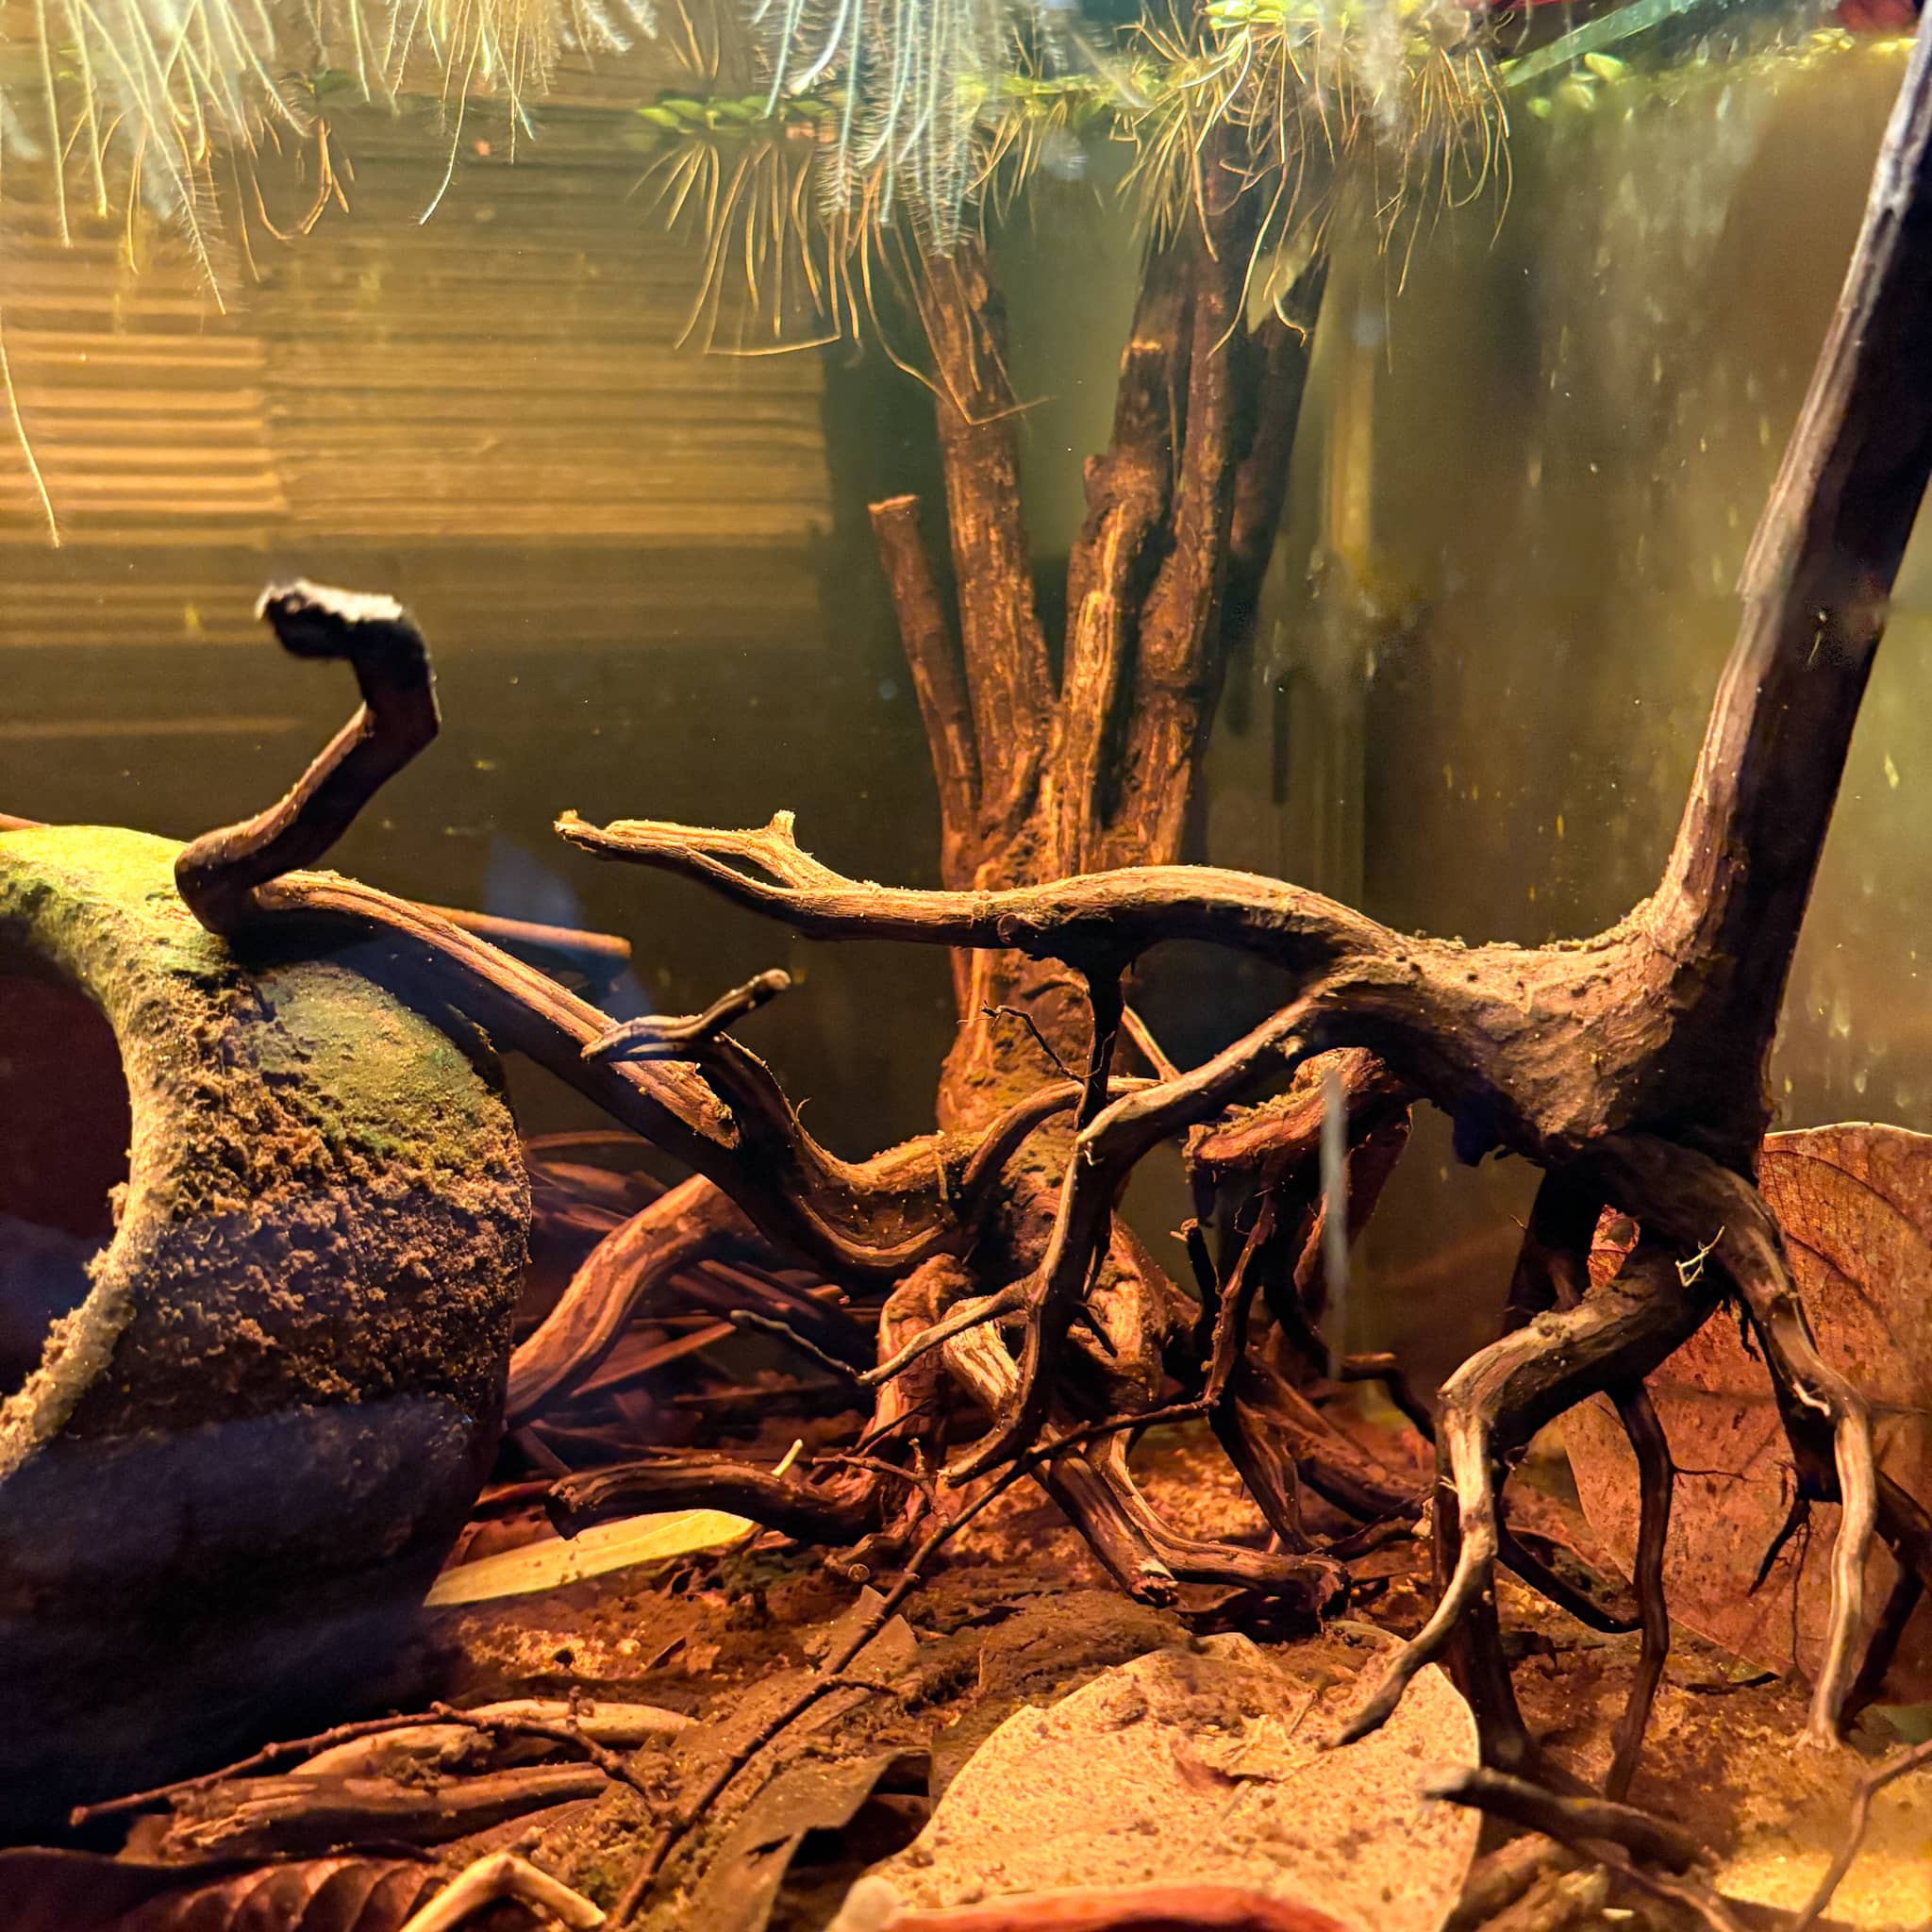
20 Gallon Long
Aquariums of 20 gallons, whether long or tall, are really where the fun begins, as you can create micro-niches within the ecosystem. The left side could utilize larger river pebbles, while the right fosters a heavy leaf litter zone. Larger manzanita wood can be incorporated with epiphytic plants such as anubias, buce, or ferns affixed with thread or super glue. The real benefit of a botanical method aquarium of this size is that the water volume allows the system to be more forgiving. If you add a few too many leaves, dilution of the beneficial bacteria bloom is on your side. Miss your weekly water exchange? The evaporation from the aquarium won’t have your pumps running dry.
4
Standard rimmed aquarium
You don’t need a high-end, low-iron rimless tank to create a beautiful Botanical Method Aquarium. Standard rimmed aquariums from your local fish store or even secondhand options work just as well. What matters most is stability, not expensive glass. If you’re buying used, inspect carefully for scratches and check the condition of the silicone—older seals can weaken over time. With the right botanicals and setup, even the most basic tank can become a beautiful ecosystem.
5
low-iron rimless displays
You can, of course, create a stunning Botanical Method Aquarium in a low-iron rimless display. These tanks double as art pieces, but function should always come before form. Don't let mainstream aquascapes in rimless aquariums impose their methods of removing detritus—it’s food for microfauna. Algae on the back pane of glass is a living surface that sustains life. When building in this kind of aquarium, embrace those natural processes rather than scrubbing them away.
Step 3
3. Lighting and Heaters for a Botanical Aquarium
One of the unique challenges—and advantages—of the Botanical Method Aquarium is working with tinted water. Tannins naturally reduce light penetration, which means high-tech, light-hungry plants often don’t thrive in these conditions.
But that doesn’t mean a planted botanical tank is out of the question.
Far from it.
Many beautiful aquariums are built using low- to medium-light plants like Anubias, Bucephalandra, Java Fern, and Cryptocoryne, paired with moderate levels of tint. In these systems, lighting becomes less about blasting intensity and more about curating spectrum, contrast, and rhythm.
Choosing the Right Light
There are dozens of LED fixtures on the market, but a few key features matter most for a Botanical Method Aquarium:
- Dimmable intensity – lets you adjust output as tint levels change.
- Tunable spectrum – helps color-correct your fish and plants under amber water.
- Timer function or smart plug – automates a consistent light cycle.
LEDs are ideal due to their energy efficiency, longevity, and increasingly customizable outputs. If your fixture doesn’t come with built-in timing, a smart plug is an easy and inexpensive upgrade.
Adjusting as the Tint Deepens
In a Botanical Method Aquarium, your water is alive and always evolving. As botanicals release tannins and humic substances, water clarity shifts. I’ve often increased light intensity after a fresh round of botanicals, only to dial it back 72 hours later as the tint deepens. This approach helps prevent nuisance algae and keeps your plants from struggling.
What About Heaters?
Heaters are one of the easiest components to manage in a botanical method aquarium, but they still deserve attention.
Rather than simply setting your aquarium to 78°F and forgetting it, consider researching the seasonal temperature range of your livestock. For example, Betta macrostoma may benefit from cooler water in winter (72°F) and gradual warming in summer (75–76°F). This seasonal shift can promote natural behaviors and spawning readiness.
For rare or sensitive species, consider adding a temperature controller to prevent heater malfunctions—a small investment that adds peace of mind.
Step 4
4. Filtration & Flow
This section is crucial for shifting expectations away from traditional filtration models and reinforcing the core idea that the aquarium is the filter. The goal here is to frame filtration as supplemental while educating on how to modify mainstream equipment to support detritus-based systems.
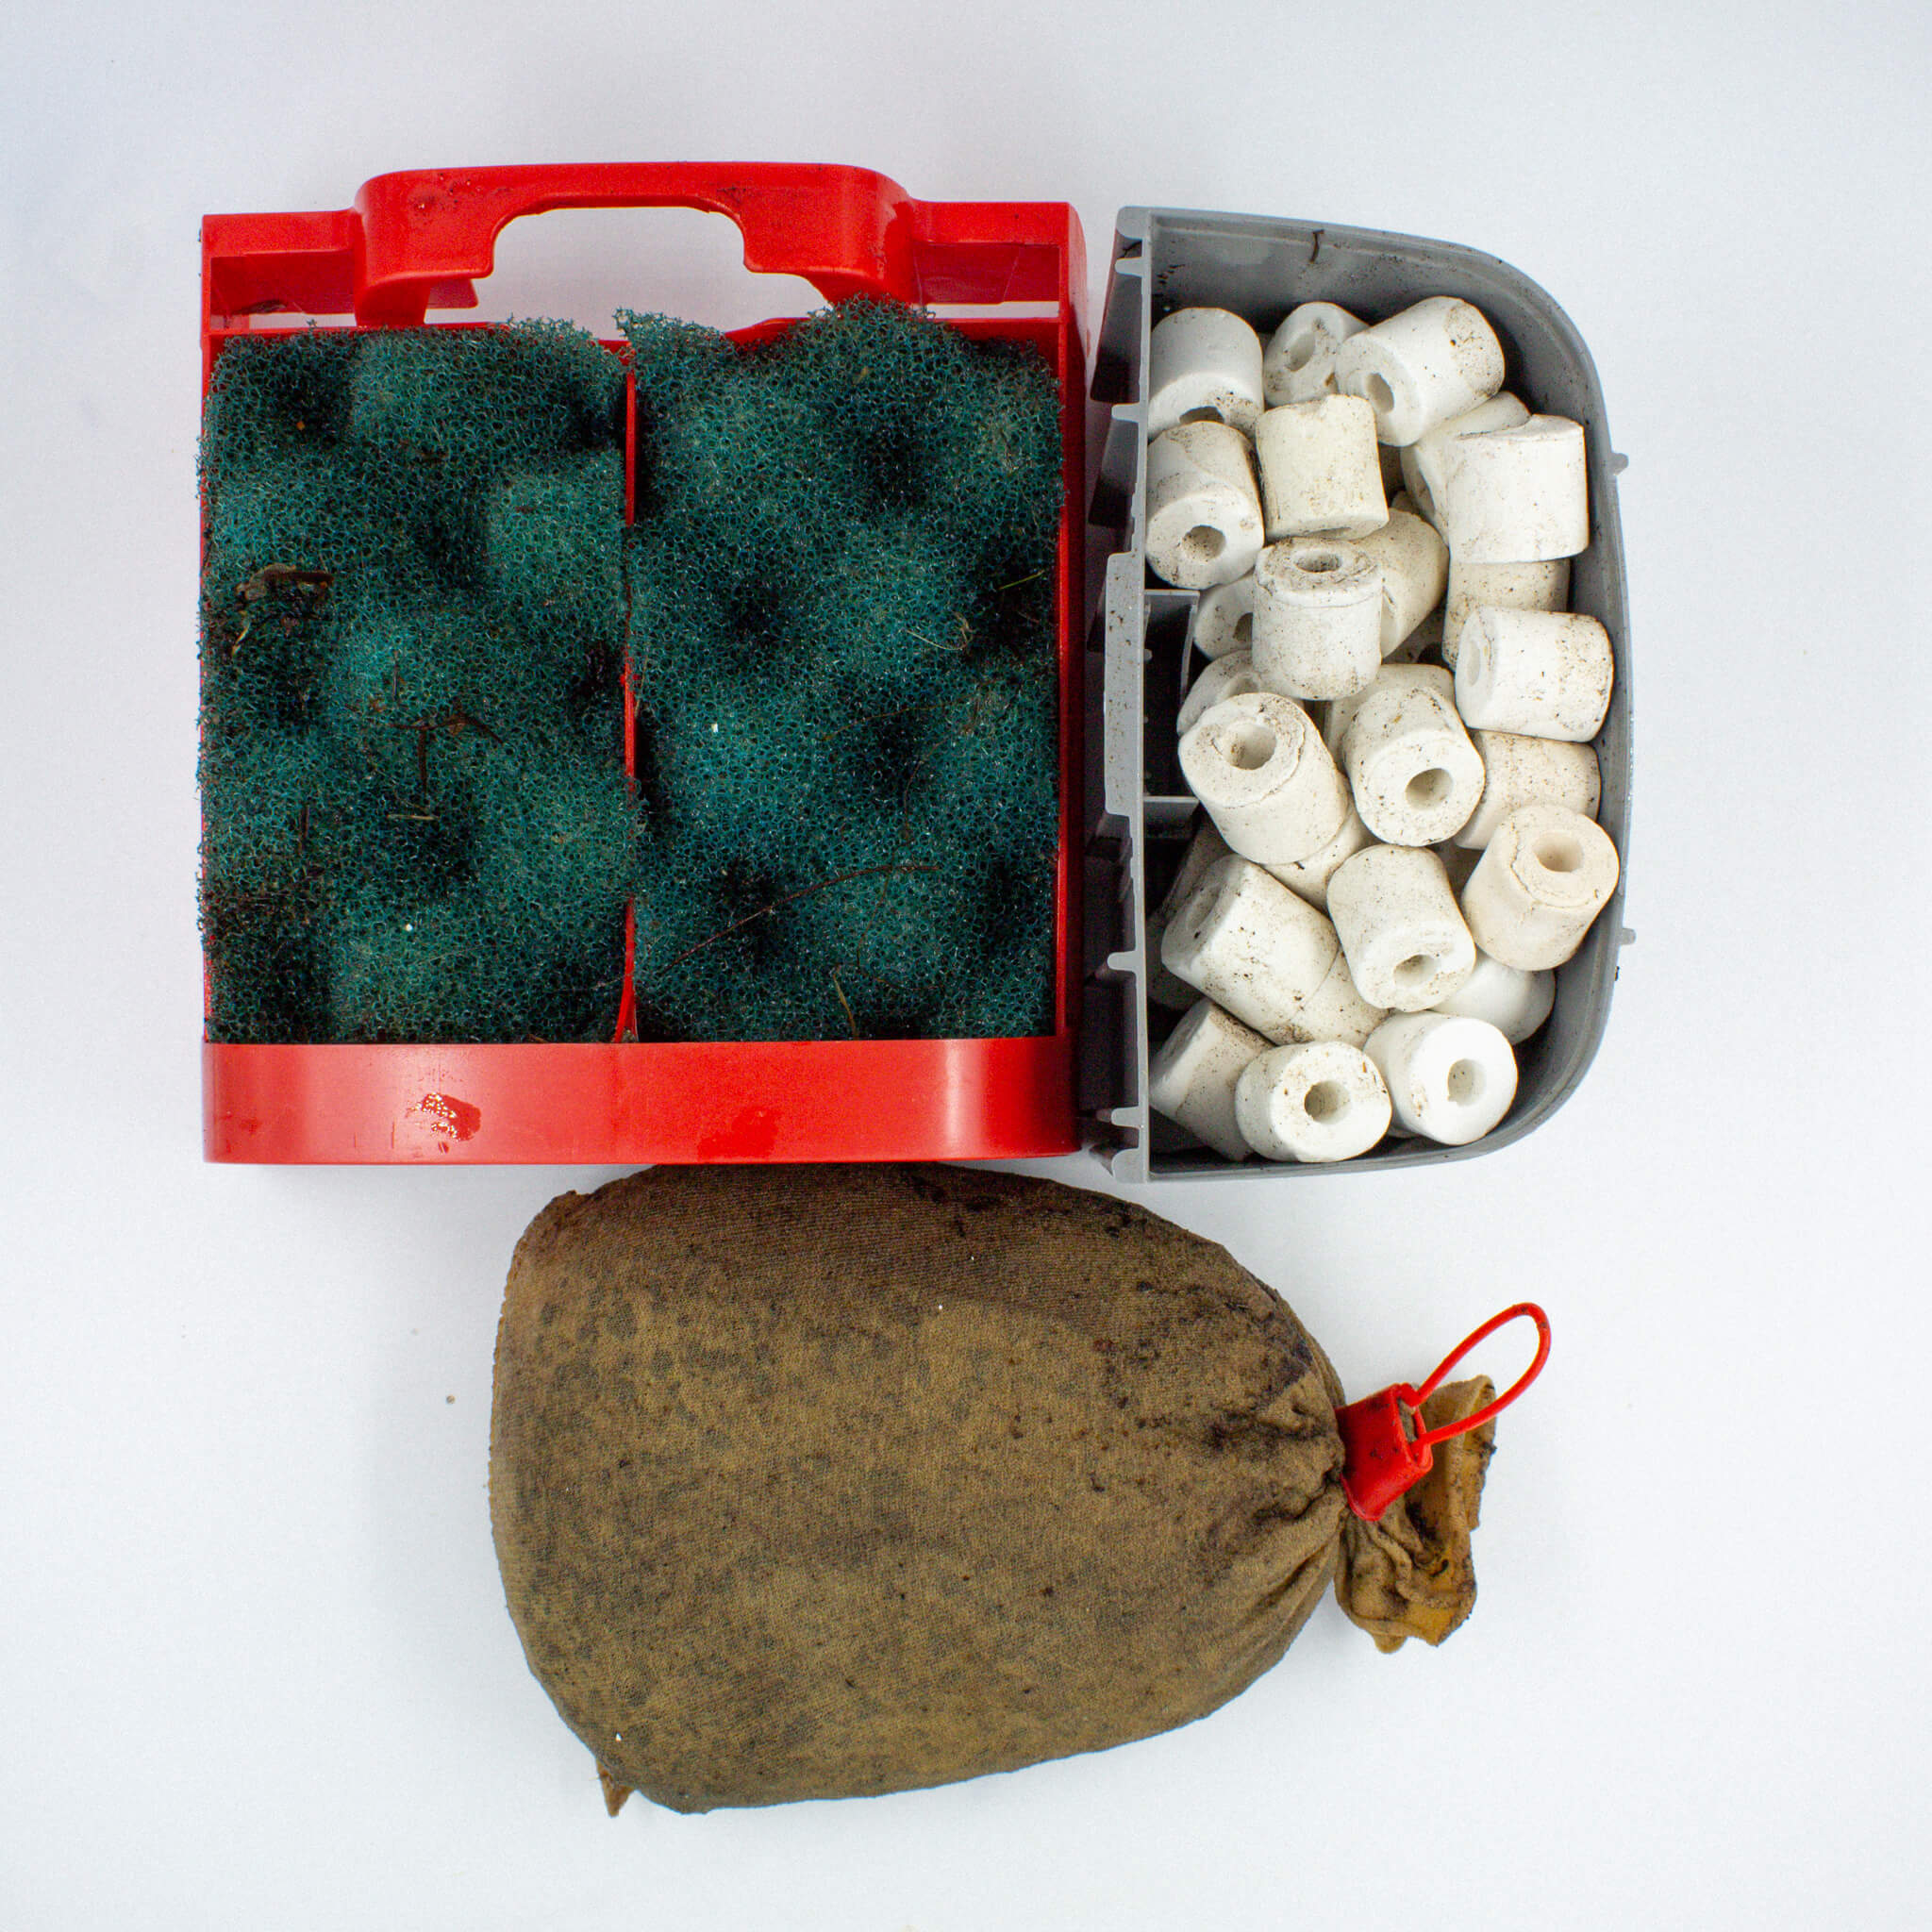
Key Method: The aquarium itself serves as the primary filter. Chemical filtration, fine filter sponges, and filter floss are poor materials for botanical method aquarium filtration. Selecting course filter sponges, ceramic media, and bags of botanicals sets the ecosystem up for success.
In the Botanical Method Aquarium, the aquarium itself becomes the filter.
Each leaf, seed pod, piece of wood, and surface in the tank serves as a habitat for beneficial bacteria, fungi, and microbial life. These organisms drive biological filtration far more effectively than most mechanical media ever could.
That said, we still use filters—not to replace nature, but to support it with gentle flow and surface agitation.
Rethinking Filter Media
In traditional aquariums, filters rely on fine sponges, chemical pads, and carbon to polish water. But in a botanically driven system, that approach strips away the very compounds—tannins, humic substances, fulvic acids—that we’ve supplemented the ecosystem with.
Here’s what we avoid:
- Carbon
- Purigen
- Phosphate pads
- Fine filter floss
- Polishing sponges
These materials clog quickly with biofilms and detritus or remove beneficial compounds outright.
Instead, we modify our filters to work with the ecology:
- Use a coarse sponge as mechanical filtration (easy to rinse, doesn’t clog quickly)
- Add ceramic media for extra surface area and biological filtration
- Tuck in a small bag of bark, pods, or leaves to help condition the water
Filter Types and Modifications
Hang-on-back (HOB) filters are easily adapted for the botanical method aquarium. Remove the disposable cartridge, and replace it with a rinseable sponge and ceramic media. In the back chamber, drop in a small mesh bag with alder cones, bark, or coconut husk. These materials will leach beneficial compounds into the water continuously in a higher-flow environment.
Canister filters can be configured the same way. Ditch the chemical filter media and fill with layered ceramic media, coarse sponge, and durable botanicals like coconut husk. Coconut husk is a natural, pH-lowering alternative to peat moss.
Managing Flow and Surface Biofilm
We aim for gentle, indirect flow, but not a torrent. Too much circulation can disturb leaf litter beds, lift too much detritus into the water column, and make fish feel stressed. Sponge filters, spray bars, or directional flow nozzles can help distribute the current without blasting delicate microhabitats.
And what about that thin oily film on the water’s surface? That’s biofilm—and it can impede gas exchange if it becomes too thick.
A surface skimmer or gentle air stone is a simple, elegant solution. It clears the top without scrubbing away the ecology below.
Why We Avoid Chemical Filtration
Botanicals release a host of beneficial compounds:
- Tannins, which provide mild antimicrobial properties and slight pH buffering of soft water
- Humic & fulvic acids – water-softening, mineral-chelating. Often removed in standard tap water because they negatively interact with chlorine sterilization.
- Coumarins, terpenes, saponins – plant-derived compounds with microbial impacts
- Trace vitamins & minerals - many plants reabsorb nutrients from their leaves before dropping them. But botanicals like guava, loquat, and mulberry contain many beneficial vitamins and minerals still present.
Chemical filtration strips these away, neutralizing the very ecological advantages the botanical method offers. That’s why we exclude them—and let nature take the lead. ...plus, if you've purchased botanicals from us, it wouldn't make sense to promote a product that absorbs what you've spent money on!
Filters Appropriate for Botanical Method Aquariums
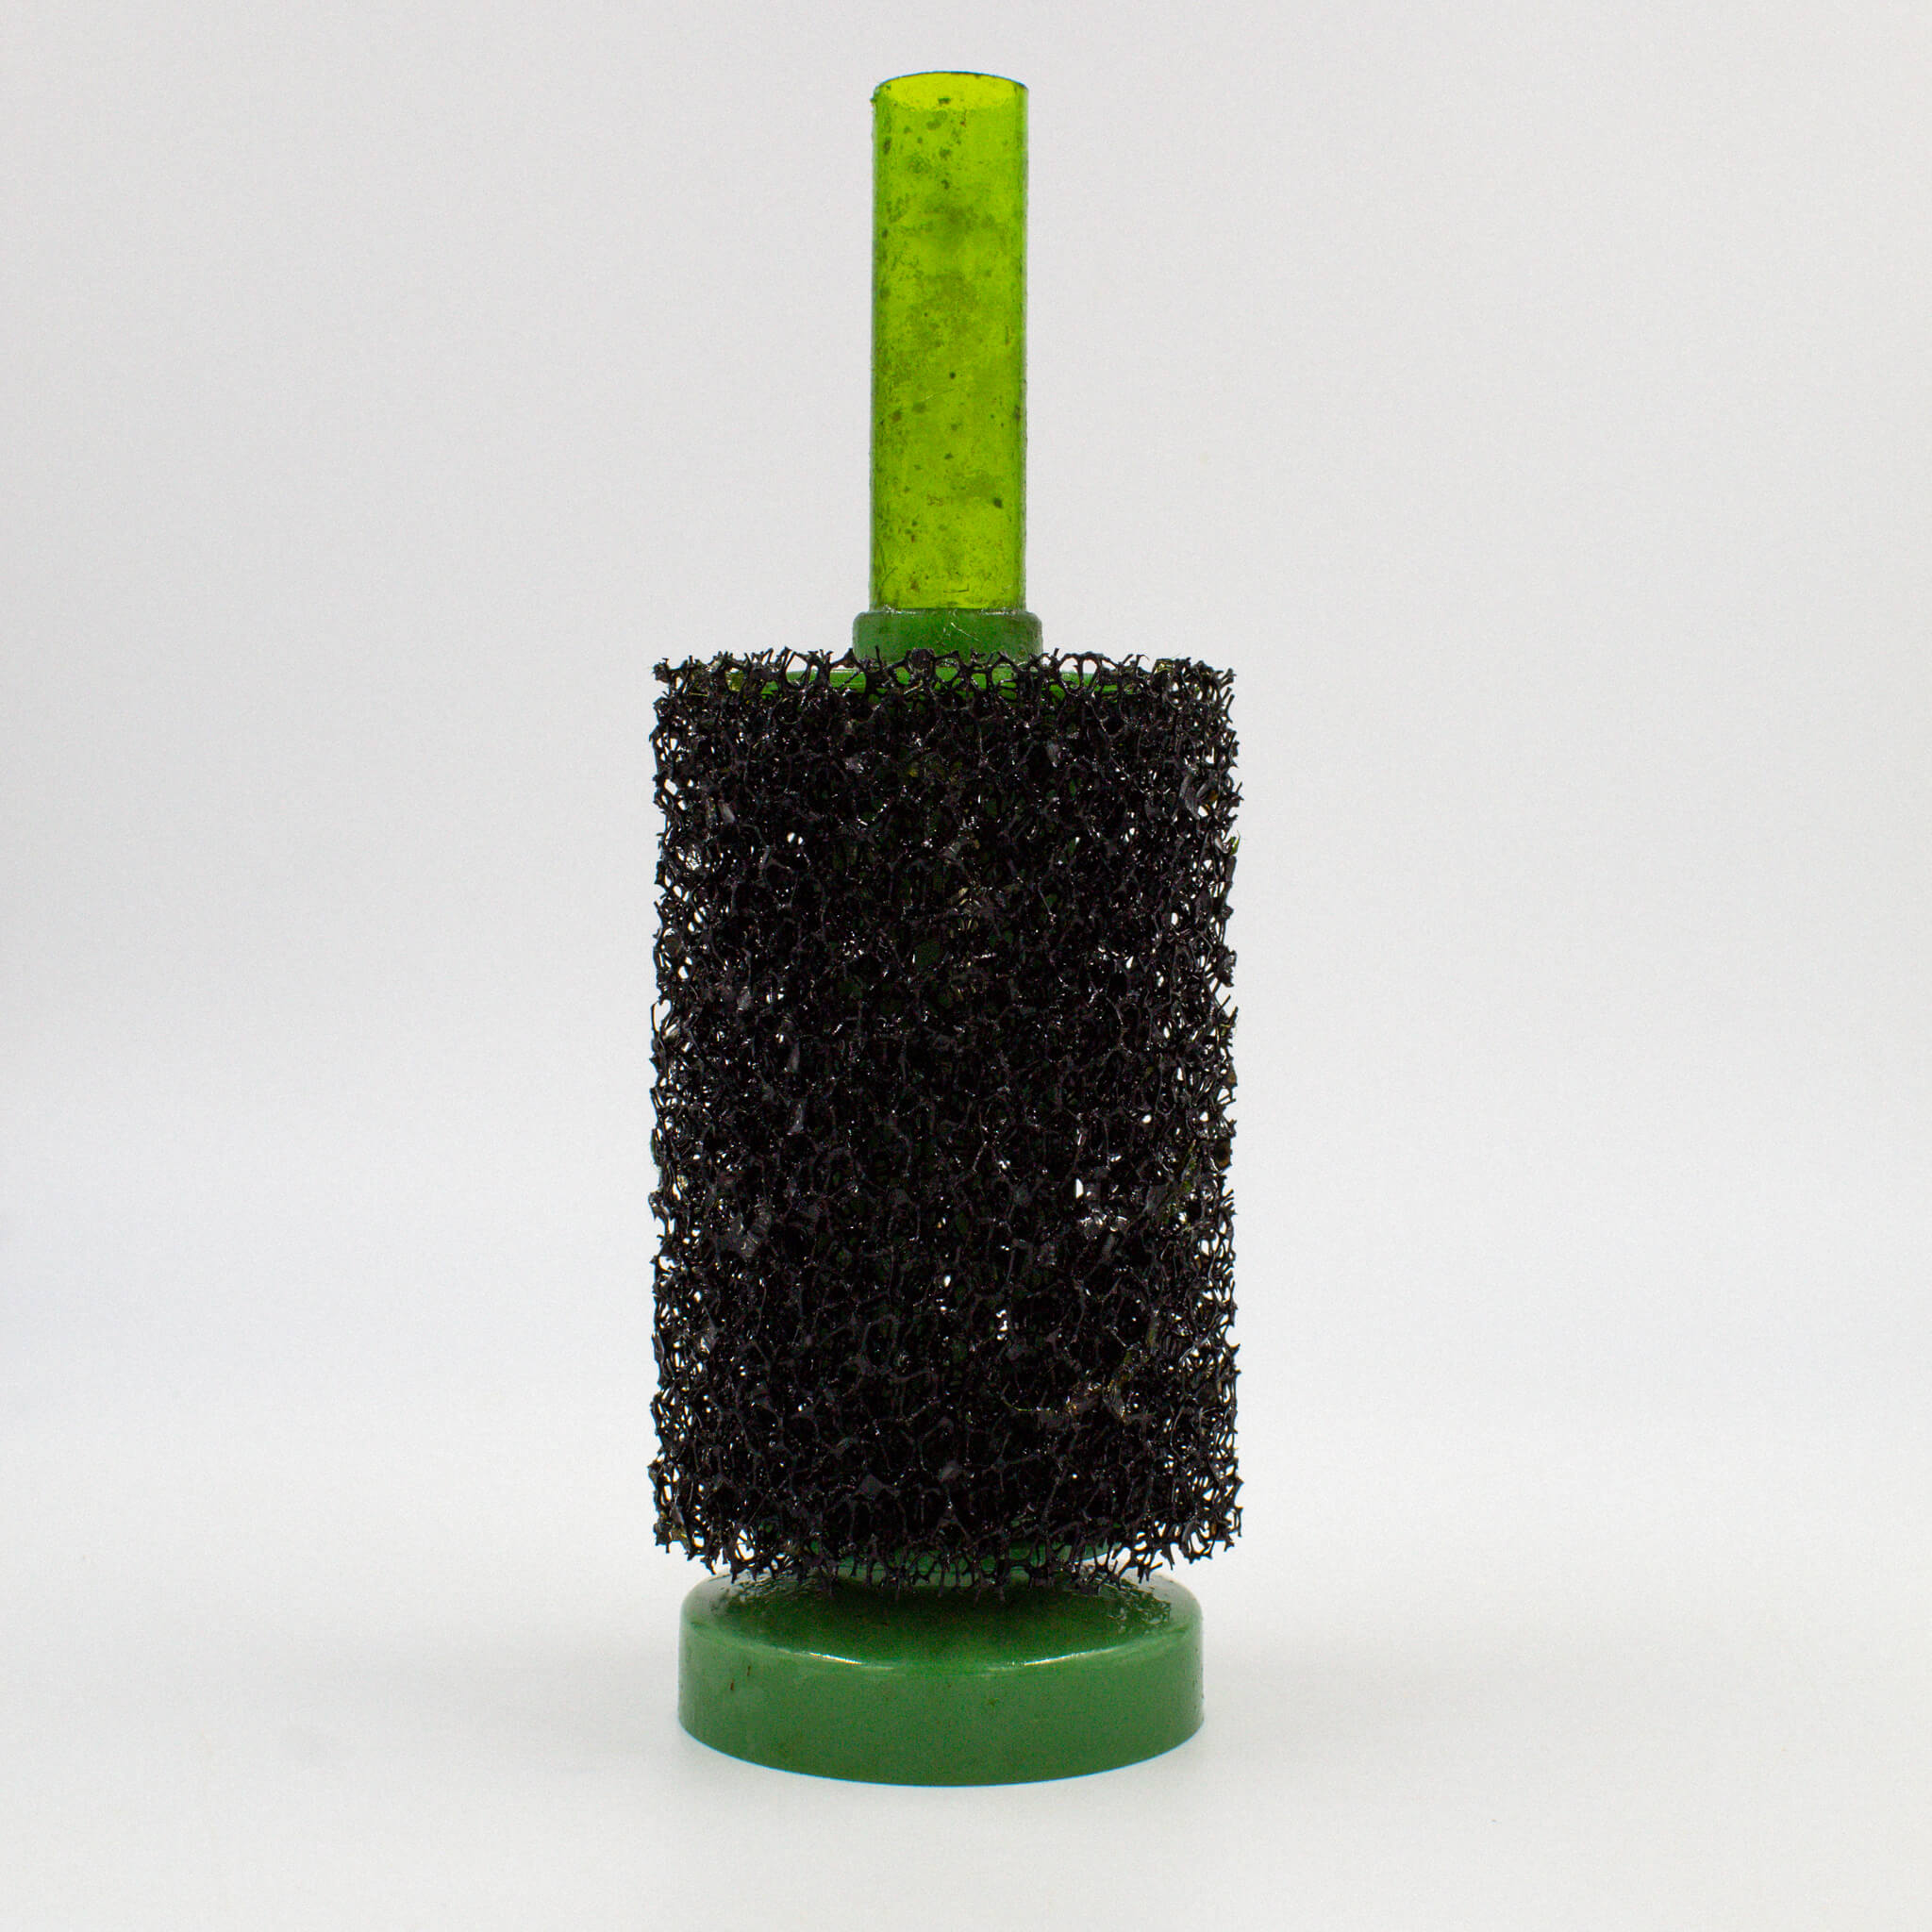
Sponge Filter
The most cost-effective way to filter a Botanical Method Aquarium is with a sponge filter. Choose a coarse sponge rather than a fine one—finer pores clog quickly under the load of biofilms and detritus these systems naturally produce.
In this method, the sponge’s role is less about trapping every speck of debris and more about keeping water moving. Circulation helps oxygenate the system, while the true biological filtration happens on the leaves, seed pods, wood, and substrate.
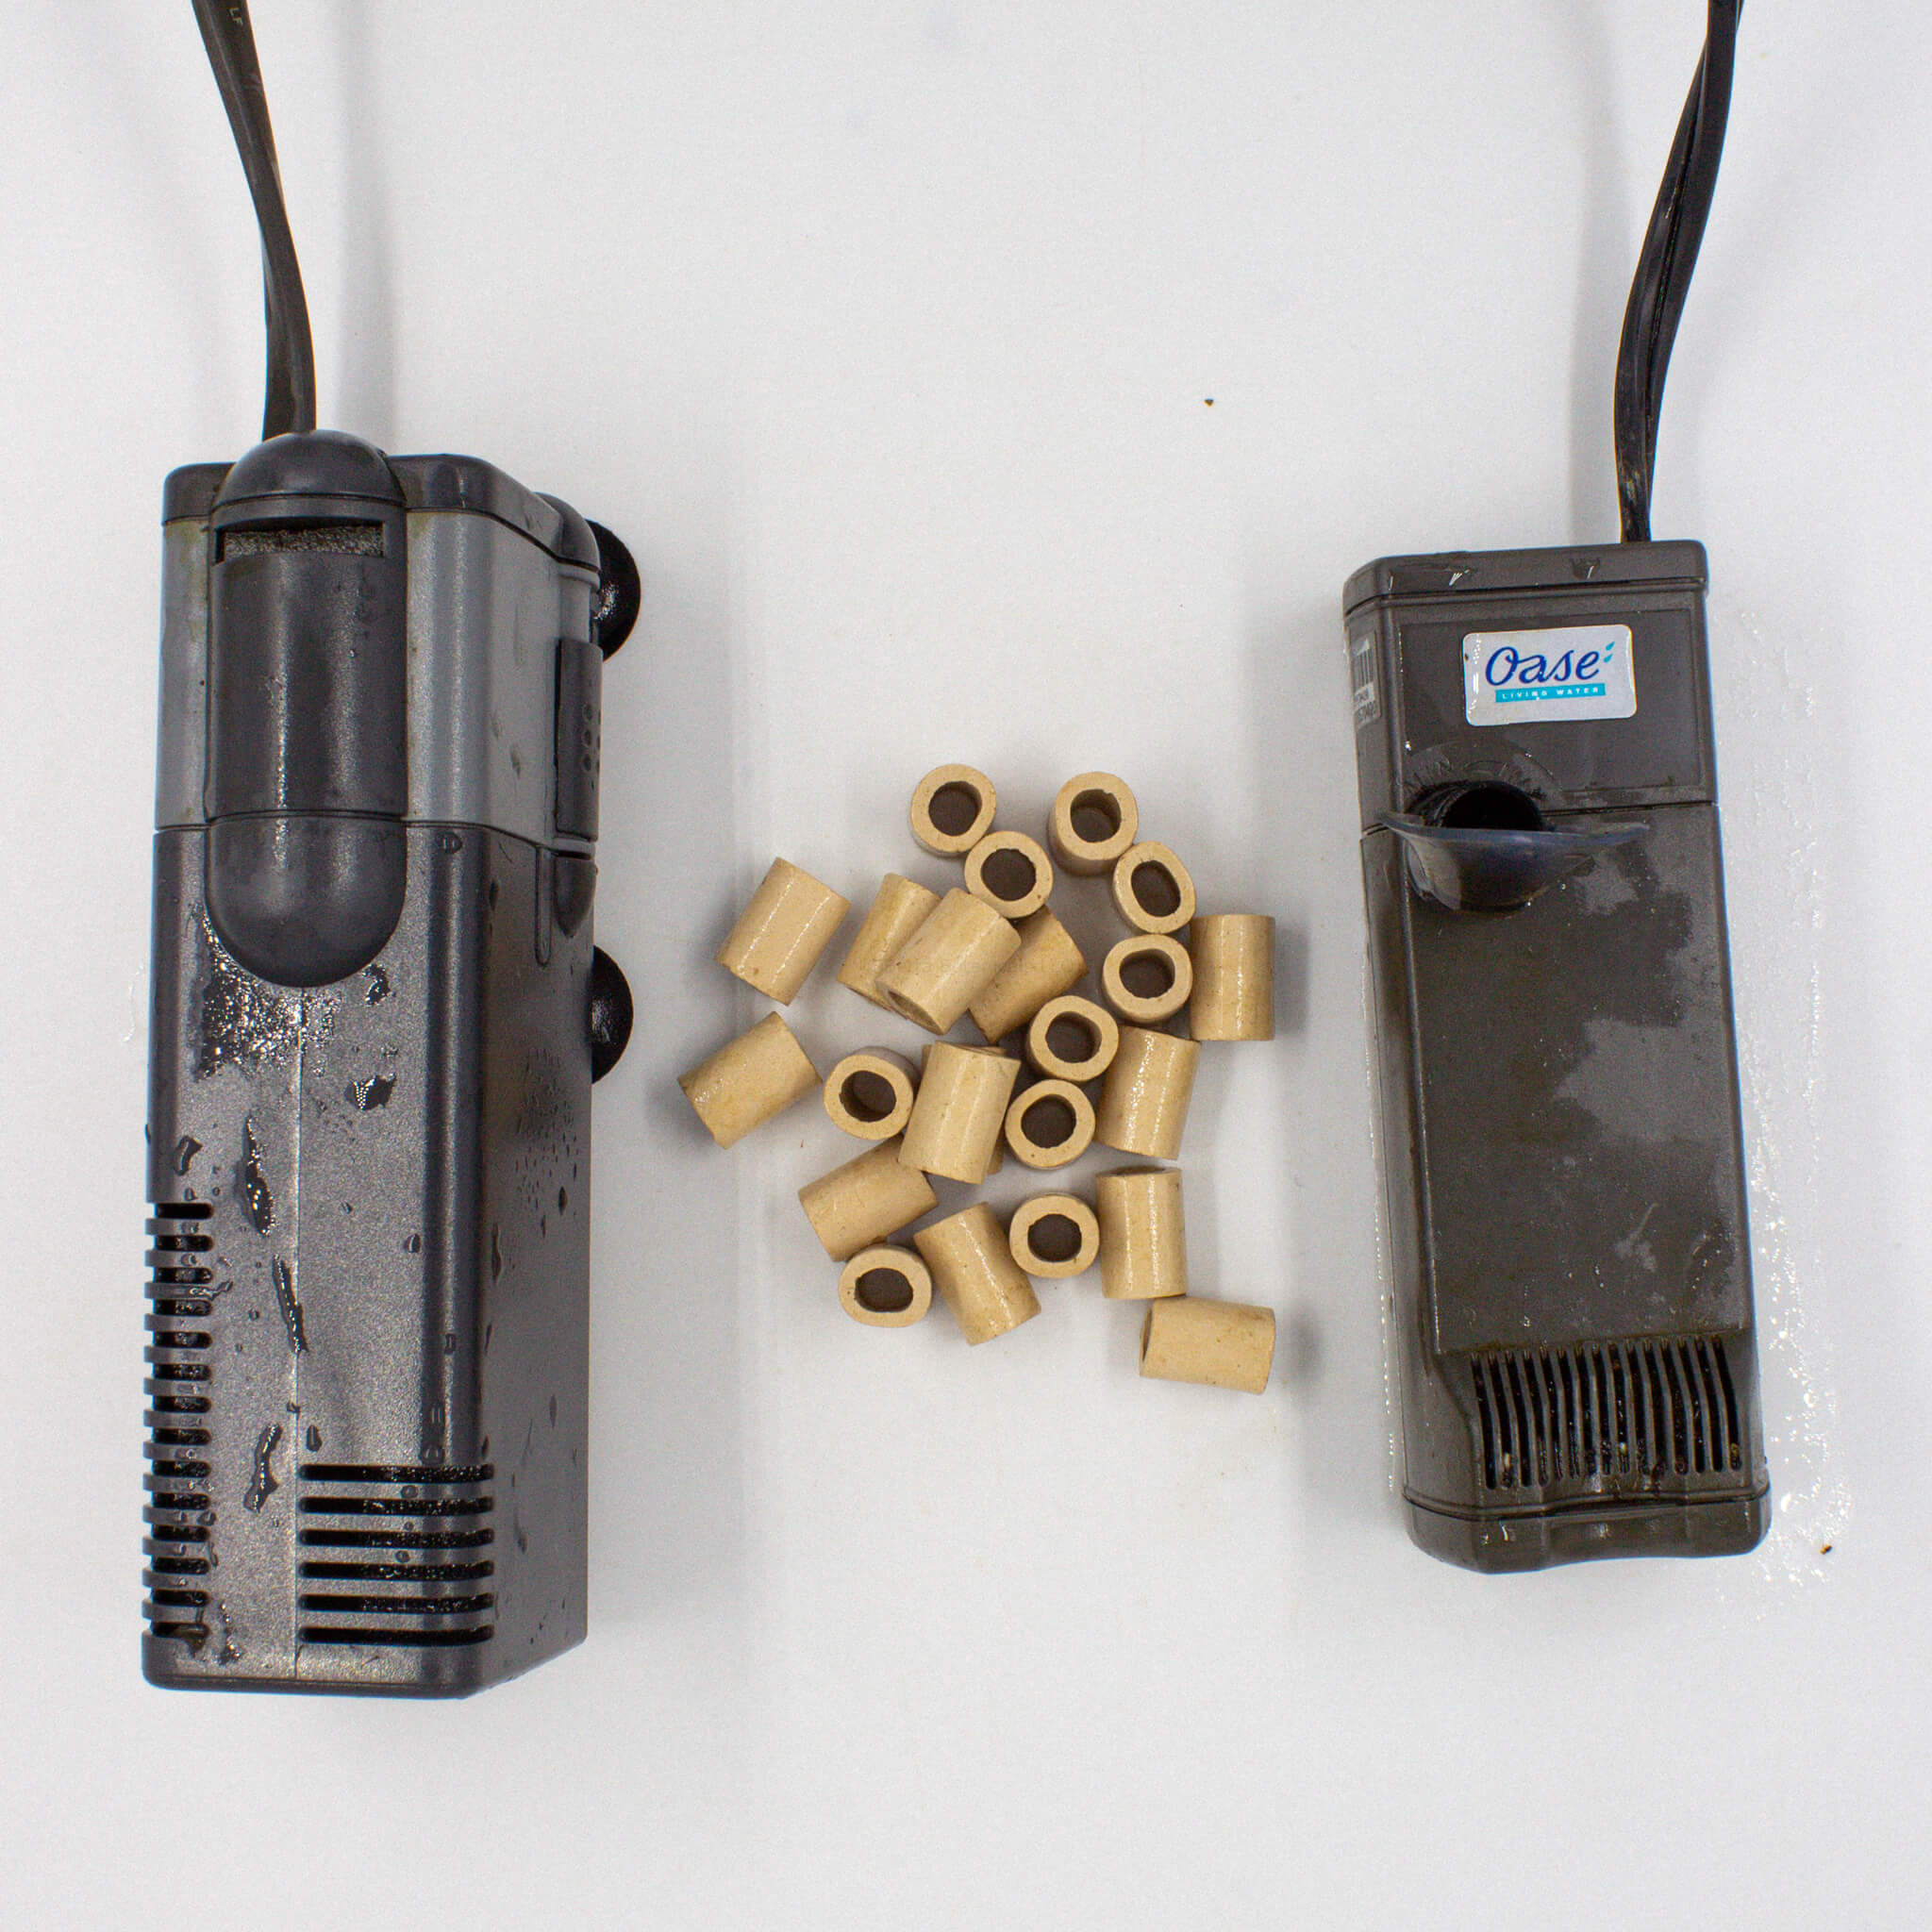
Internal Filter
Most stock internal filters come with pricey replaceable cartridges containing fine sponges, carbon pads, and phosphate removers. In a Botanical Method Aquarium, these aren’t necessary—and they often strip out the very tannins and organics we want to keep.
Instead, use a coarse filter spongeto to gently polish the water. Better yet, swap in ceramic media. These porous cylinders offer more surface area for microbial colonization.
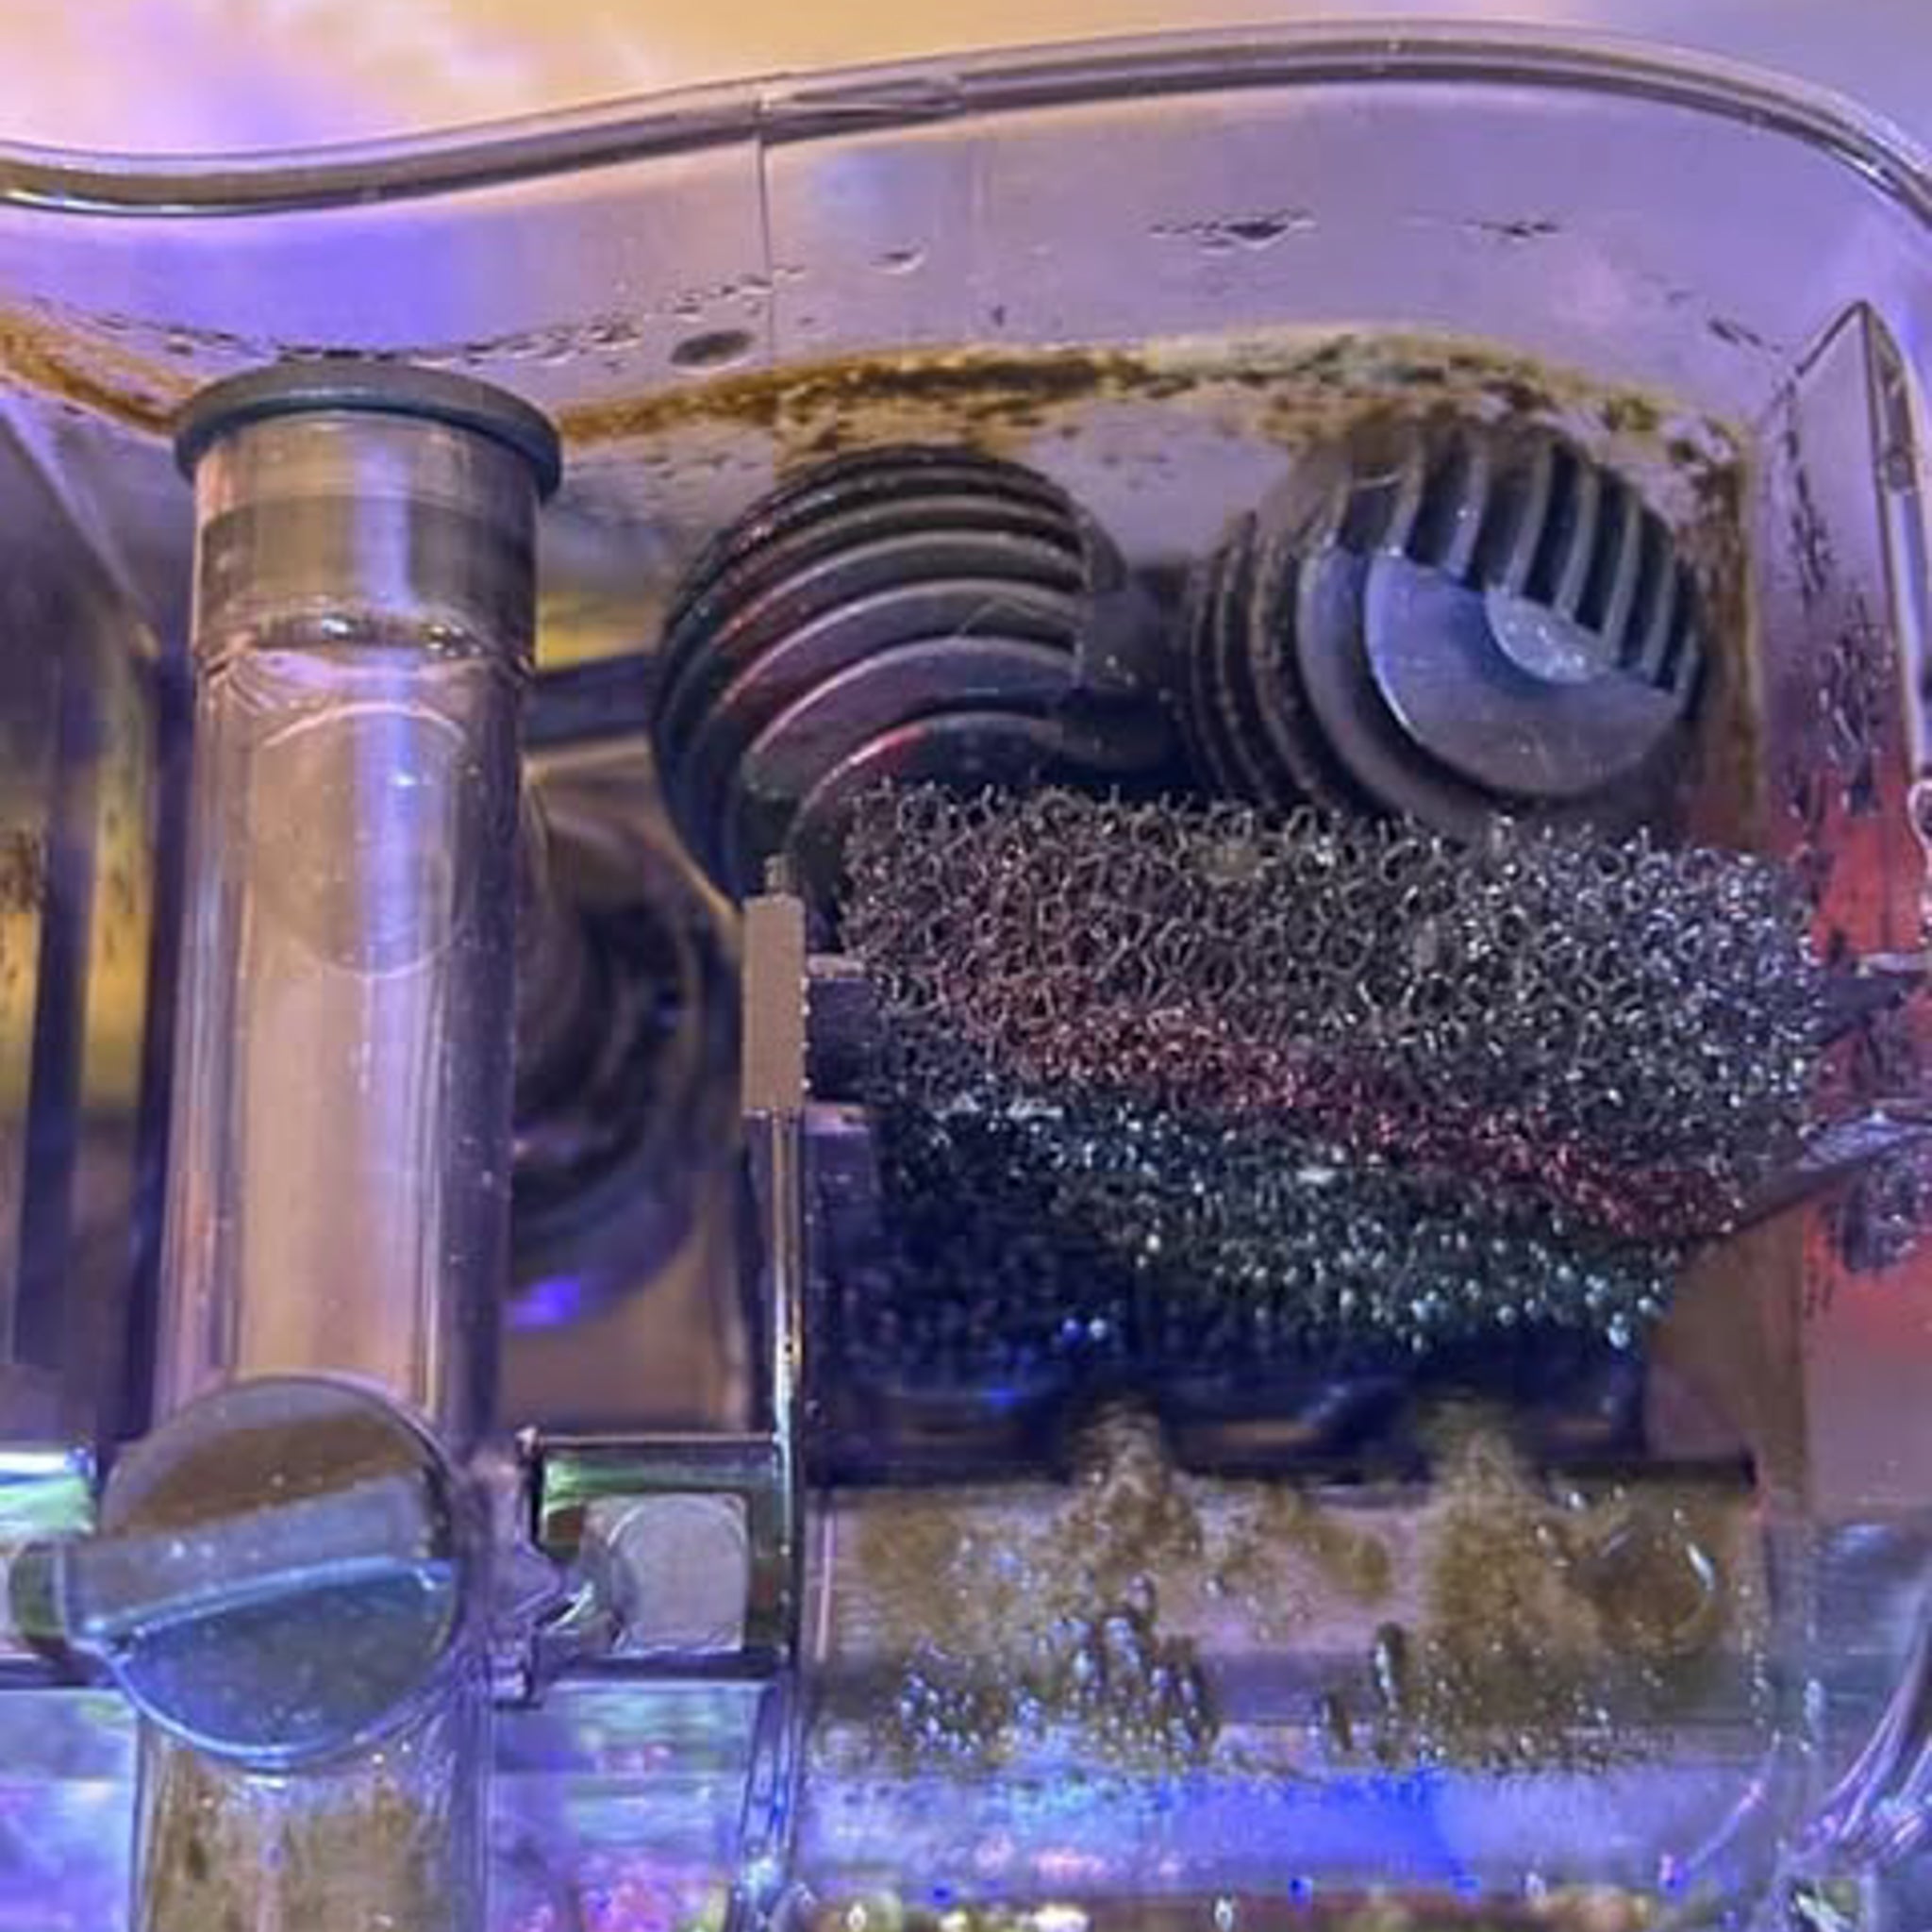
HOB Filter
The HOB (hang-on-back) filter is another excellent choice for a Botanical Method Aquarium, but like most internal filters, it usually comes with disposable cartridges filled with fine sponges, carbon pads, or chemical media—none of which support our goals. The first step is to remove the cartridges entirely. In their place, fill the chamber with materials that align with the ecology of your tank like ceramic media, course filter sponges, or a pouch of botanicals.
Canister Filter
A canister filter is the most streamlined way to filter a Botanical Method Aquarium, keeping equipment hidden while providing customizable media options. Skip the stock carbon and phosphate pads, as they strip away the tannins and compounds we want to keep. Instead, fill the trays with coarse sponges, ceramic media, and a pouch of durable botanicals to condition the water naturally.
Step 5
5. Substrate & Leaf Litter Layering
In a Botanical Method Aquarium, your substrate is an active biological zone. It’s where fungi, bacteria, detritus, roots, and microfauna converge to stabilize the aquarium. It is the foundation.
Key Method: Unlike standard aquariums that use 2–3 inches of sand or aquasoil, we keep substrate depth to about 1–1.5 inches. The rest of the “floor” is built over time through detritus accumulation and the layering of botanicals. This approach mirrors wild habitats, where leaf litter and woody debris gradually bury the underlying sediments and form a living cap over top. This gives the substrate room to grow as materials deposit over the lifespan of the ecosystem.
But, one of the most common pitfalls for beginners is using the wrong kind of substrate.
Why Aquasoils Can Strip Your Tint
Aquasoils and clay-based substrates may be great for high-tech planted tanks, but they’re usually a poor match for the botanical method aquarium. Their high cation exchange capacity (CEC) means they absorb tannins and other compounds, pulling the signature tint right out of the water.
This is the #1 question I get when hobbyists try Betta Tea:
“Why did my water turn clear after 48 hours?”
To preserve that rich amber tone and create a functional substrate base for your ecosystem, we recommend starting with inert materials and building up from there. If you plan to keep rooted plants with higher nutrient needs, see Section 7 for options on safely adding small amounts of aquasoil or root tabs without compromising tint.
Natural Substrate Blends
We suggest layering natural sands, fine gravels, and inert pebbles to create a substrate that resembles the forest floor. The substrate is not a sterile environment. It contains an entire substrate biome.
You can blend these with:
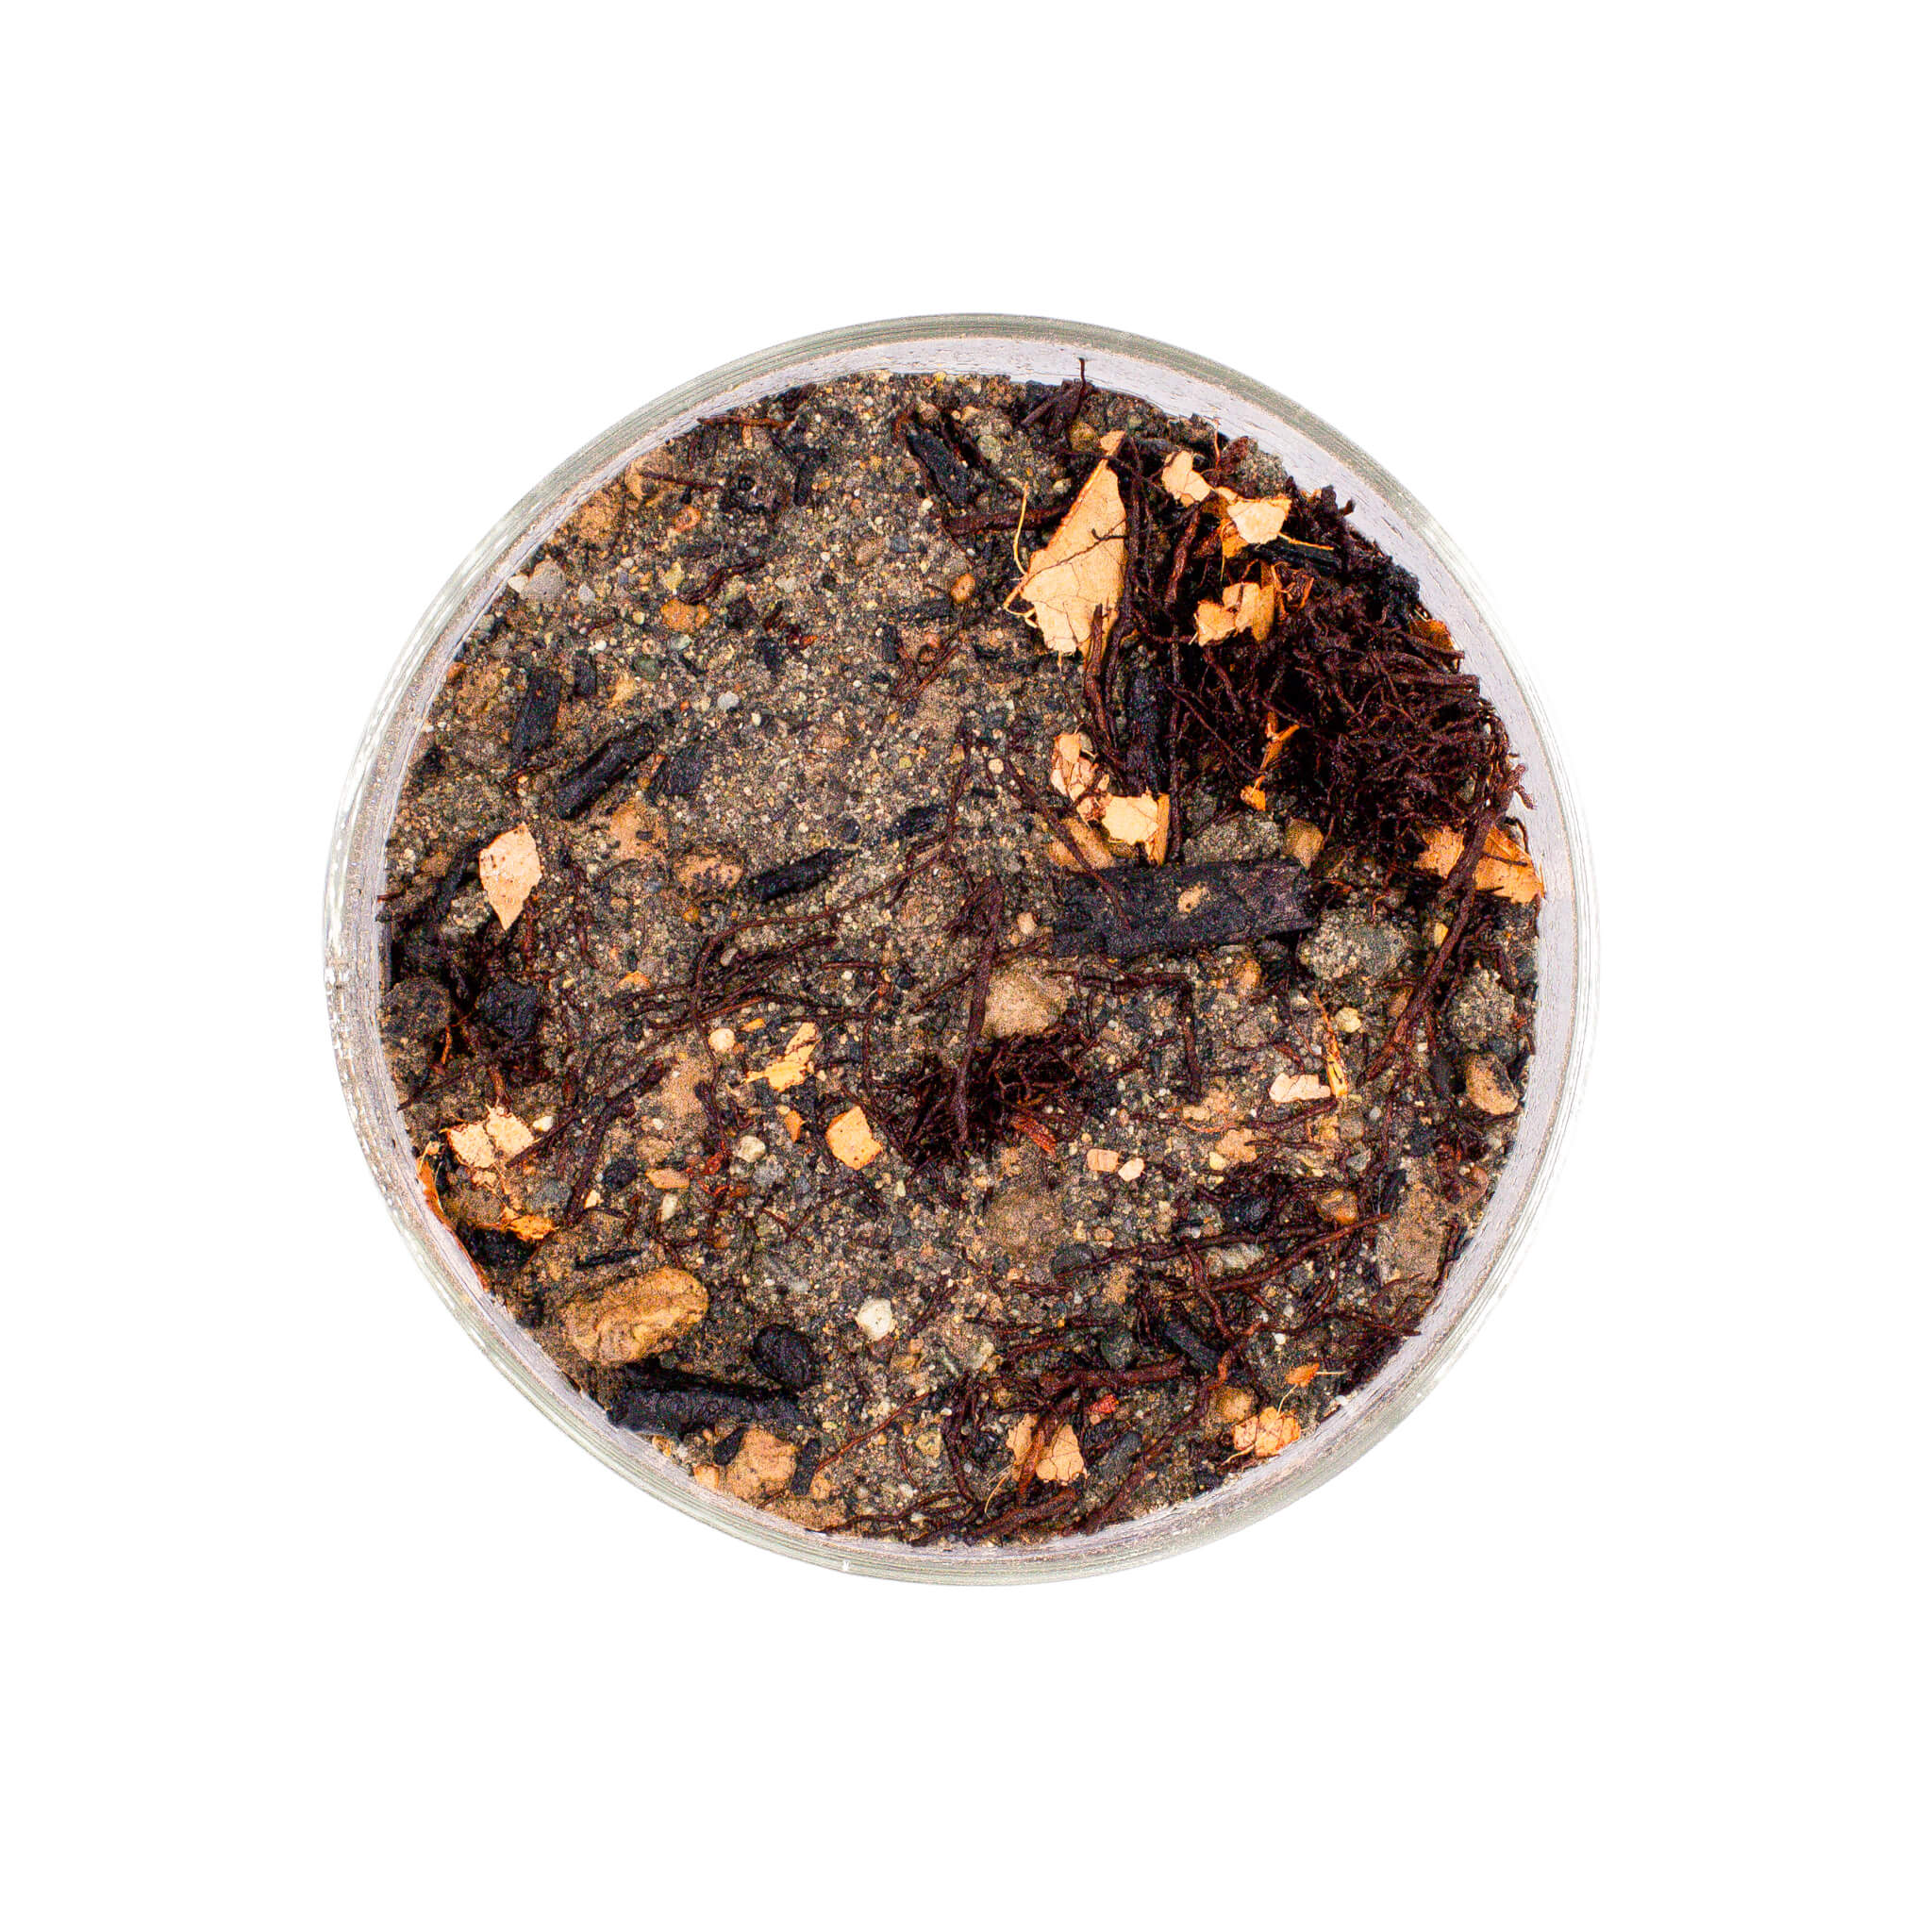
- Flooded Forest Sedimented Substrate – a mix of soils, clays, botanicals, and sediments
- Inert sand and gravel – from CaribSea, Fluval, UNS, or similar brands
- Small, rounded pebbles – for textural contrast and to mimic streambeds
These layers replicate real-world riverbanks and forest floor conditions while supporting both plant growth and microbial diversity.
The Role of Leaf Litter
In the wild, leaf litter beds are dynamic, shifting habitats where fish forage, shelter, and spawn. In the Botanical Method Aquarium, they serve the same role. A thick bed of diverse, layered leaves creates a slow-decomposing zone rich in detritus, biofilms, and hiding places.
You can also combine leaf litter atop sedimented substrates, recreating the same habitat we’d find our aquarium fish in.
The Concept of Perpetual Substrate
In nature, leaf litter doesn’t get “cleaned” once a week. It gets seasonally layered.
New leaves fall from the canopy and settle atop decomposing ones. This same process can be mimicked in the aquarium by regularly adding fresh botanicals, without resetting or disturbing the leaf litter base. Over time, this becomes a perpetual substrate—an ever-shifting living matrix of decomposing organics, biofilms, plant roots, and microfauna.
Leave it undisturbed. Resist the urge to gravel vac. Let the ecosystem evolve. Though if you desire to remove a little bit of detritus here or there to mimic what may have been swept up in a sudden current, a 1"x1" or 3"x3" section (depending on tank size) is allowed. Just remember that you are removing someone else's food source.
Substrate Tips:
- Avoid substrates with carbonates, as they can buffer pH upward.
- Use crushed leaf zones or cleared patches to expose sediment layers for contrast.
- Plant roots help oxygenate and stabilize substrate zones.
- Microfauna (copepods, detritus worms, etc.) tunnel through the layers, improving flow and structure.
- Minimal vacuuming. Spot clean only if necessary.
Substrates & Their Function
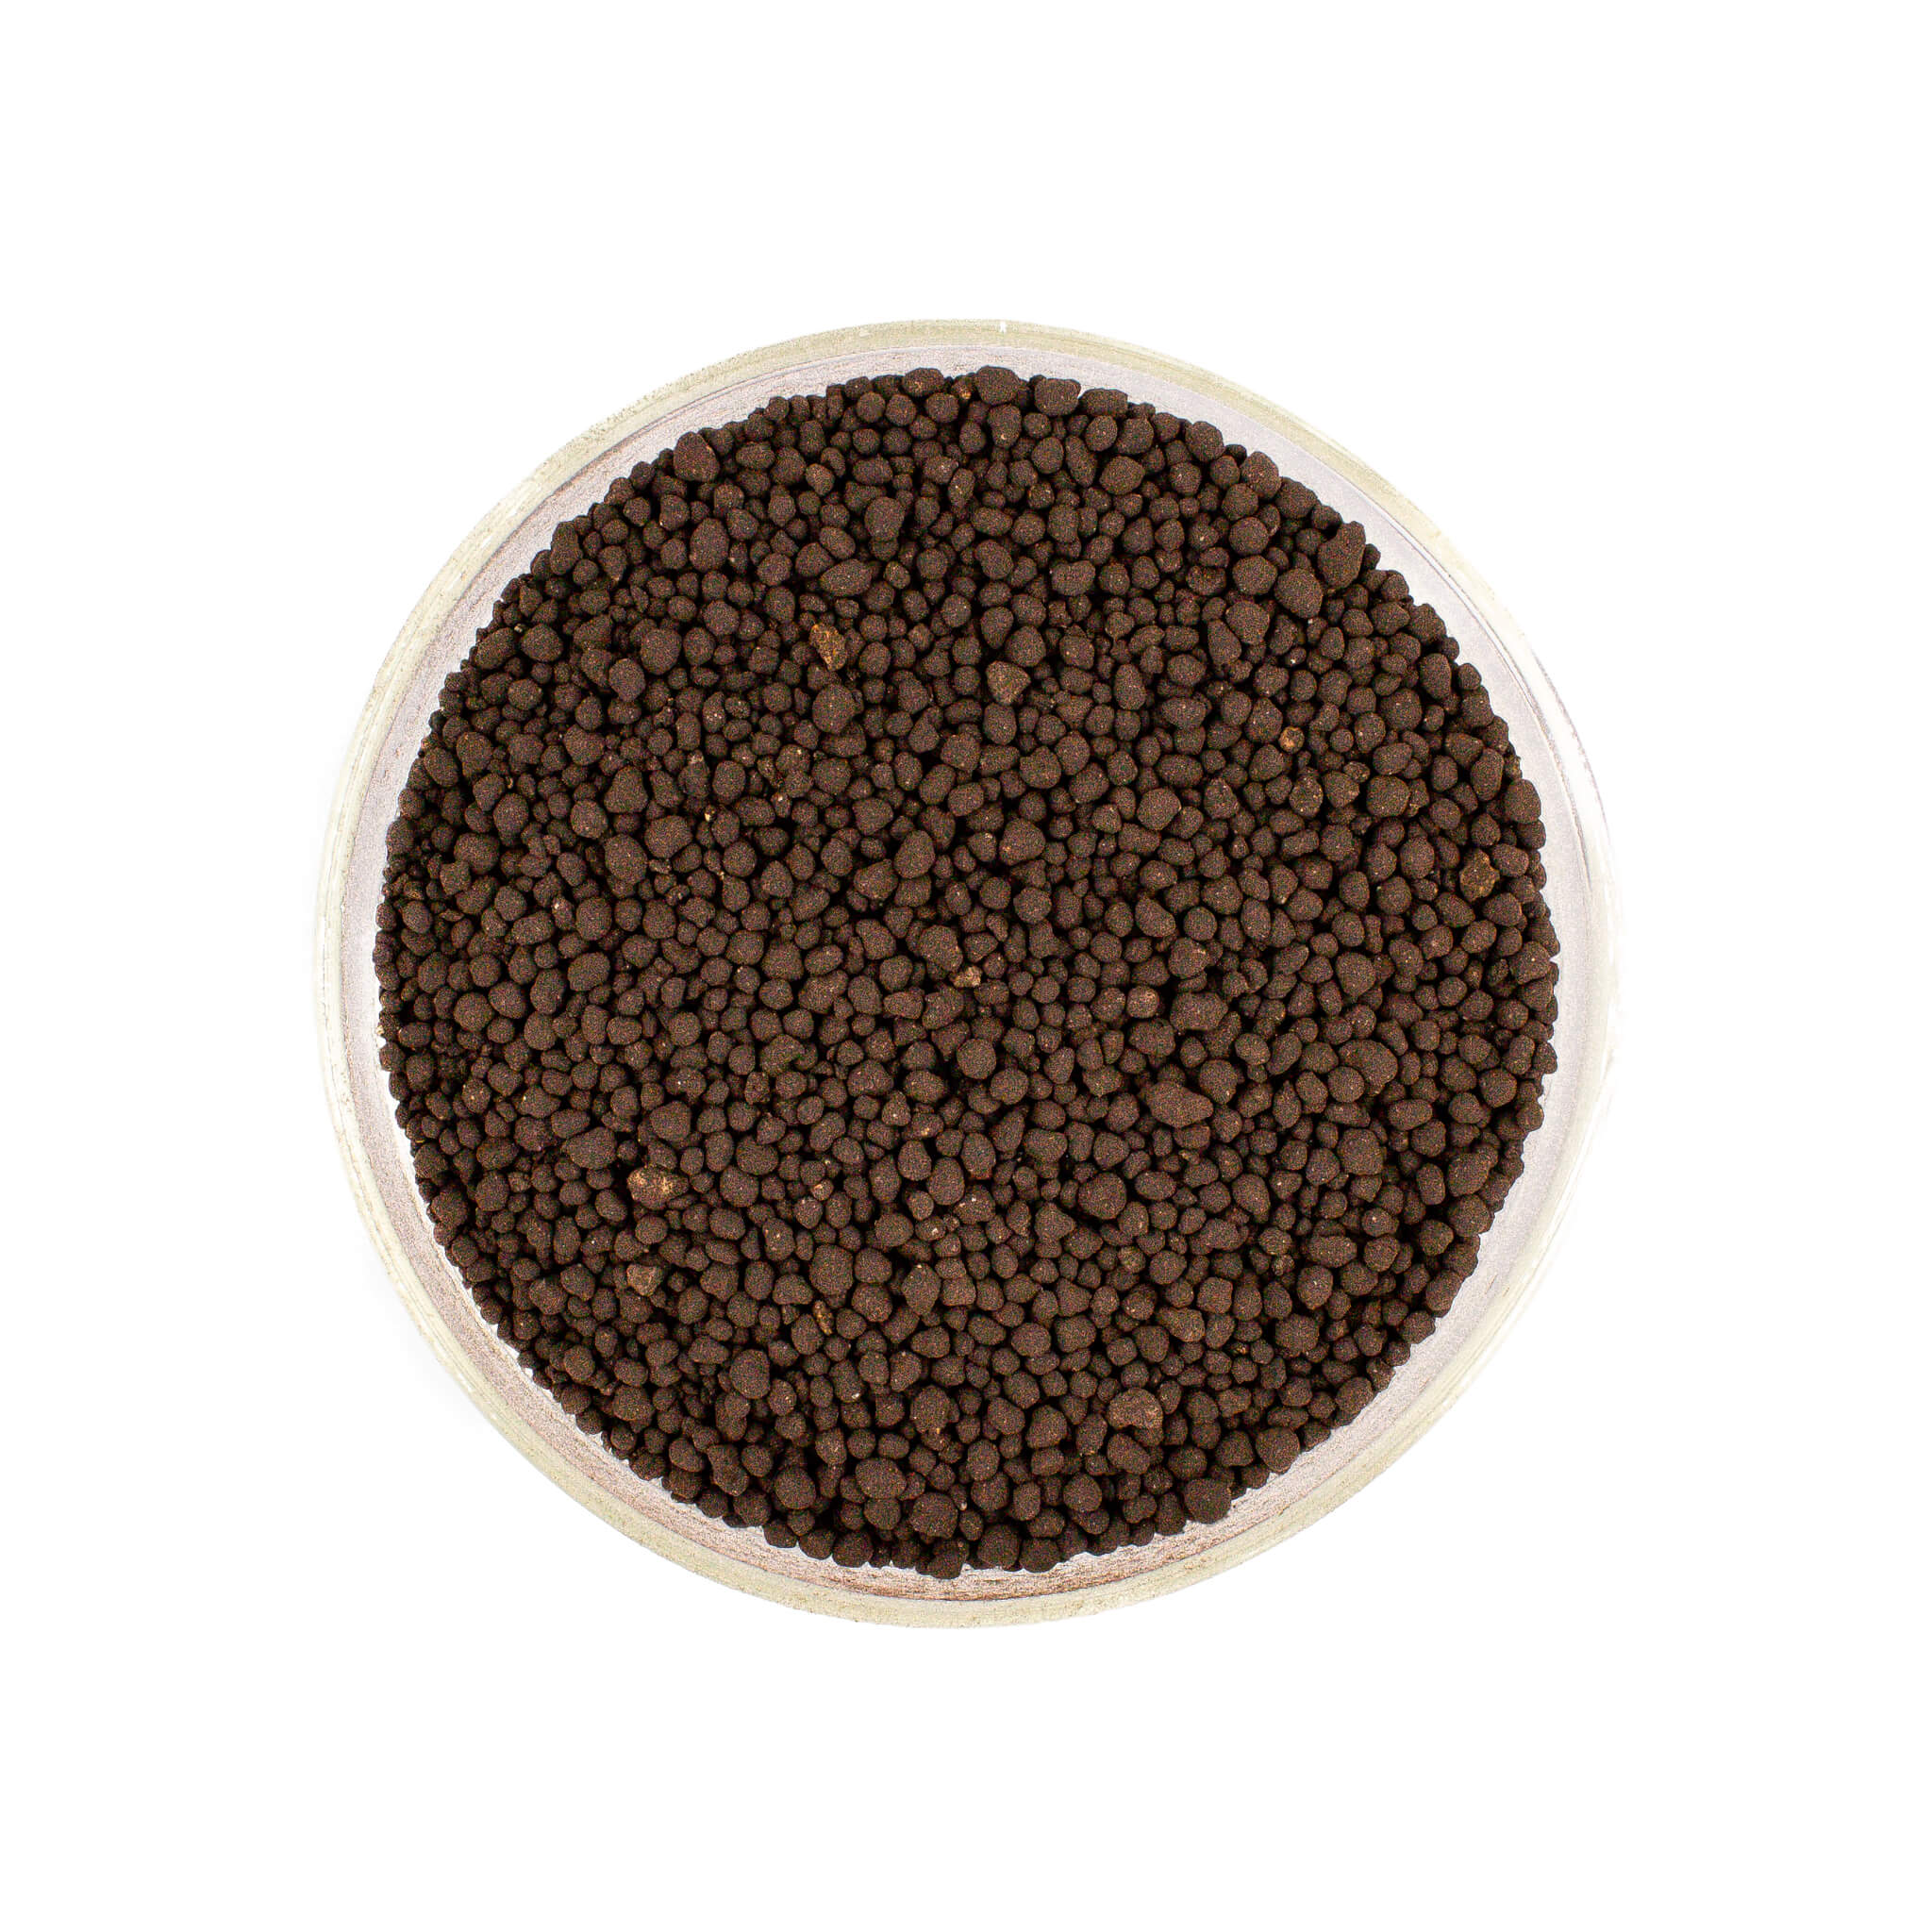
Sedimented Substrate
FloodedForest™ Sedimented Substrates are designed to replicate the complex, organic-rich substrate beds found in seasonal forest floors when they become submerged. This blend of sediments, sands, soils, and finely shredded botanicals creates a living foundation where fungi, bacteria, and microfauna thrive. Over time, it sifts itself into a layered matrix that supports plant roots, and mirrors the perpetual layering of organics seen in wild flooded habitats which support microfauna.
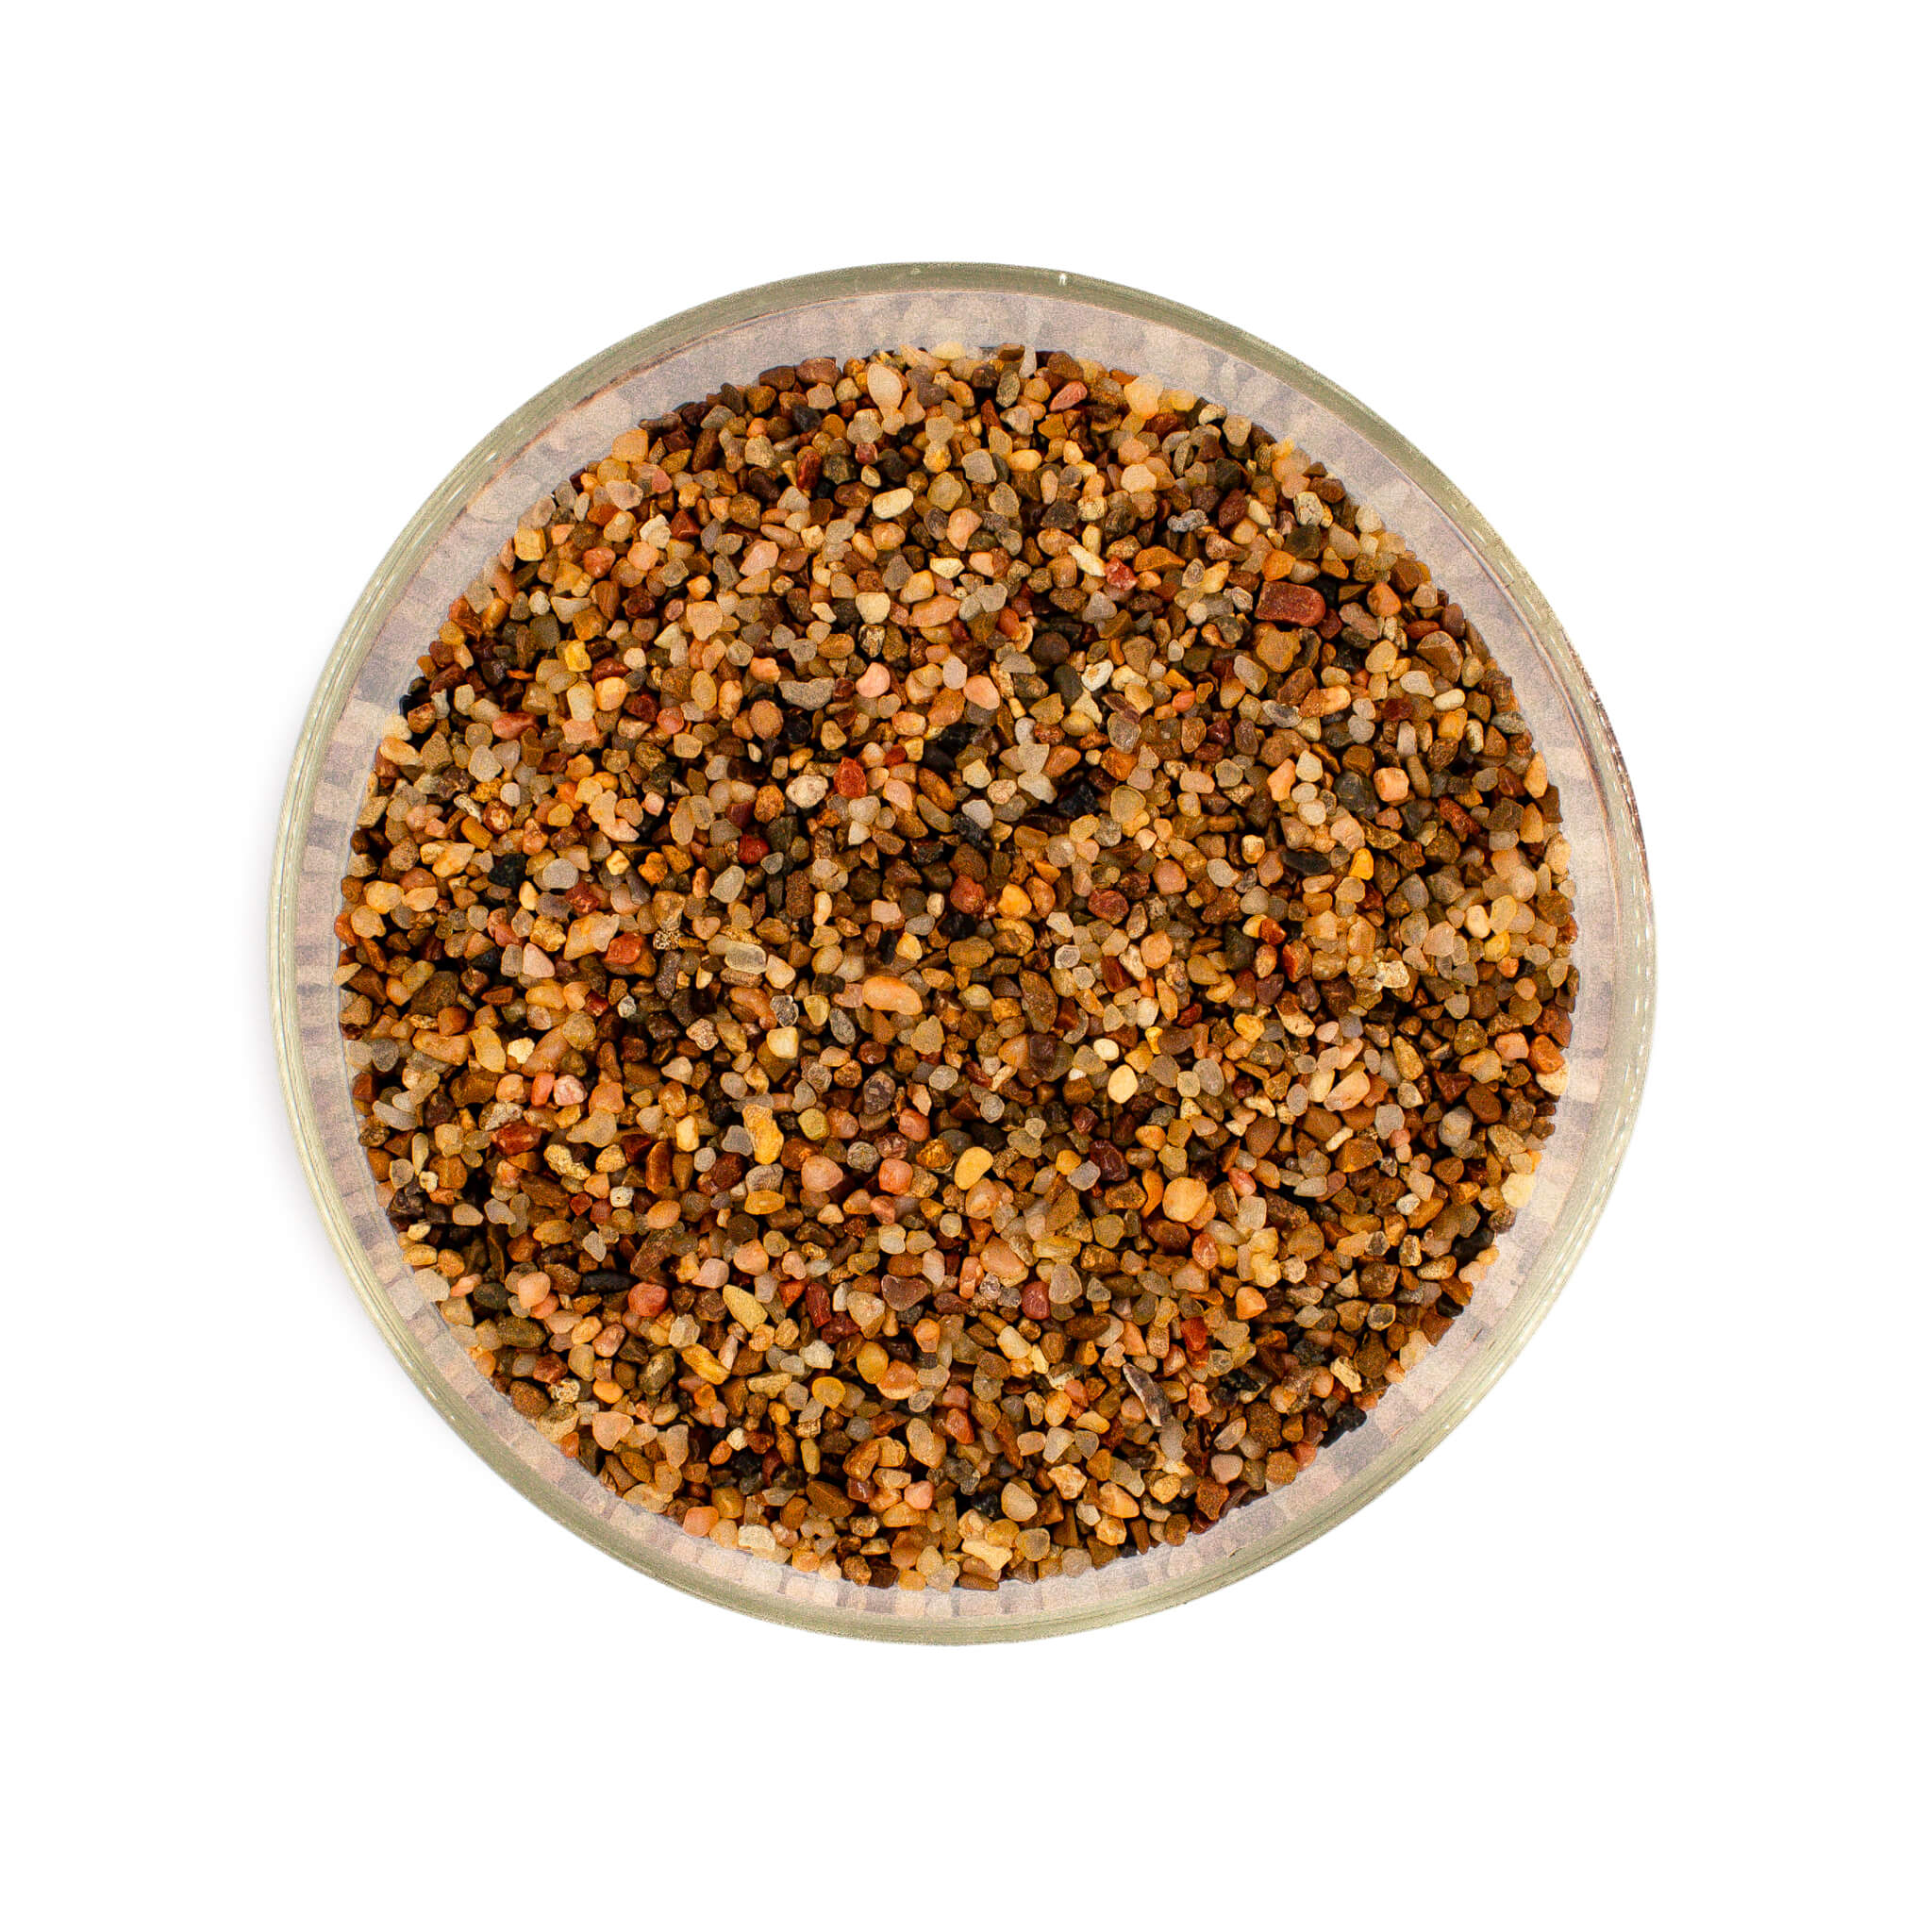
Sand
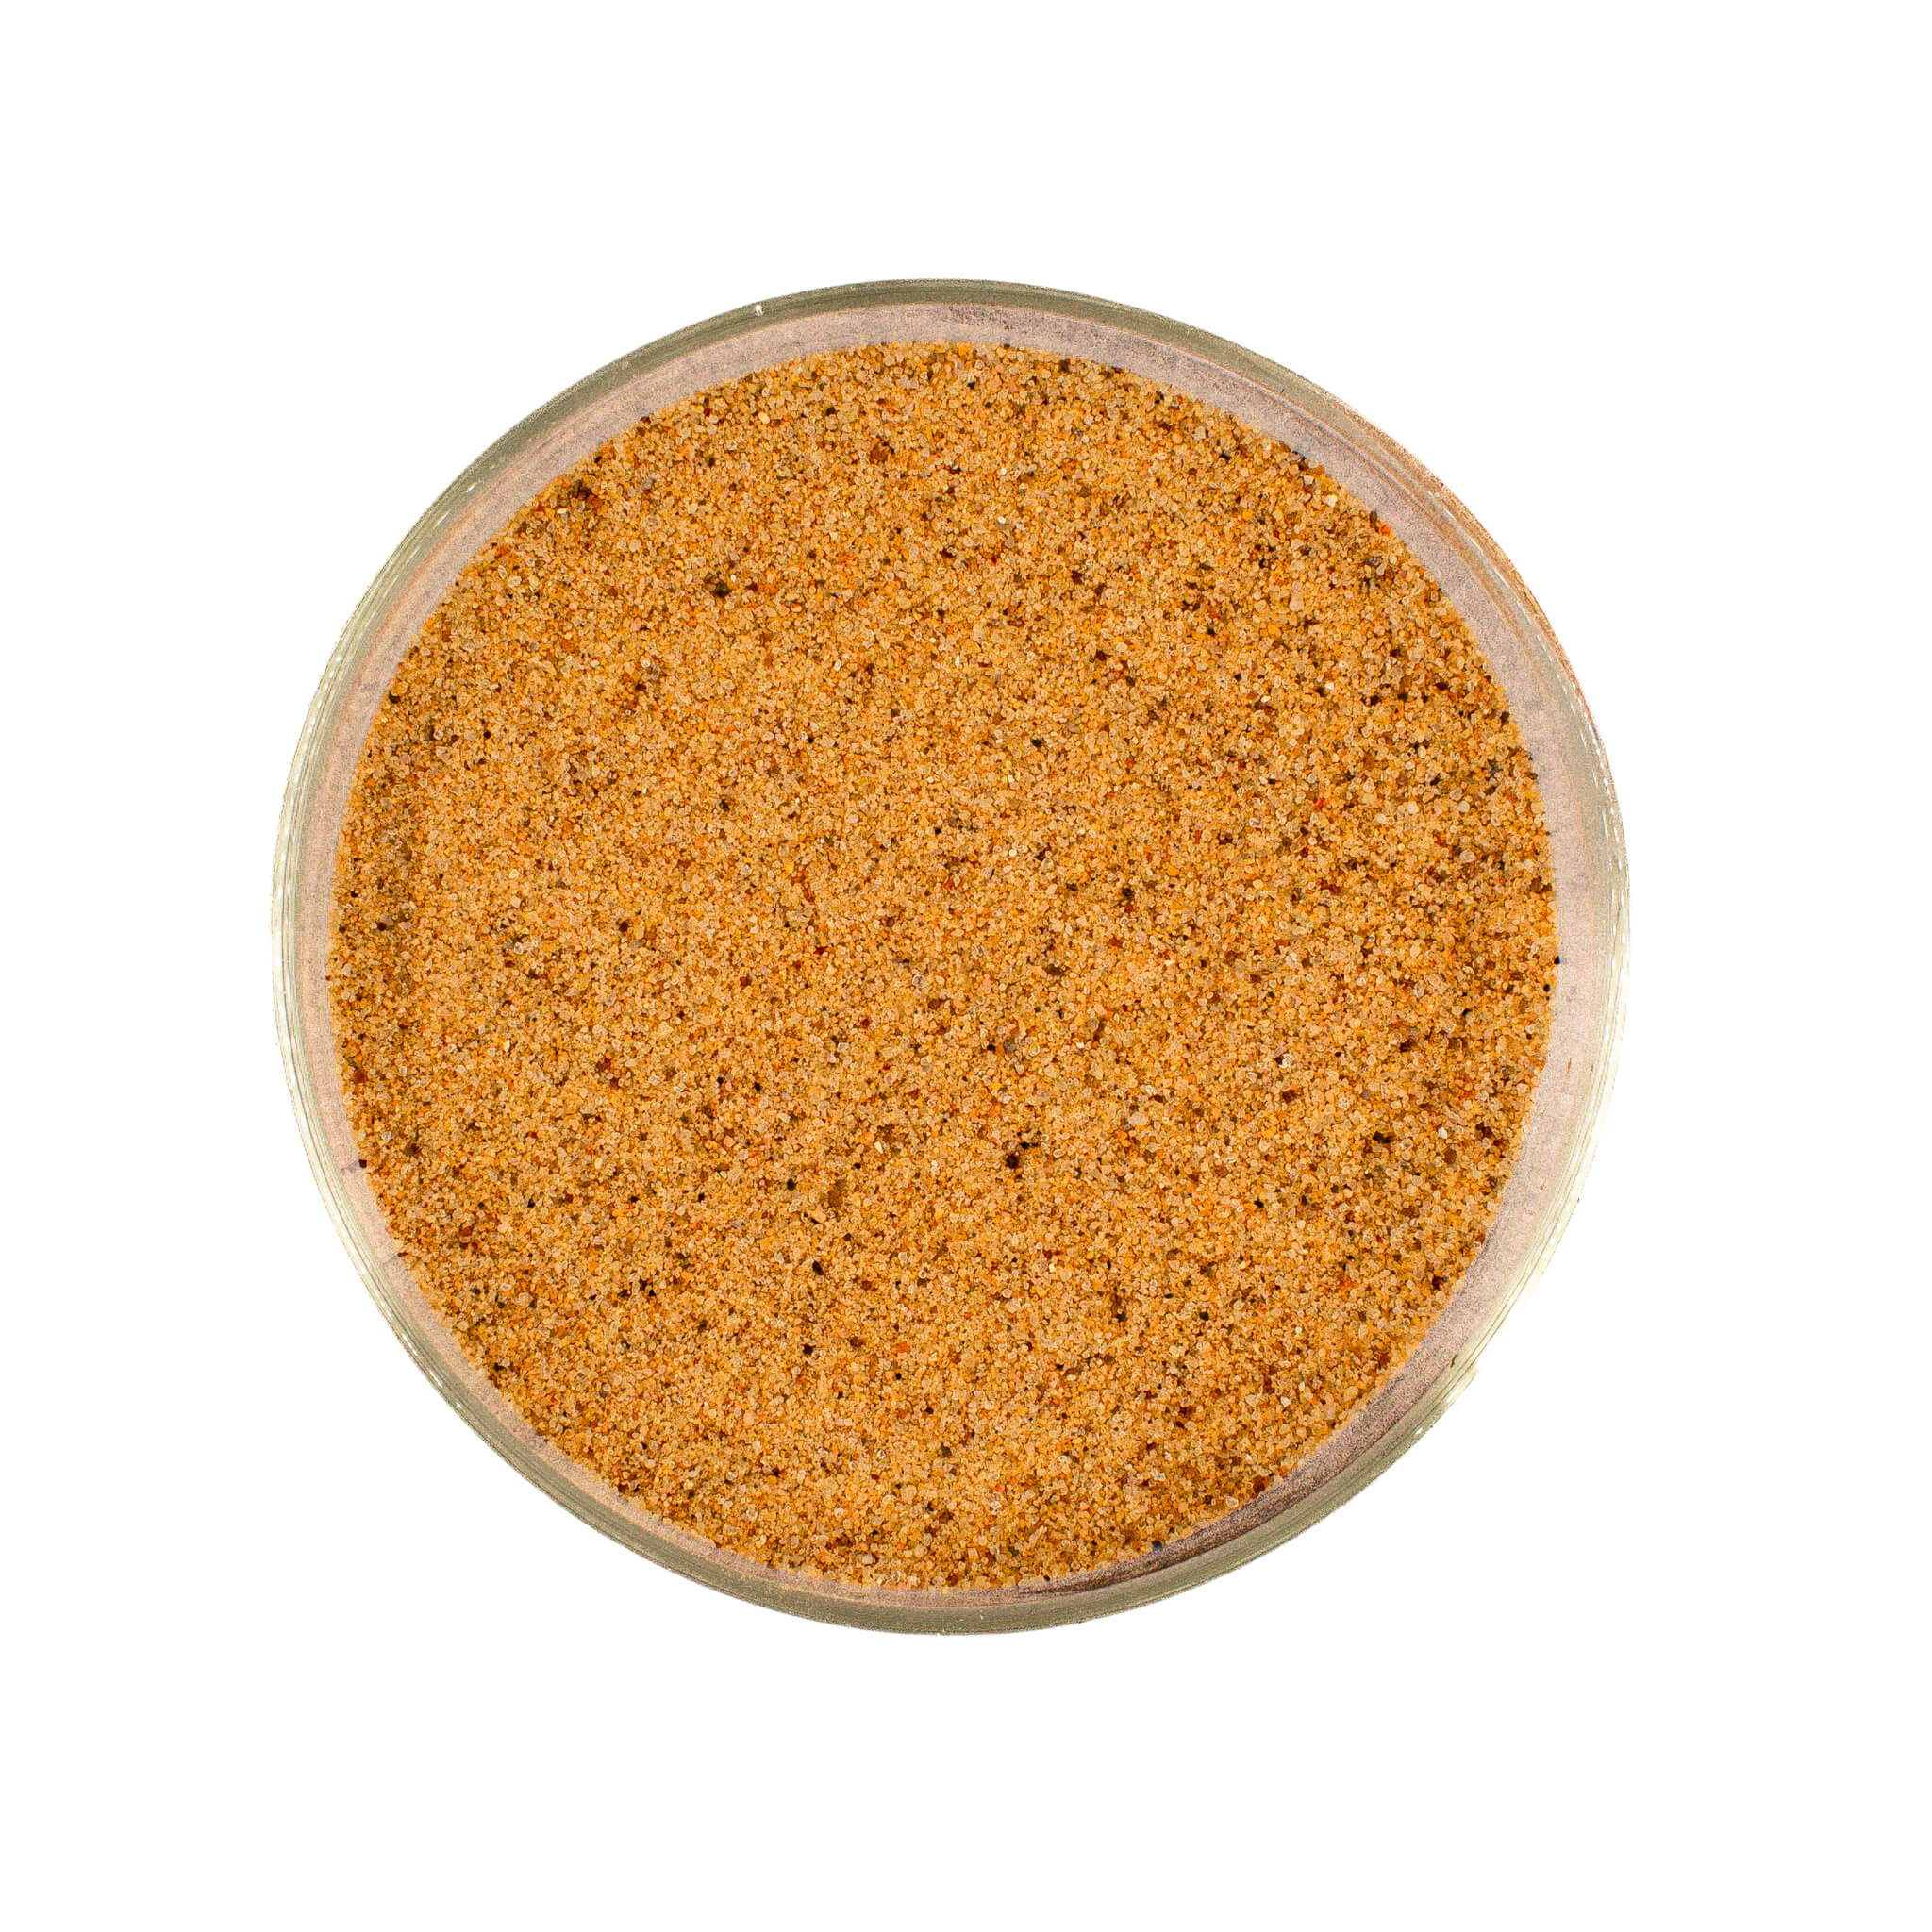
Sand is an excellent choice for low-flow botanical method aquariums, where detritus, leaf litter, and organics are meant to settle naturally across the surface rather than sinking deep into the substrate. Its fine texture mimics riverbeds and floodplains, providing a soft, stable floor for bottom-dwellers like Corydoras while supporting the layering of botanicals above. Natural-colored sands from trusted brands are widely available—our personal favorite comes from CaribSea for its balance of grain size and natural aesthetic.
Gravel
Small gravels can be an effective choice in a Botanical Method Aquarium, offering stability and texture. However, the larger the grain size, the less natural the substrate tends to look, as detritus and leaf litter often slip between the gaps instead of resting on the surface. In nature, gravels are most commonly found in higher-flow habitats where organics are swept away, leaving a cleaner substrate. When used thoughtfully, fine gravels can still support leaf litter layering and plant rooting, but they’re best suited for aquarists who prefer a slightly tidier look while retaining ecological function.
Aquasoil
For clear-water Botanical Method Aquariums, aquasoils are often chosen, but they aren’t well-suited for systems where tint and natural decomposition are the focus. Their high cation exchange capacity (CEC) actively pulls tannins and humic substances from the water—stripping away the very qualities that give botanical aquariums their character. While aquasoils are excellent for high-tech planted aquariums, they work against the goals of most botanical enthusiasts. No matter the brand, we don’t recommend aquasoils for the botanical method aquarium.
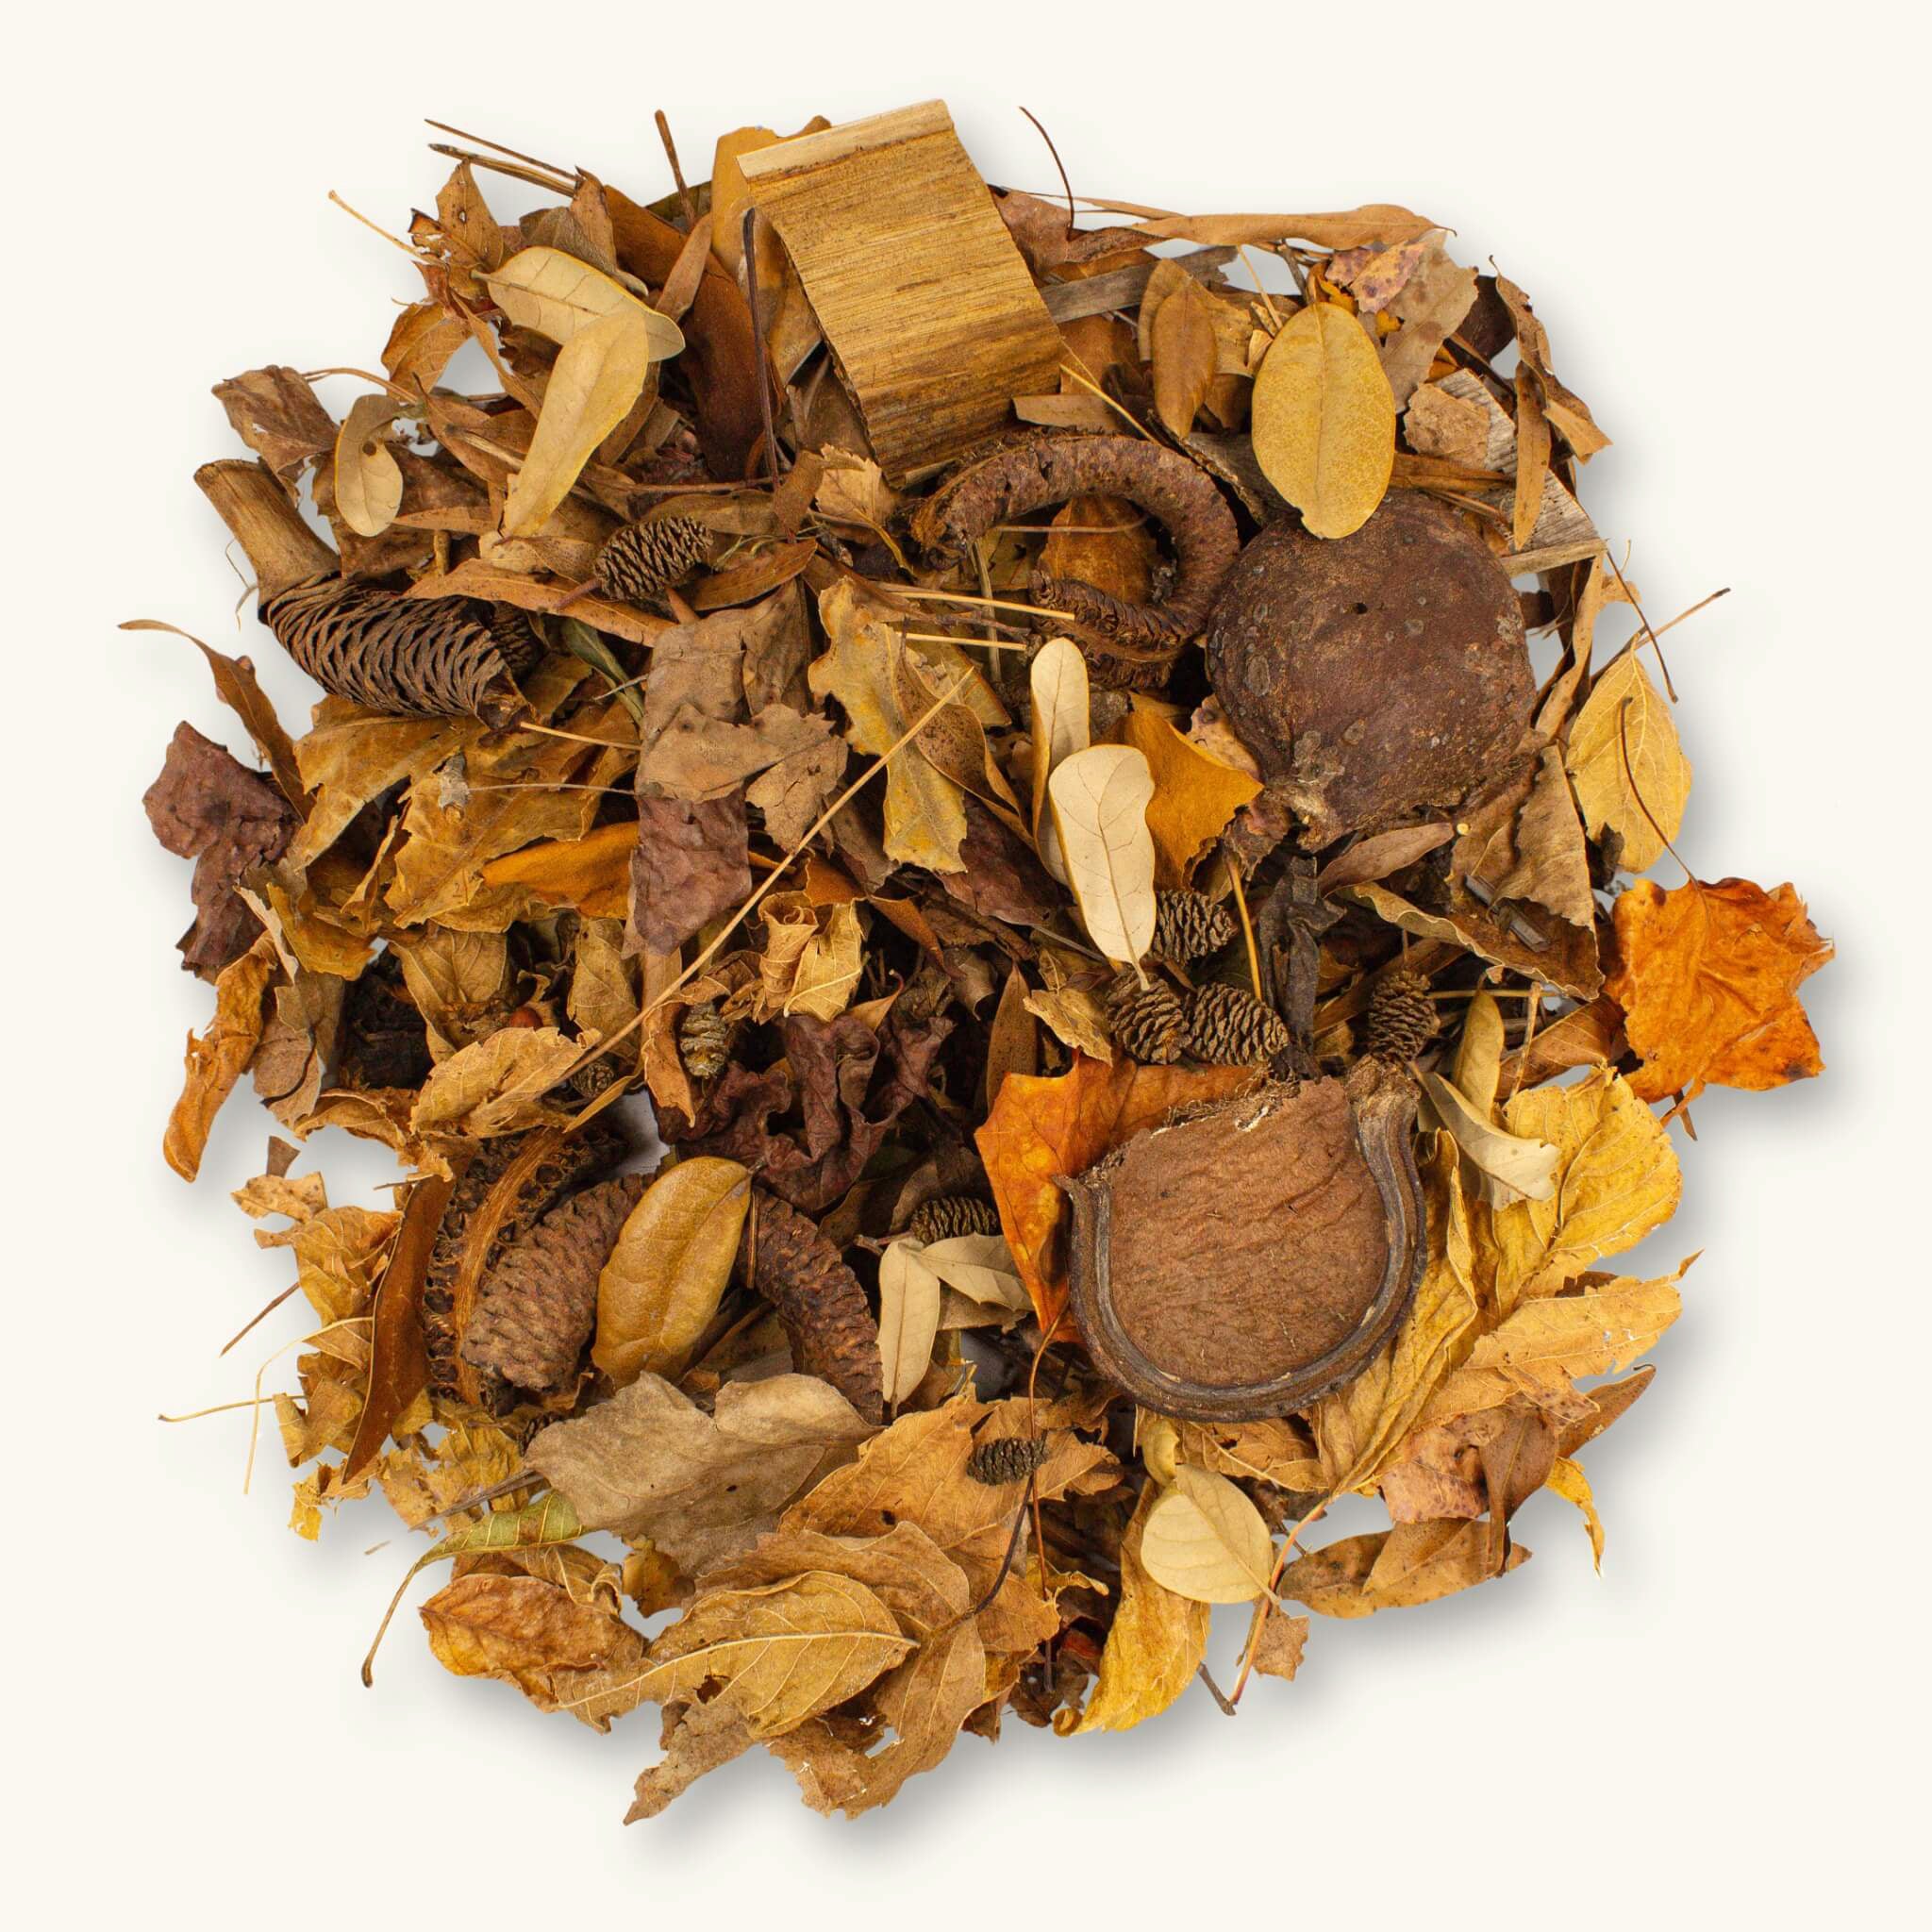
Leaf Litter Only
The leaf litter–only aquarium isn’t common in the hobby, but it creates one of the most functional habitats for fish and microfauna. A dense matrix of leaves provides both shelter and foraging surfaces, making it especially beneficial for nano fish and shrimp. The layered structure maximizes surface area, fueling biofilm and microbial growth while offering countless microhabitats. Low-flow conditions are required, where leaves, detritus, and bacterial colonies remain relatively undisturbed, allowing natural processes to unfold much like they would in a flooded forest or stream bed.
Step 6
6. Hardscape: Driftwood, Rock & Root Placement
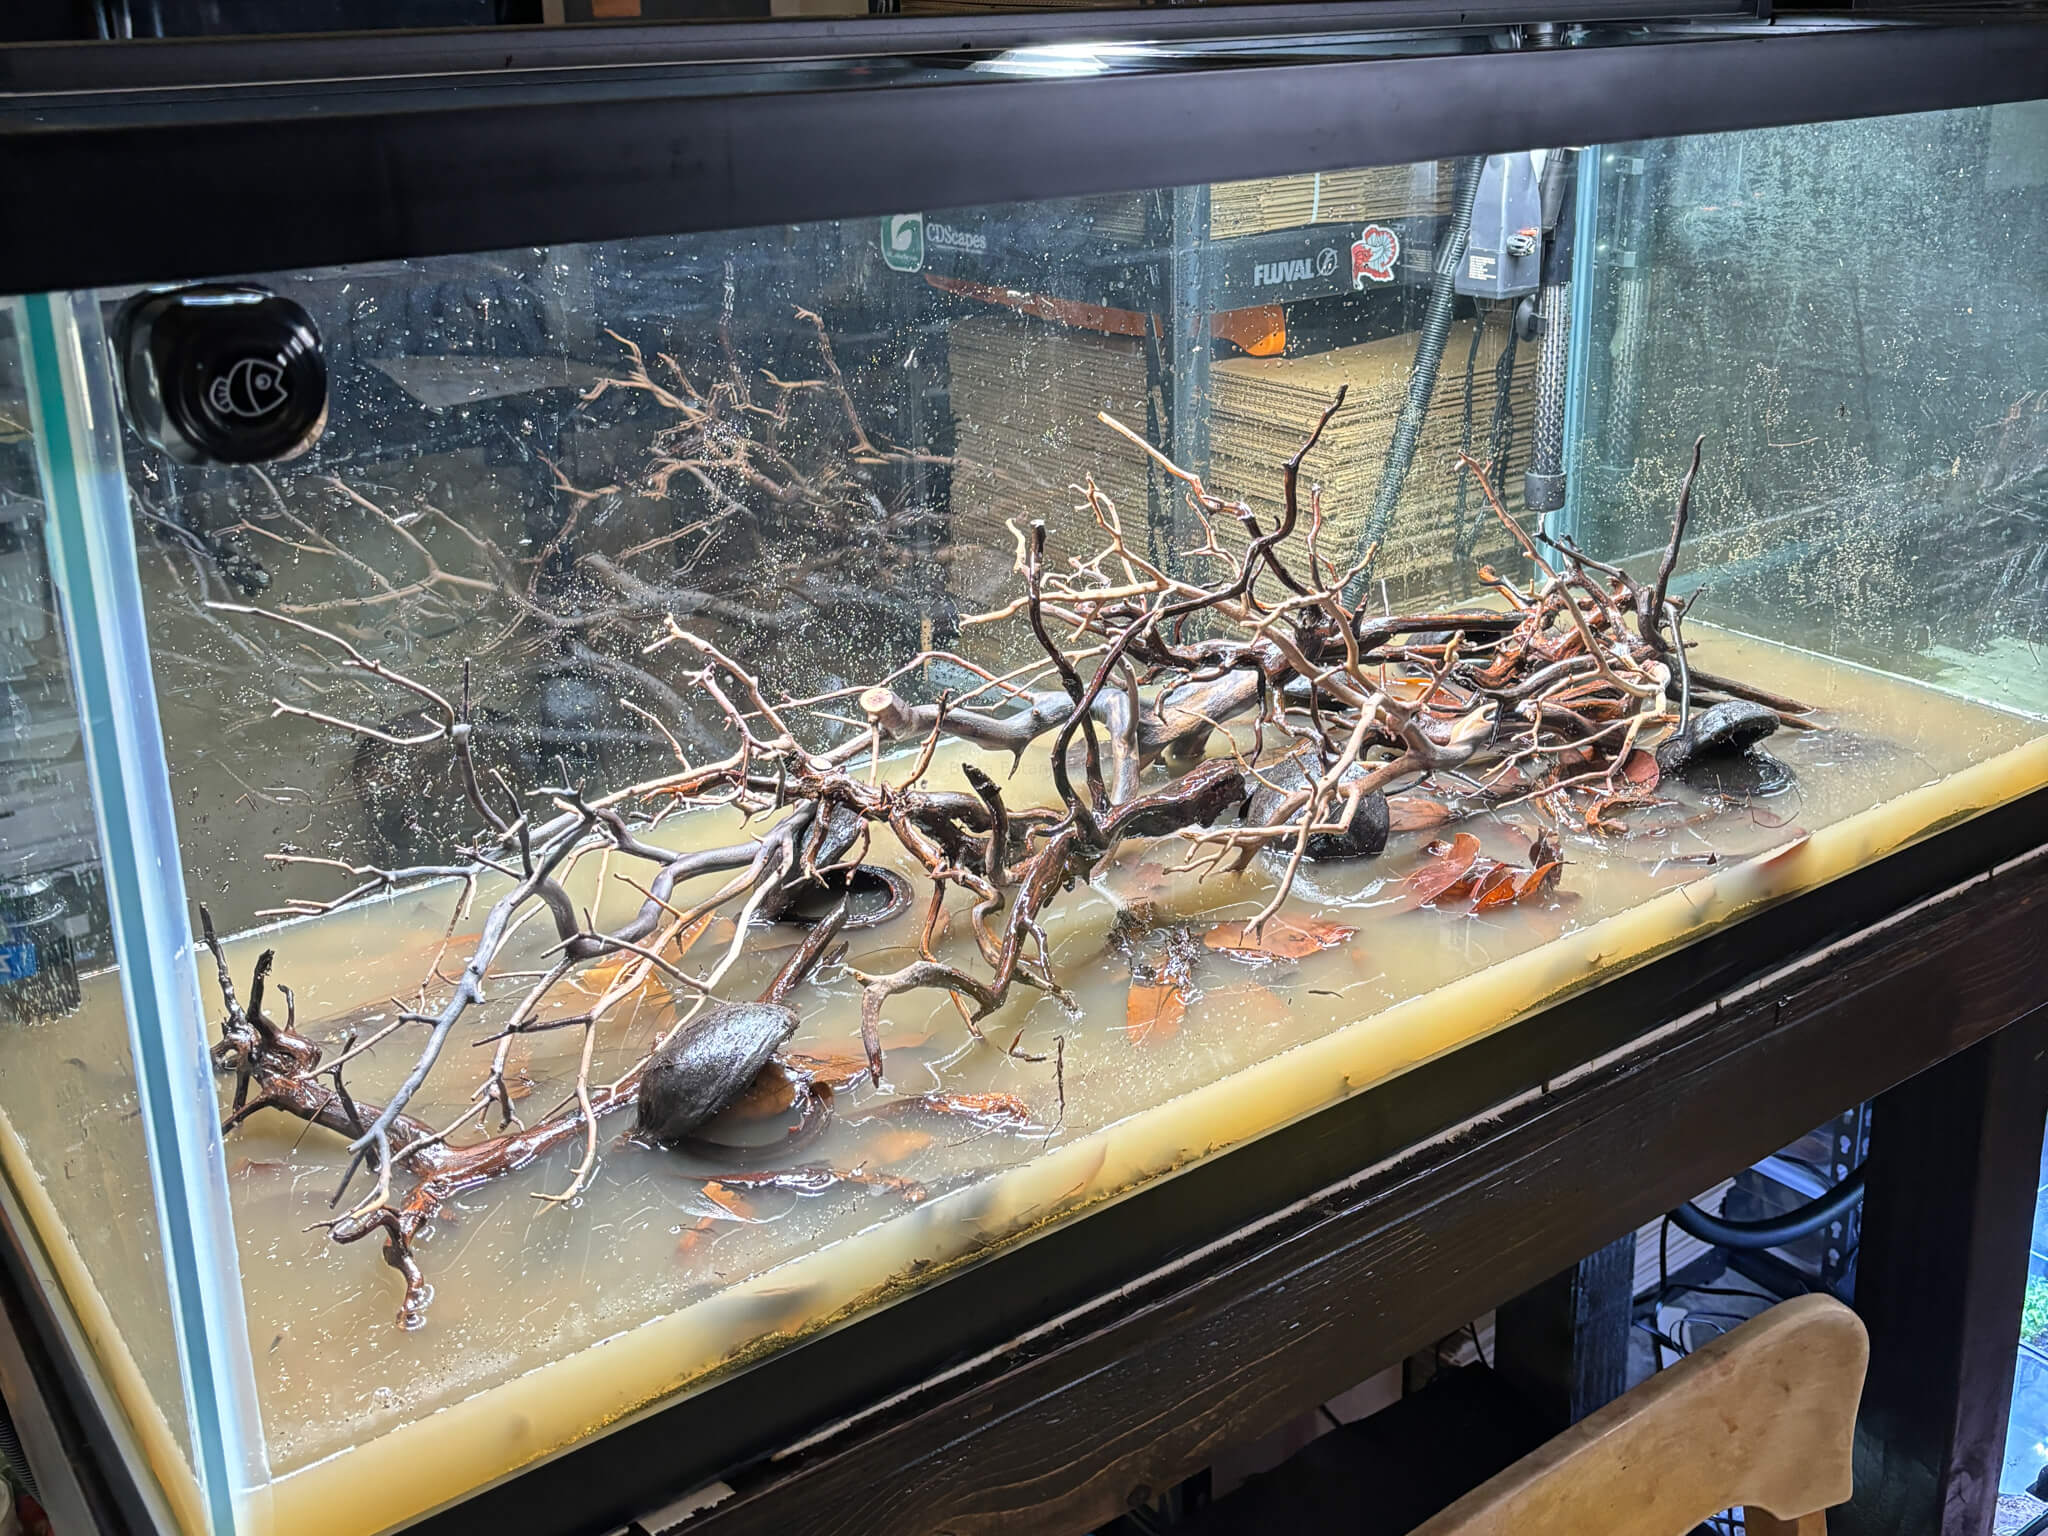
In a newly established botanical method aquarium, you can condition wood directly in the tank. But in an established system with critters already present, it’s best to prepare it outside the aquarium—in a bucket or bin of dechlorinated water.
Key Method: Condition driftwood externally to manage the sudden influx of biofilms and bacteria. In smaller aquariums, especially, new wood can present a significant increase in surface area and new food sources, which can overwhelm an already mature system.
Why Surface Area Matters
Manzanita, stump, bogwood, and cholla all have high surface area, which is “prime real estate” for microbial colonization. In a botanical method aquarium—already biologically rich— these surfaces are quickly populated with bacteria and fungi, fueled by beneficial compounds within the wood itself.
This isn’t a problem of “too much beneficial bacteria.” It’s a question of surface area to water volume. Just as we recommend introducing only 2–3 botanicals per 5 gallons of water, adding a large piece of wood all at once can shift the microbial balance.
Preparation Tips:
Conditioning usually takes about 7–10 days, but the real sign of readiness is when the initial biofilms have subsided and the surface no longer appears “fuzzy.” For larger pieces, extended soaking in a bin allows tannin release and biofilm formation outside the main tank.
Placement in the Aquarium
When ready, position driftwood and roots so they create both structure and microhabitats:
- Anchor pieces partially into the substrate to mimic sunken roots.
- Angle branches to break up sight lines, giving fish natural territories.
- Combine with botanicals like seed pods or leaf litter for a more natural forest floor or streambed.
Well-placed wood shapes water flow, creates shaded zones, and increases habitat complexity.


Branching Manzanita | WYSIWYG Pieces

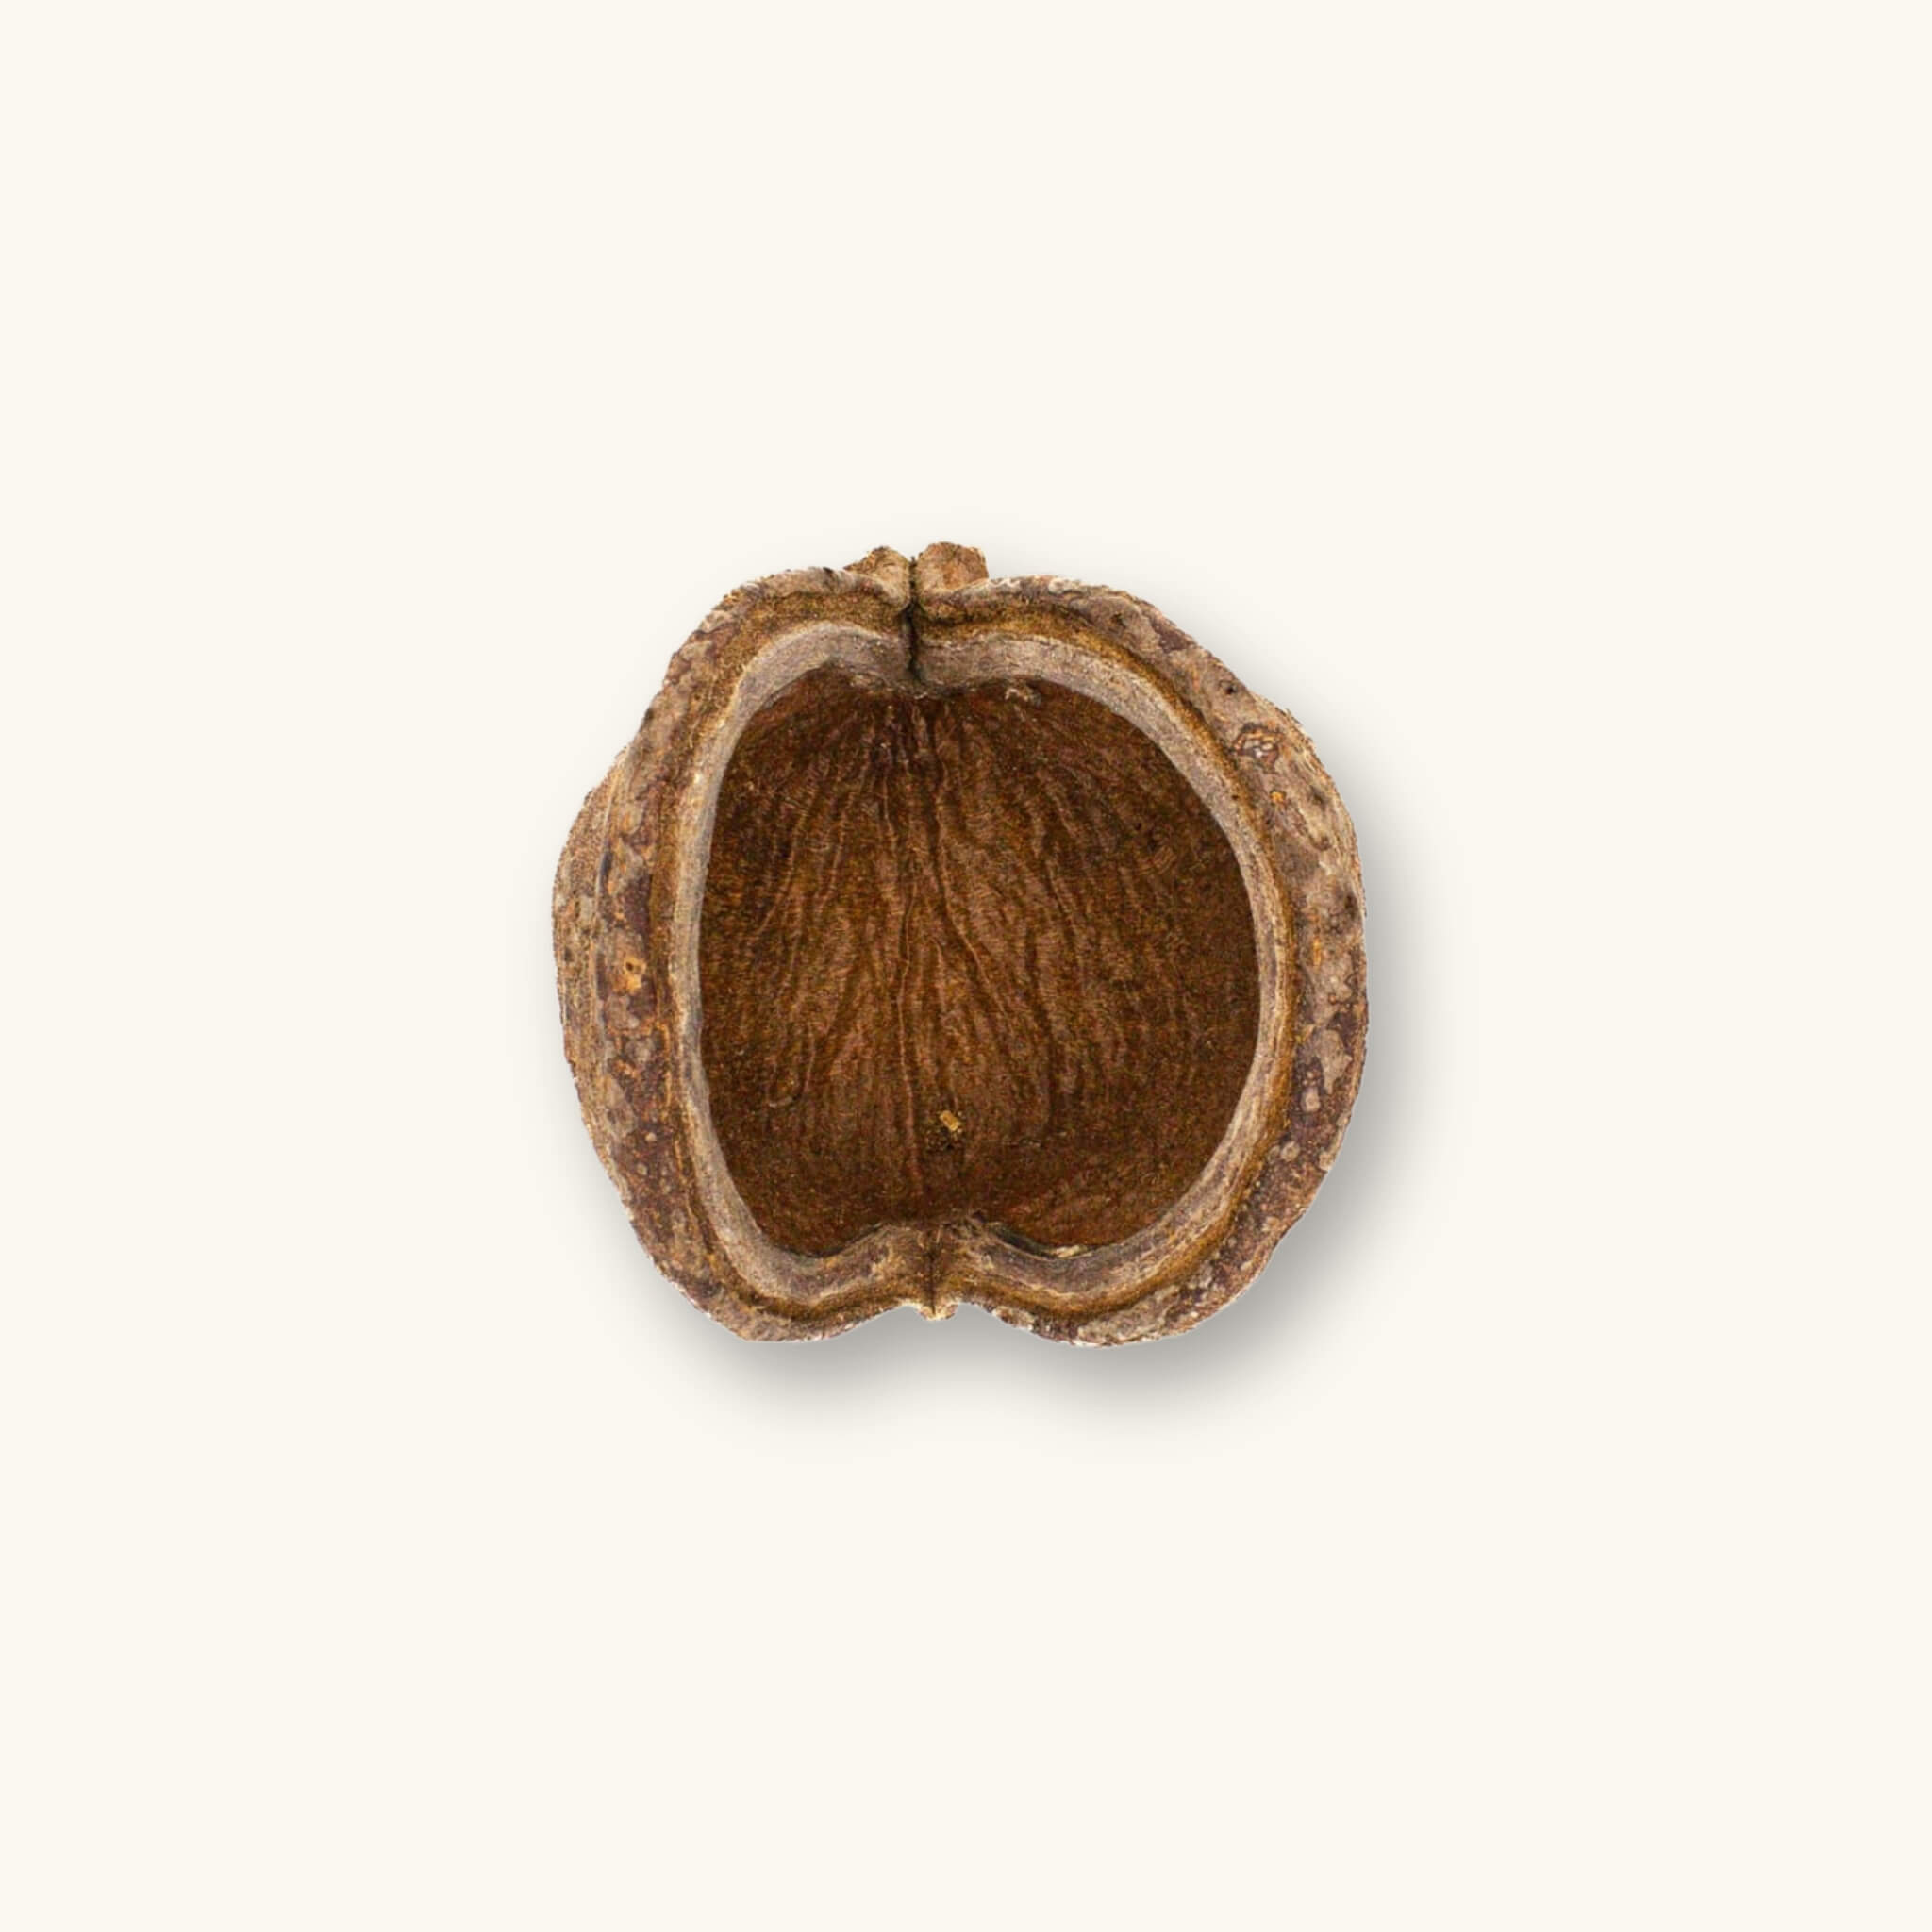
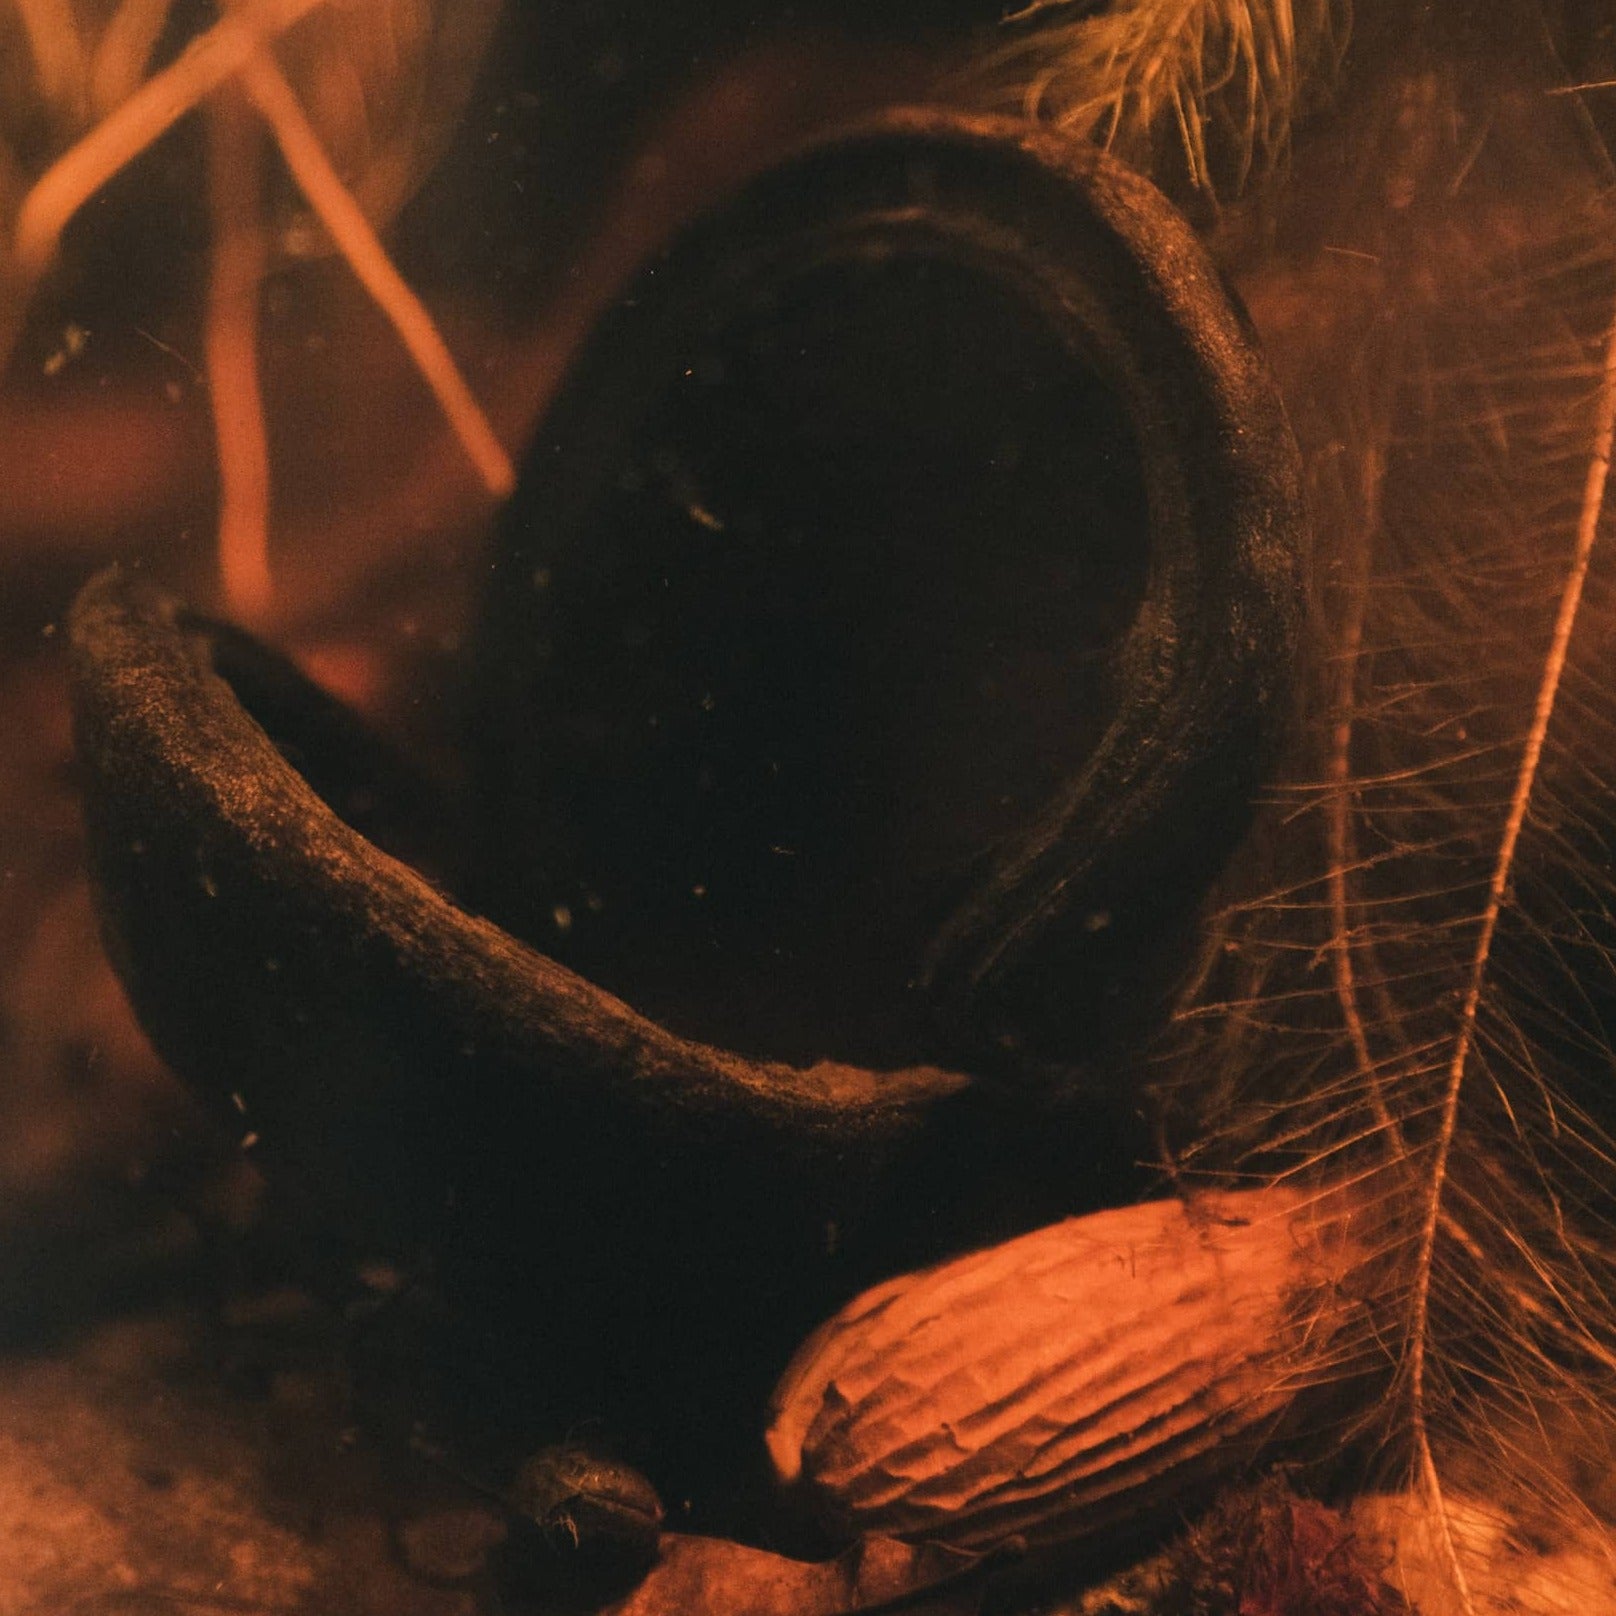
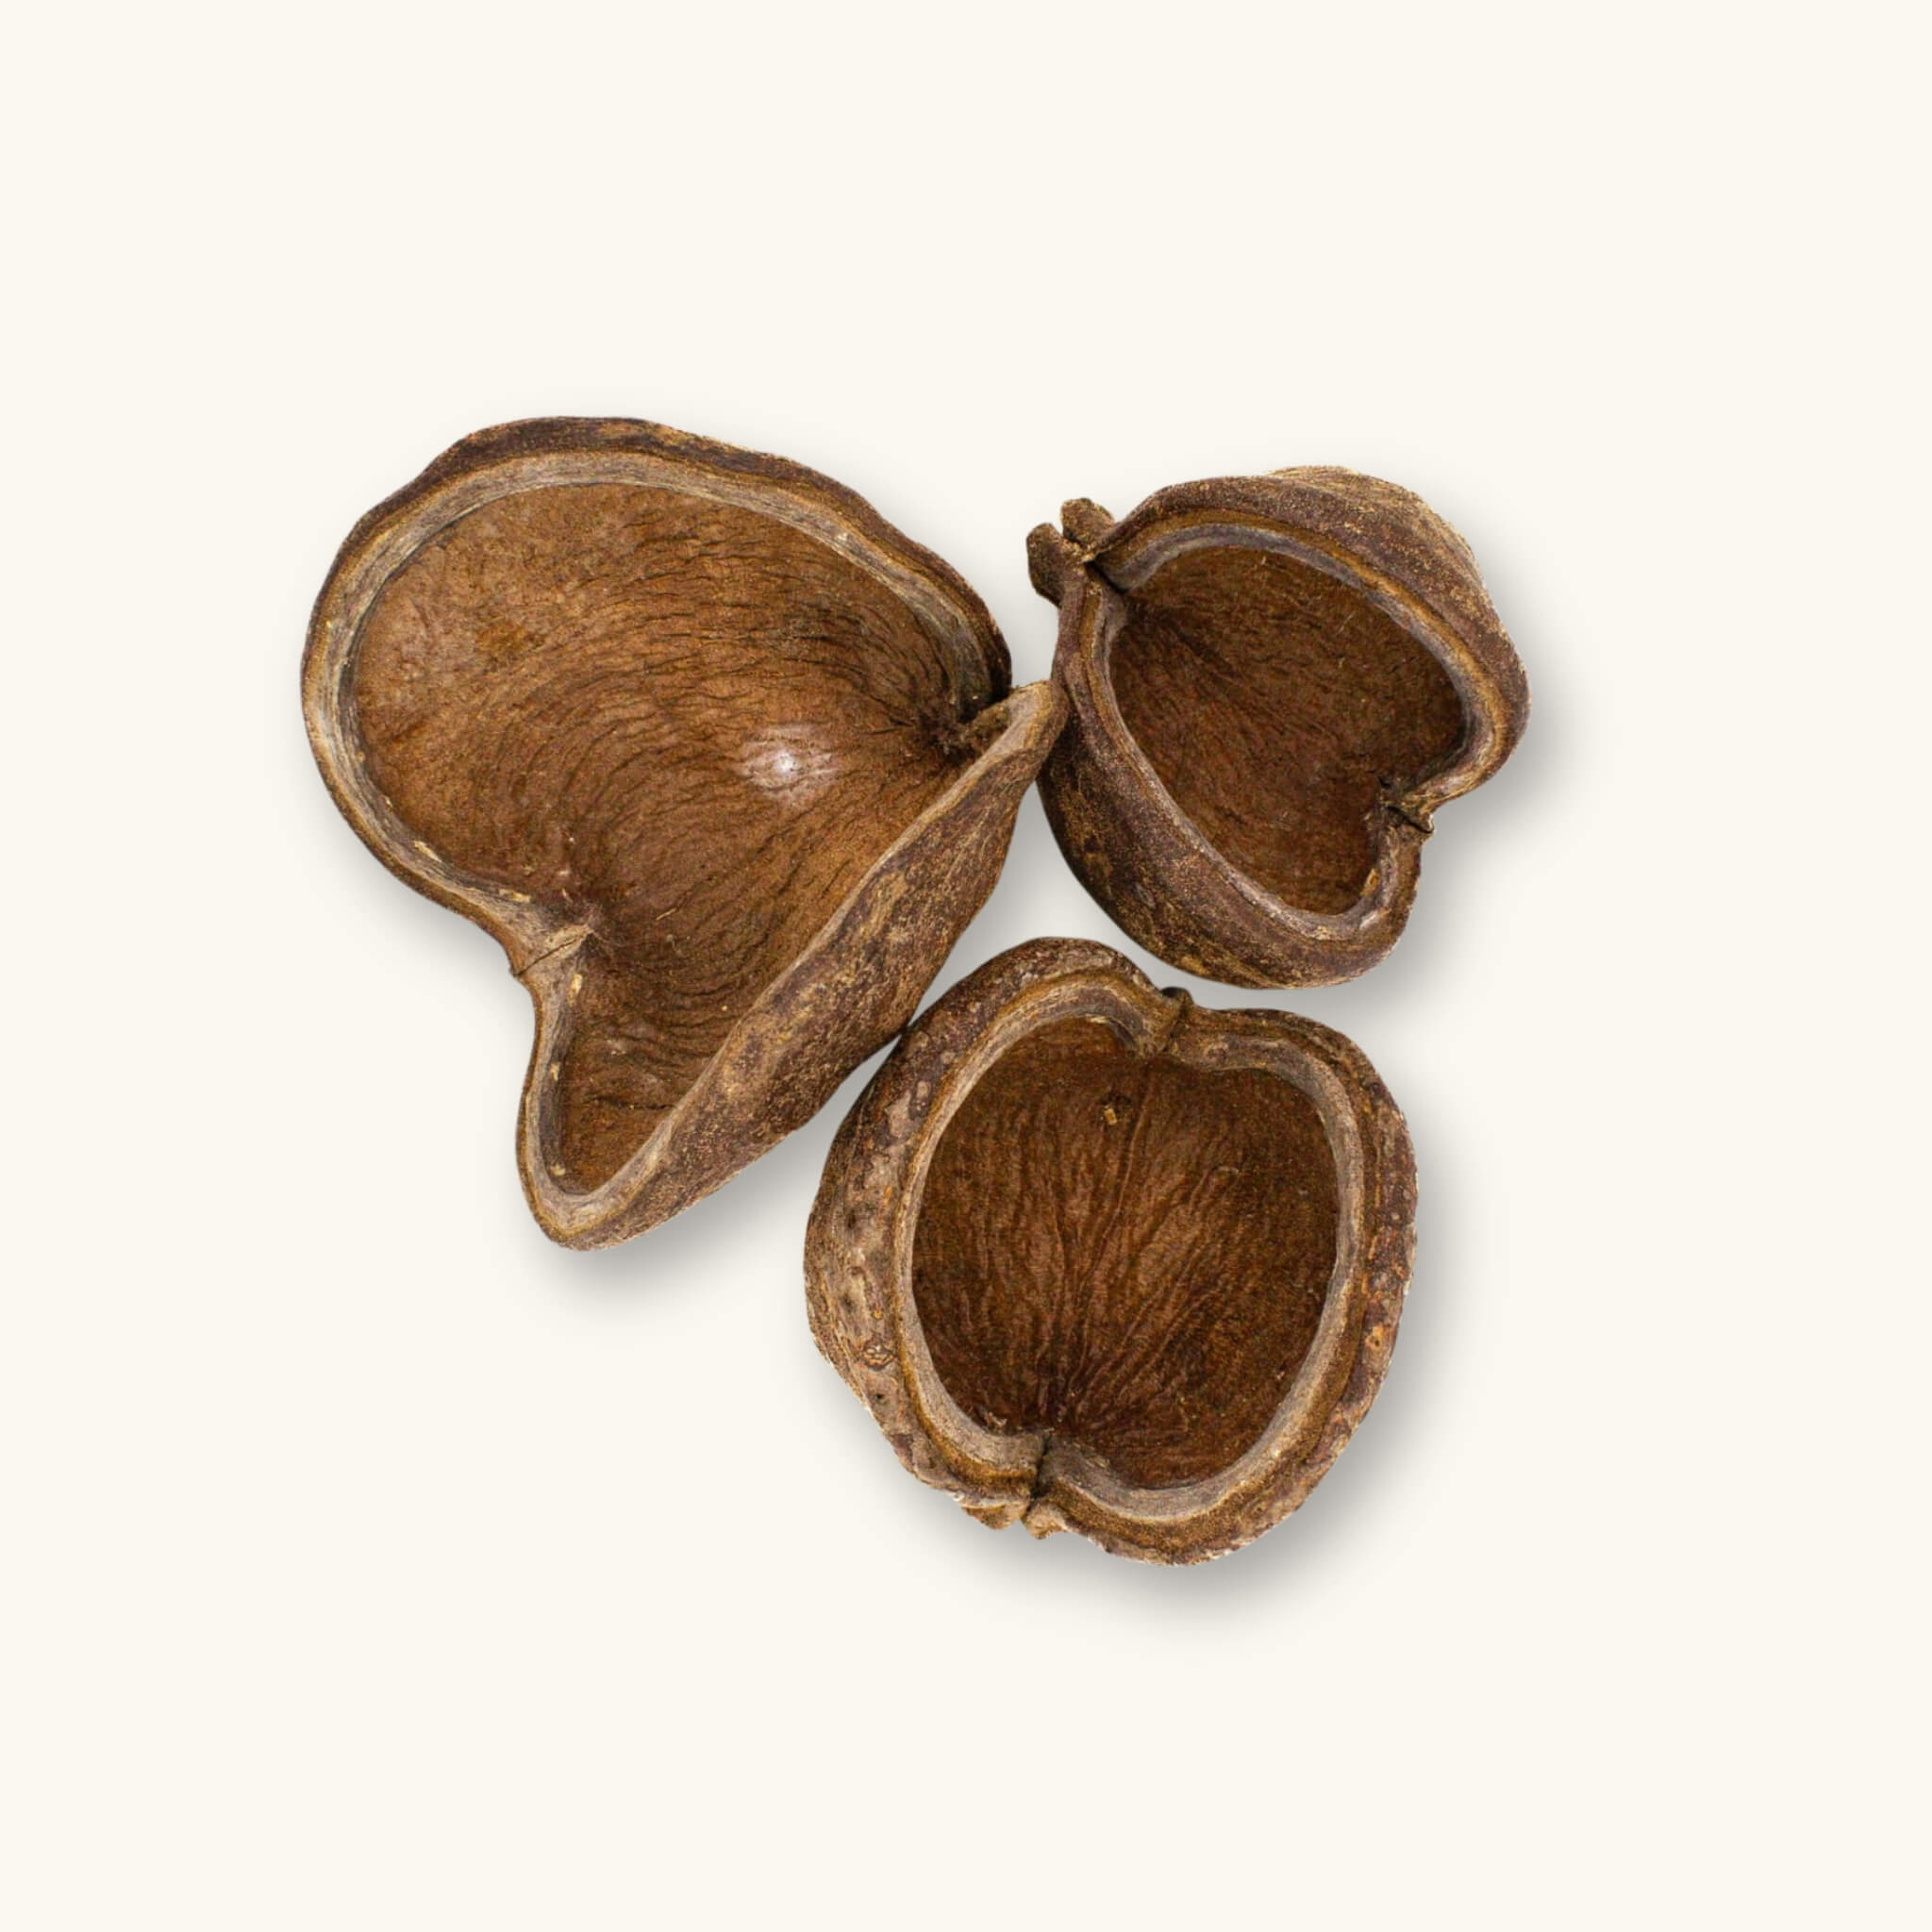
Jungle Pods | Sterculia Foetida
Step 7
7. Planting a Botanical Method Aquarium
Plants may not always be the star of a Botanical Method Aquarium, but when chosen with care, they anchor the ecosystem in both function and form. From floating plants that diffuse light to rooted species that oxygenate the substrate and stabilize the water column, their presence enhances the overall balance of the ecosystem.
For a full recount of establishing a Dirted Botanical Method Aquarium—with plants—a collaborative blog post by our #tanninbae ambassador has been curated to define the methods and provide tips and tricks.
A well-planted botanical method aquarium will push the boundaries that mainstream aquascaping has conditioned us to strive for.
Key Method: Opt for low- to medium-light plants that thrive in tinted water. Match nutrient demand to your substrate: use our Flooded Forest Sedimented Substrate, or (if you need an extra punch) blend a small amount of aquasoil into sands and gravels—5–10% by volume, capped with inert sand to protect tint—or stick with root tabs under plants in inert substrates.
All of the aquatic plants we have available are curated towards the tinted environment of a botanical method, blackwater, and biotope aquarium.
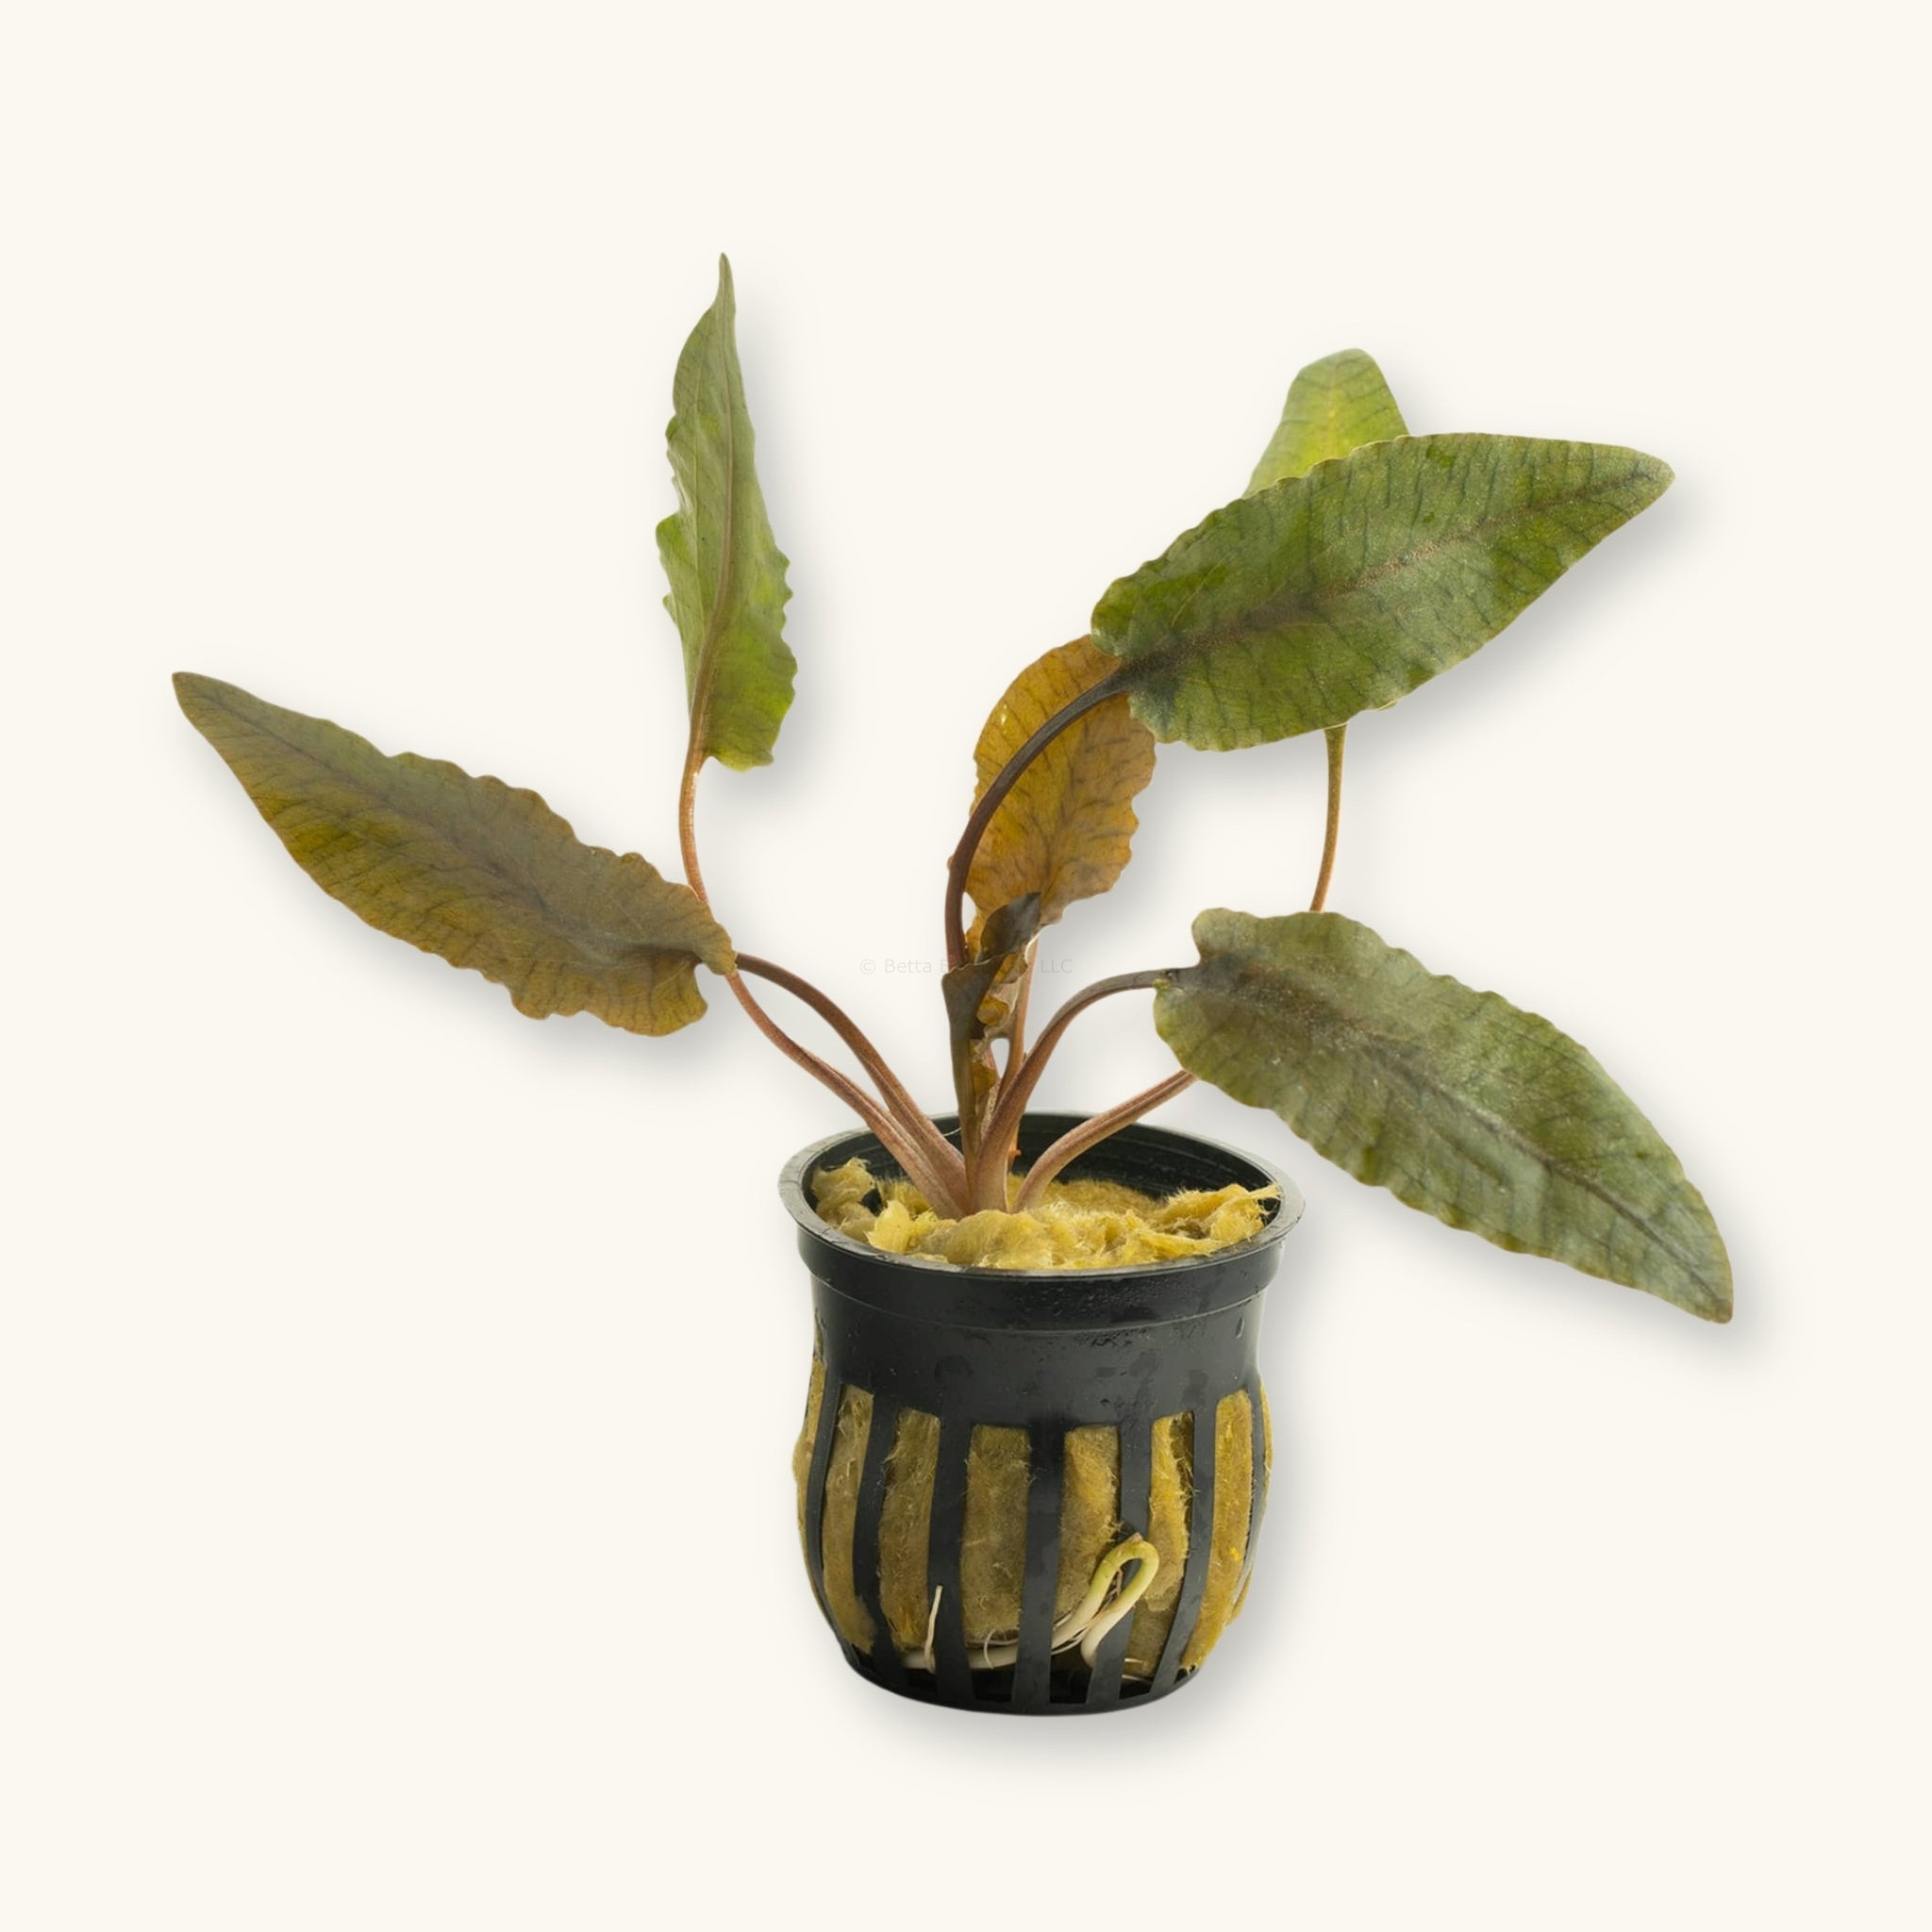
Rooted Plants and Substrate Considerations
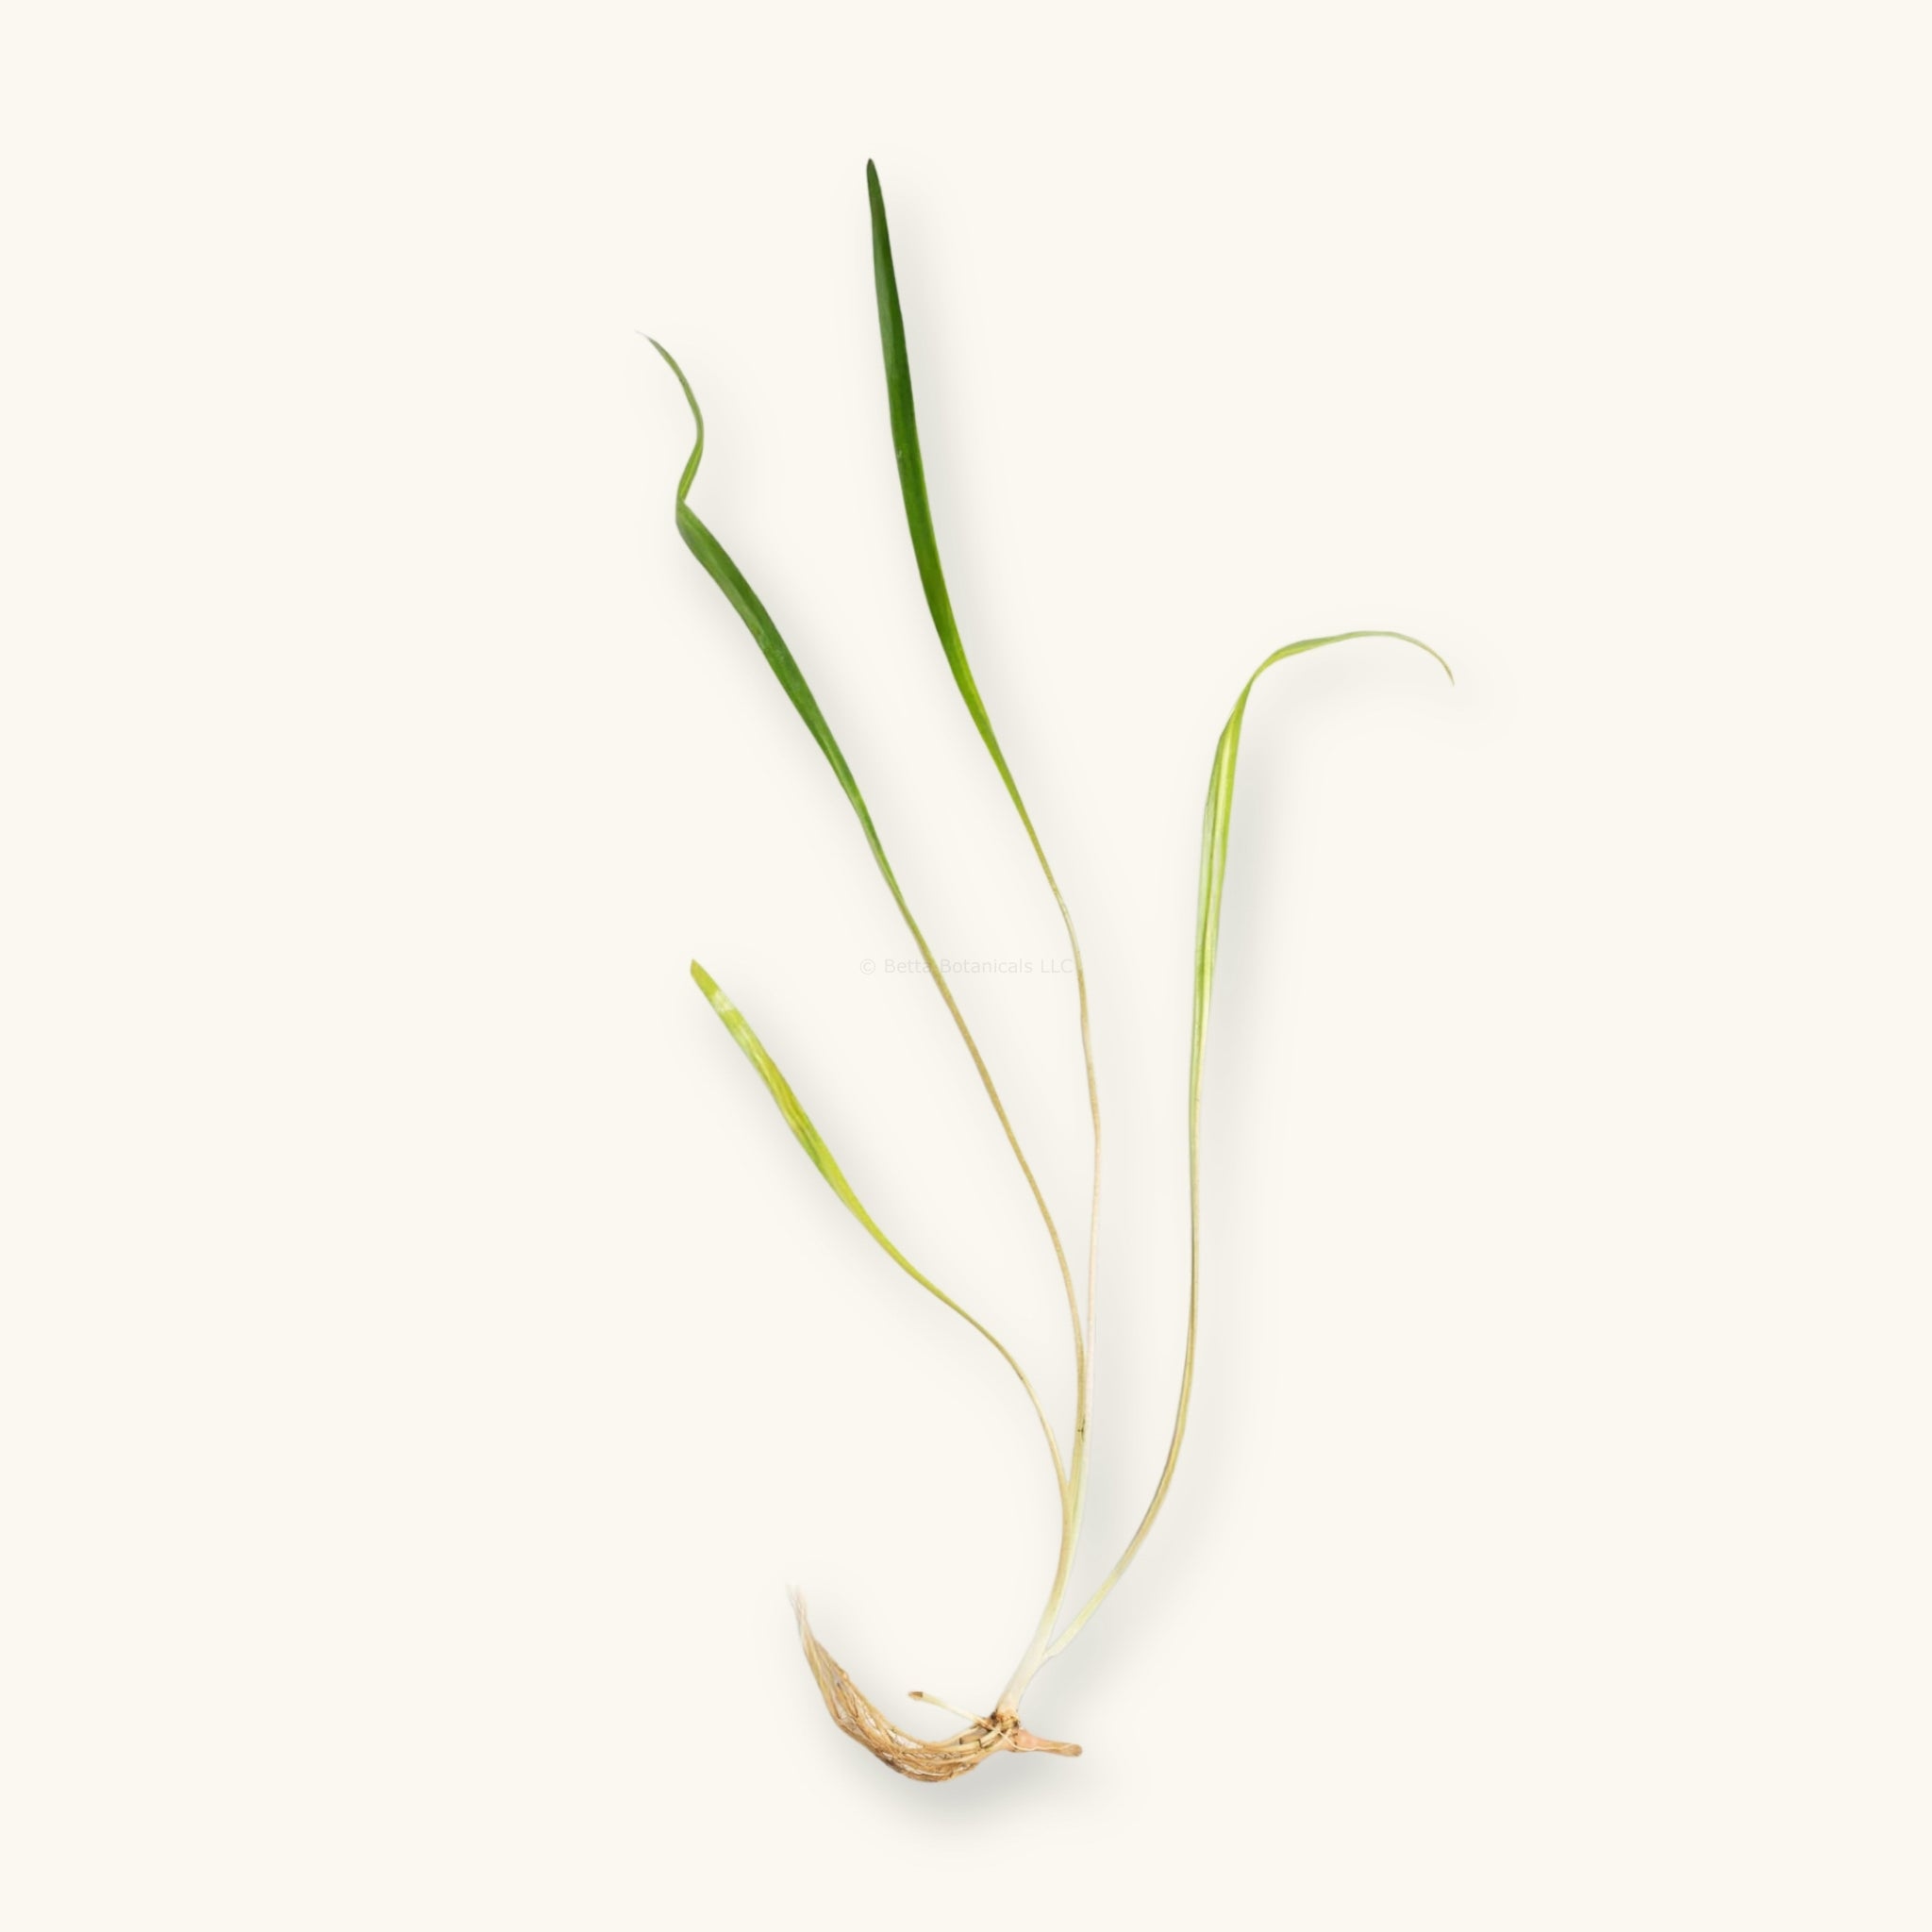
Rooted aquatic plants like Echinodorus, Cryptocoryne, and Nymphaea adapt well to botanical method aquariums, especially when paired with a sedimented base layer. Their roots interact with decomposing botanicals, drawing nutrients from the detritus and enriching the substrate with oxygen. You’ll often find roots winding through leaf litter, gripping driftwood, or pushing into soft soils.
For aquarists planting into inert sands or gravels, choose species that tolerate low nutrient levels or supplement with root tabs if needed. Slow-growing species thrive in the stable conditions that the Botanical Method Aquarium provides.
Floating Plants and Shade-Tolerant Species
Floating plants like Salvinia, Limnobium, and Pistia can dramatically shift the aesthetic and function of your setup. They reduce surface agitation, aid in ammonia uptake, and create the gentle, dappled lighting common in flooded forests and jungle streams.
This also benefits fish species that prefer lower light conditions, while helping suppress algae growth in early-stage systems. Surface plants pair especially well with darker water, where their roots can grow long and tangled, absorbing nutrients directly from the water column where light levels aren’t high enough to grow other species.
Mosses, Ferns, and Epiphytes
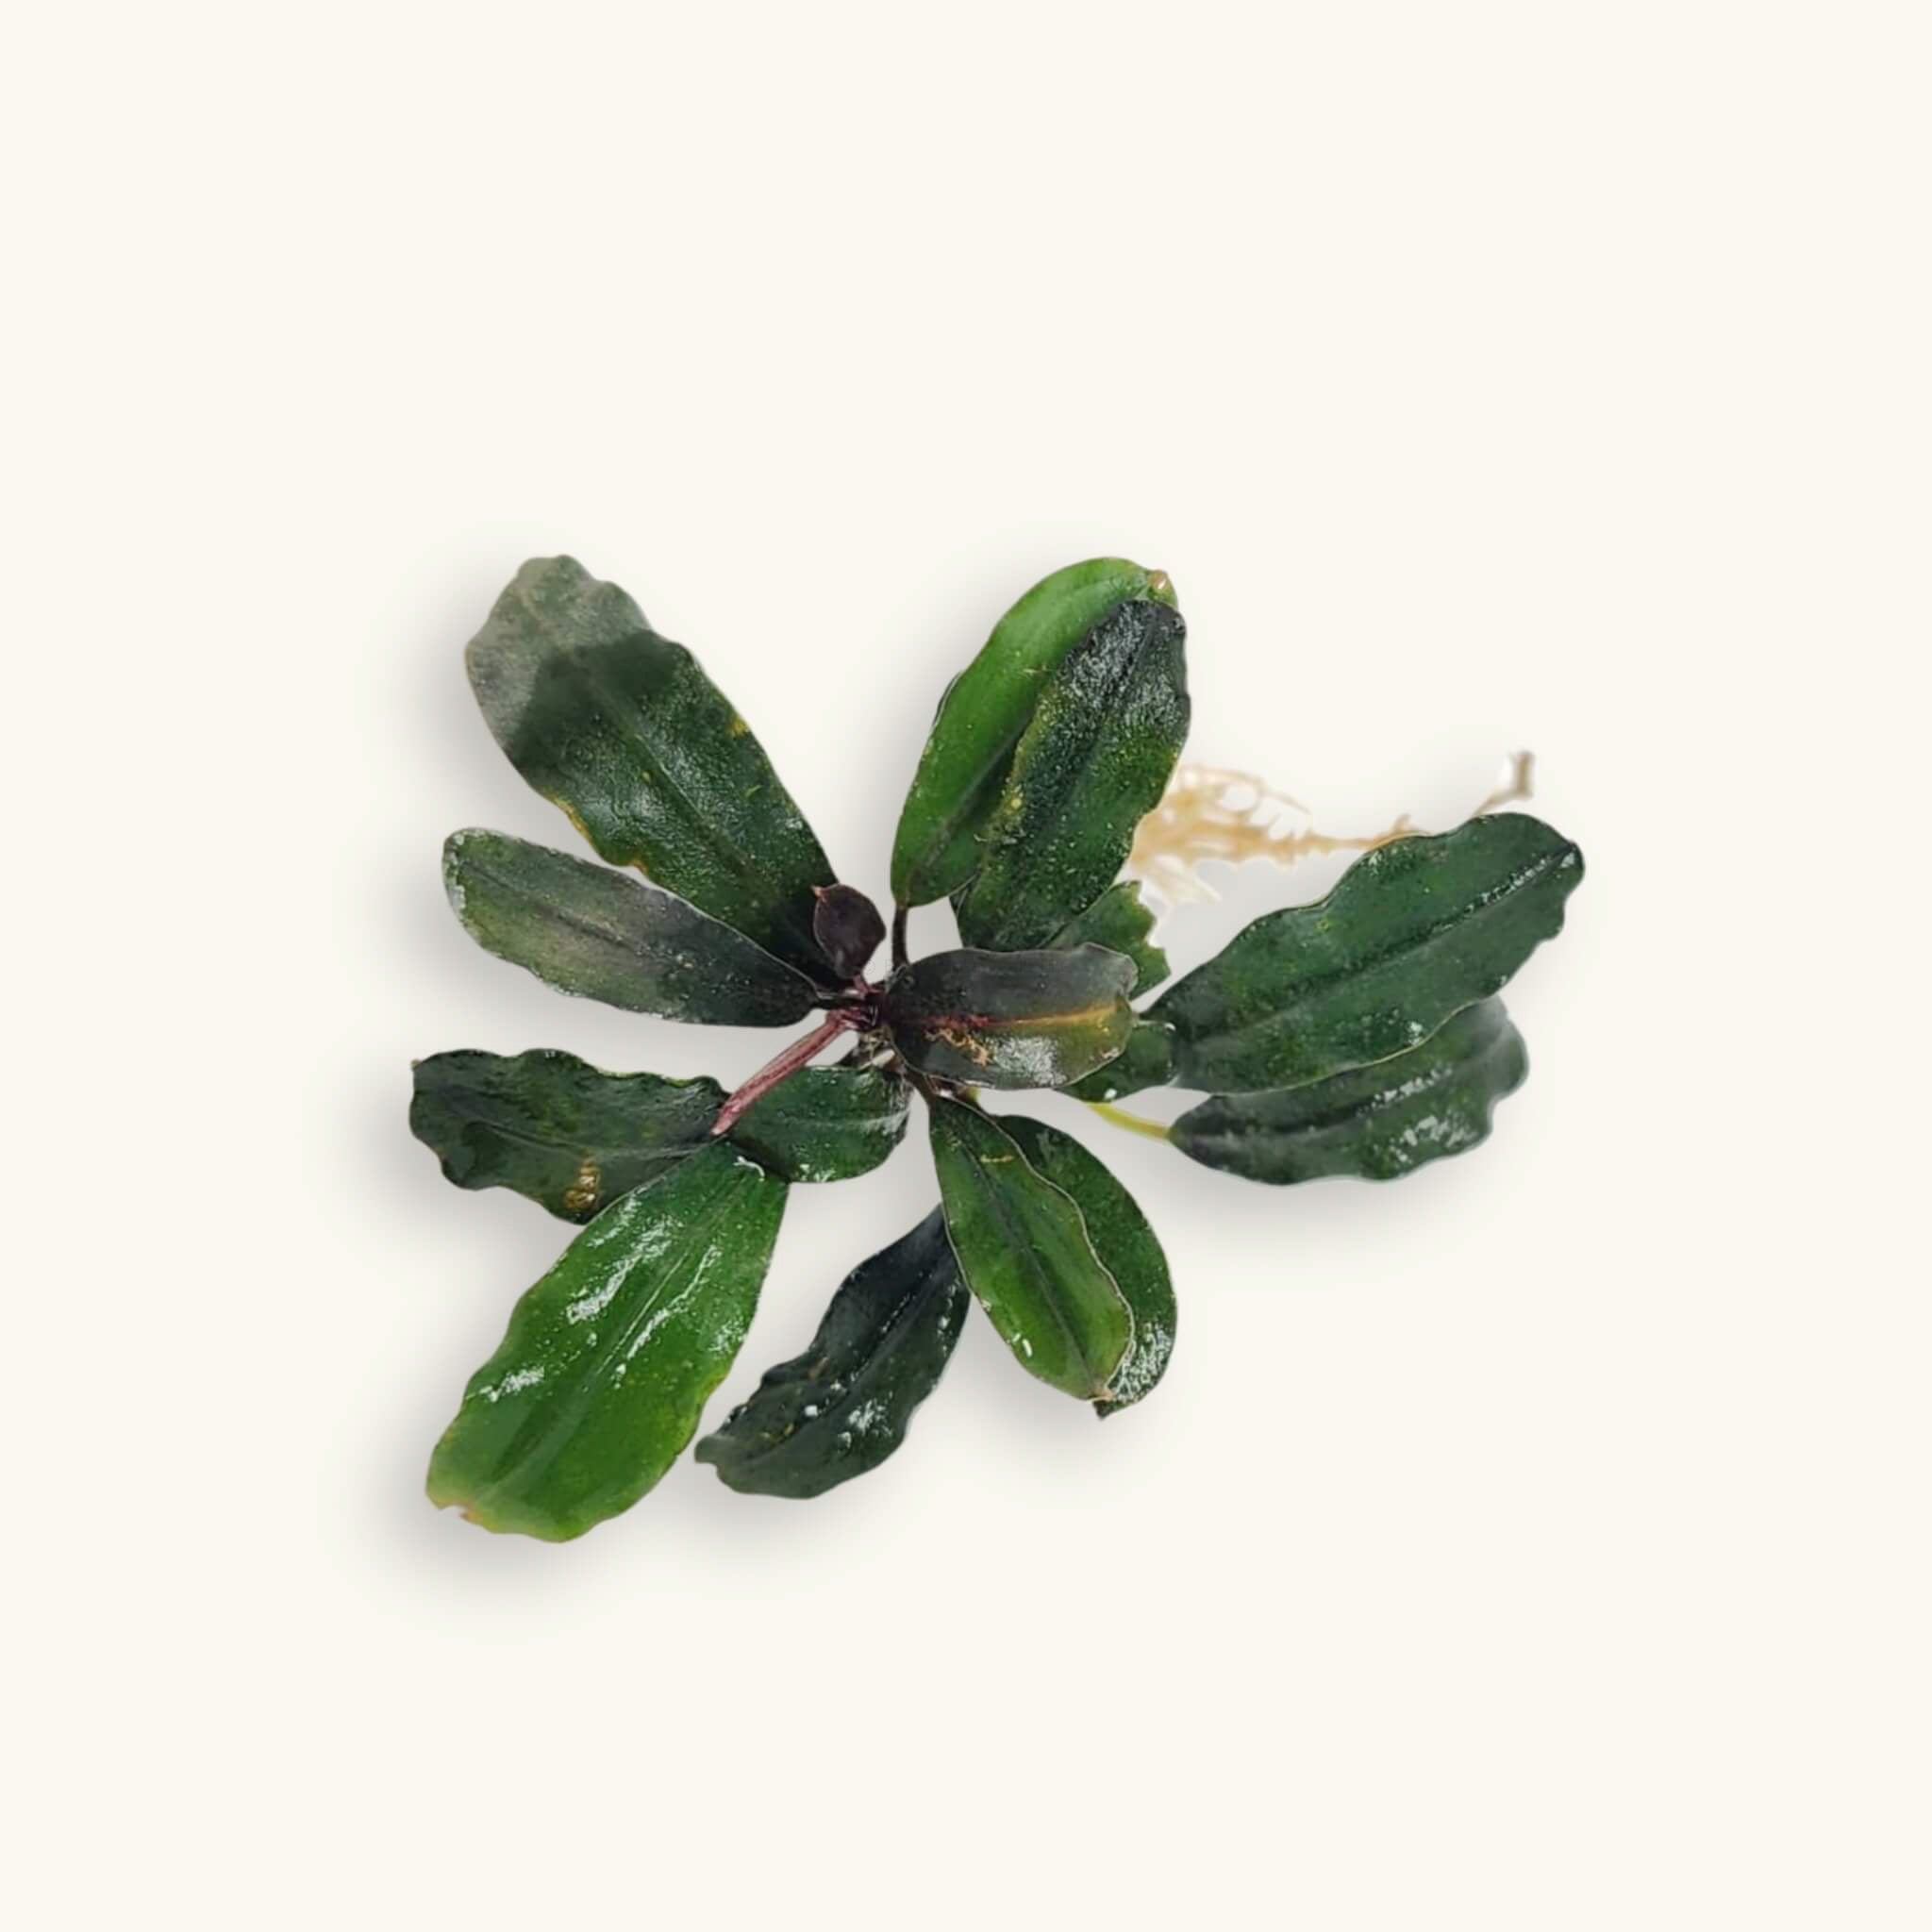
Ferns, Anubias, and Bucephalandra are natural fits for the botanical method aquarium. These epiphytic plants don’t need substrate and can be attached directly to driftwood, rocks, or even seed pods. Their slow growth aligns with the steady pace of botanical method aquariums, and their leaves host beneficial biofilms that shrimp and small fish graze on.
Mosses like Taxiphyllum or Riccardia can anchor themselves to botanicals over time, gradually forming lush patches of greenery that mimic submerged forest debris.
Terrestrial Plants in Emergent Zones
In paludariums or shallow aquariums with emergent hardscape, terrestrial or semi-aquatic plants add a dramatic vertical element. Pothos, Monstera, Spathiphyllum, and Syngonium are commonly used.
Their roots often trail into the water, functioning like mangrove roots in coastal swamps—harboring detritus, biofilms, and microfauna while helping stabilize water parameters over time.
Liquid Fertilizers & Root Tabs
The use of Aquasoils in the Planted Botanical Method Aquarium is the single most detrimental impact to the tannins released by the botanicals—the color. To avoid this, the use of root tabs placed in inert substrates is your best choice. I have also experienced positive impacts from the use of liquid fertilizers—though I opt for a 30-50% strength dose. We don't use exactly what's on the back of the bottle because we have tinted water, with a reduced light penetration, therefore lower rates of photosynthesis.
There are many brands on the market, but I have had personal success with an all-in-one fertilizer from NilocG, Seachem, or APT.
Choosing Tint-Tolerant Aquatic Plants
Planting in a Botanical Method Aquarium is less about filling space and more about supporting the ecosystem. Choose species that coexist with decomposing material, tolerate tinted water, and subdued light.
The recreation of nature is the driving theme of the Botanical Method Aquarium, and a close emulation of nature with plant placement can recreate a truly natural and functional environment for your aquatic companions. Nestling leaf litter up towards the base of plants helps evoke the story that the plant grew up between the leaves. Lodging an anubias in the crevice of a manzanita branch emulates it getting stuck because of the water current. Oftentimes in nature, we will see detritus and algae growing on stem plants, especially on the older growth. Allowing this to naturally occur in the aquarium builds on the natural processes we’ve built into the substrate and water parameters.
Low-Tech & Tint-Tolerant Aquarium Plants
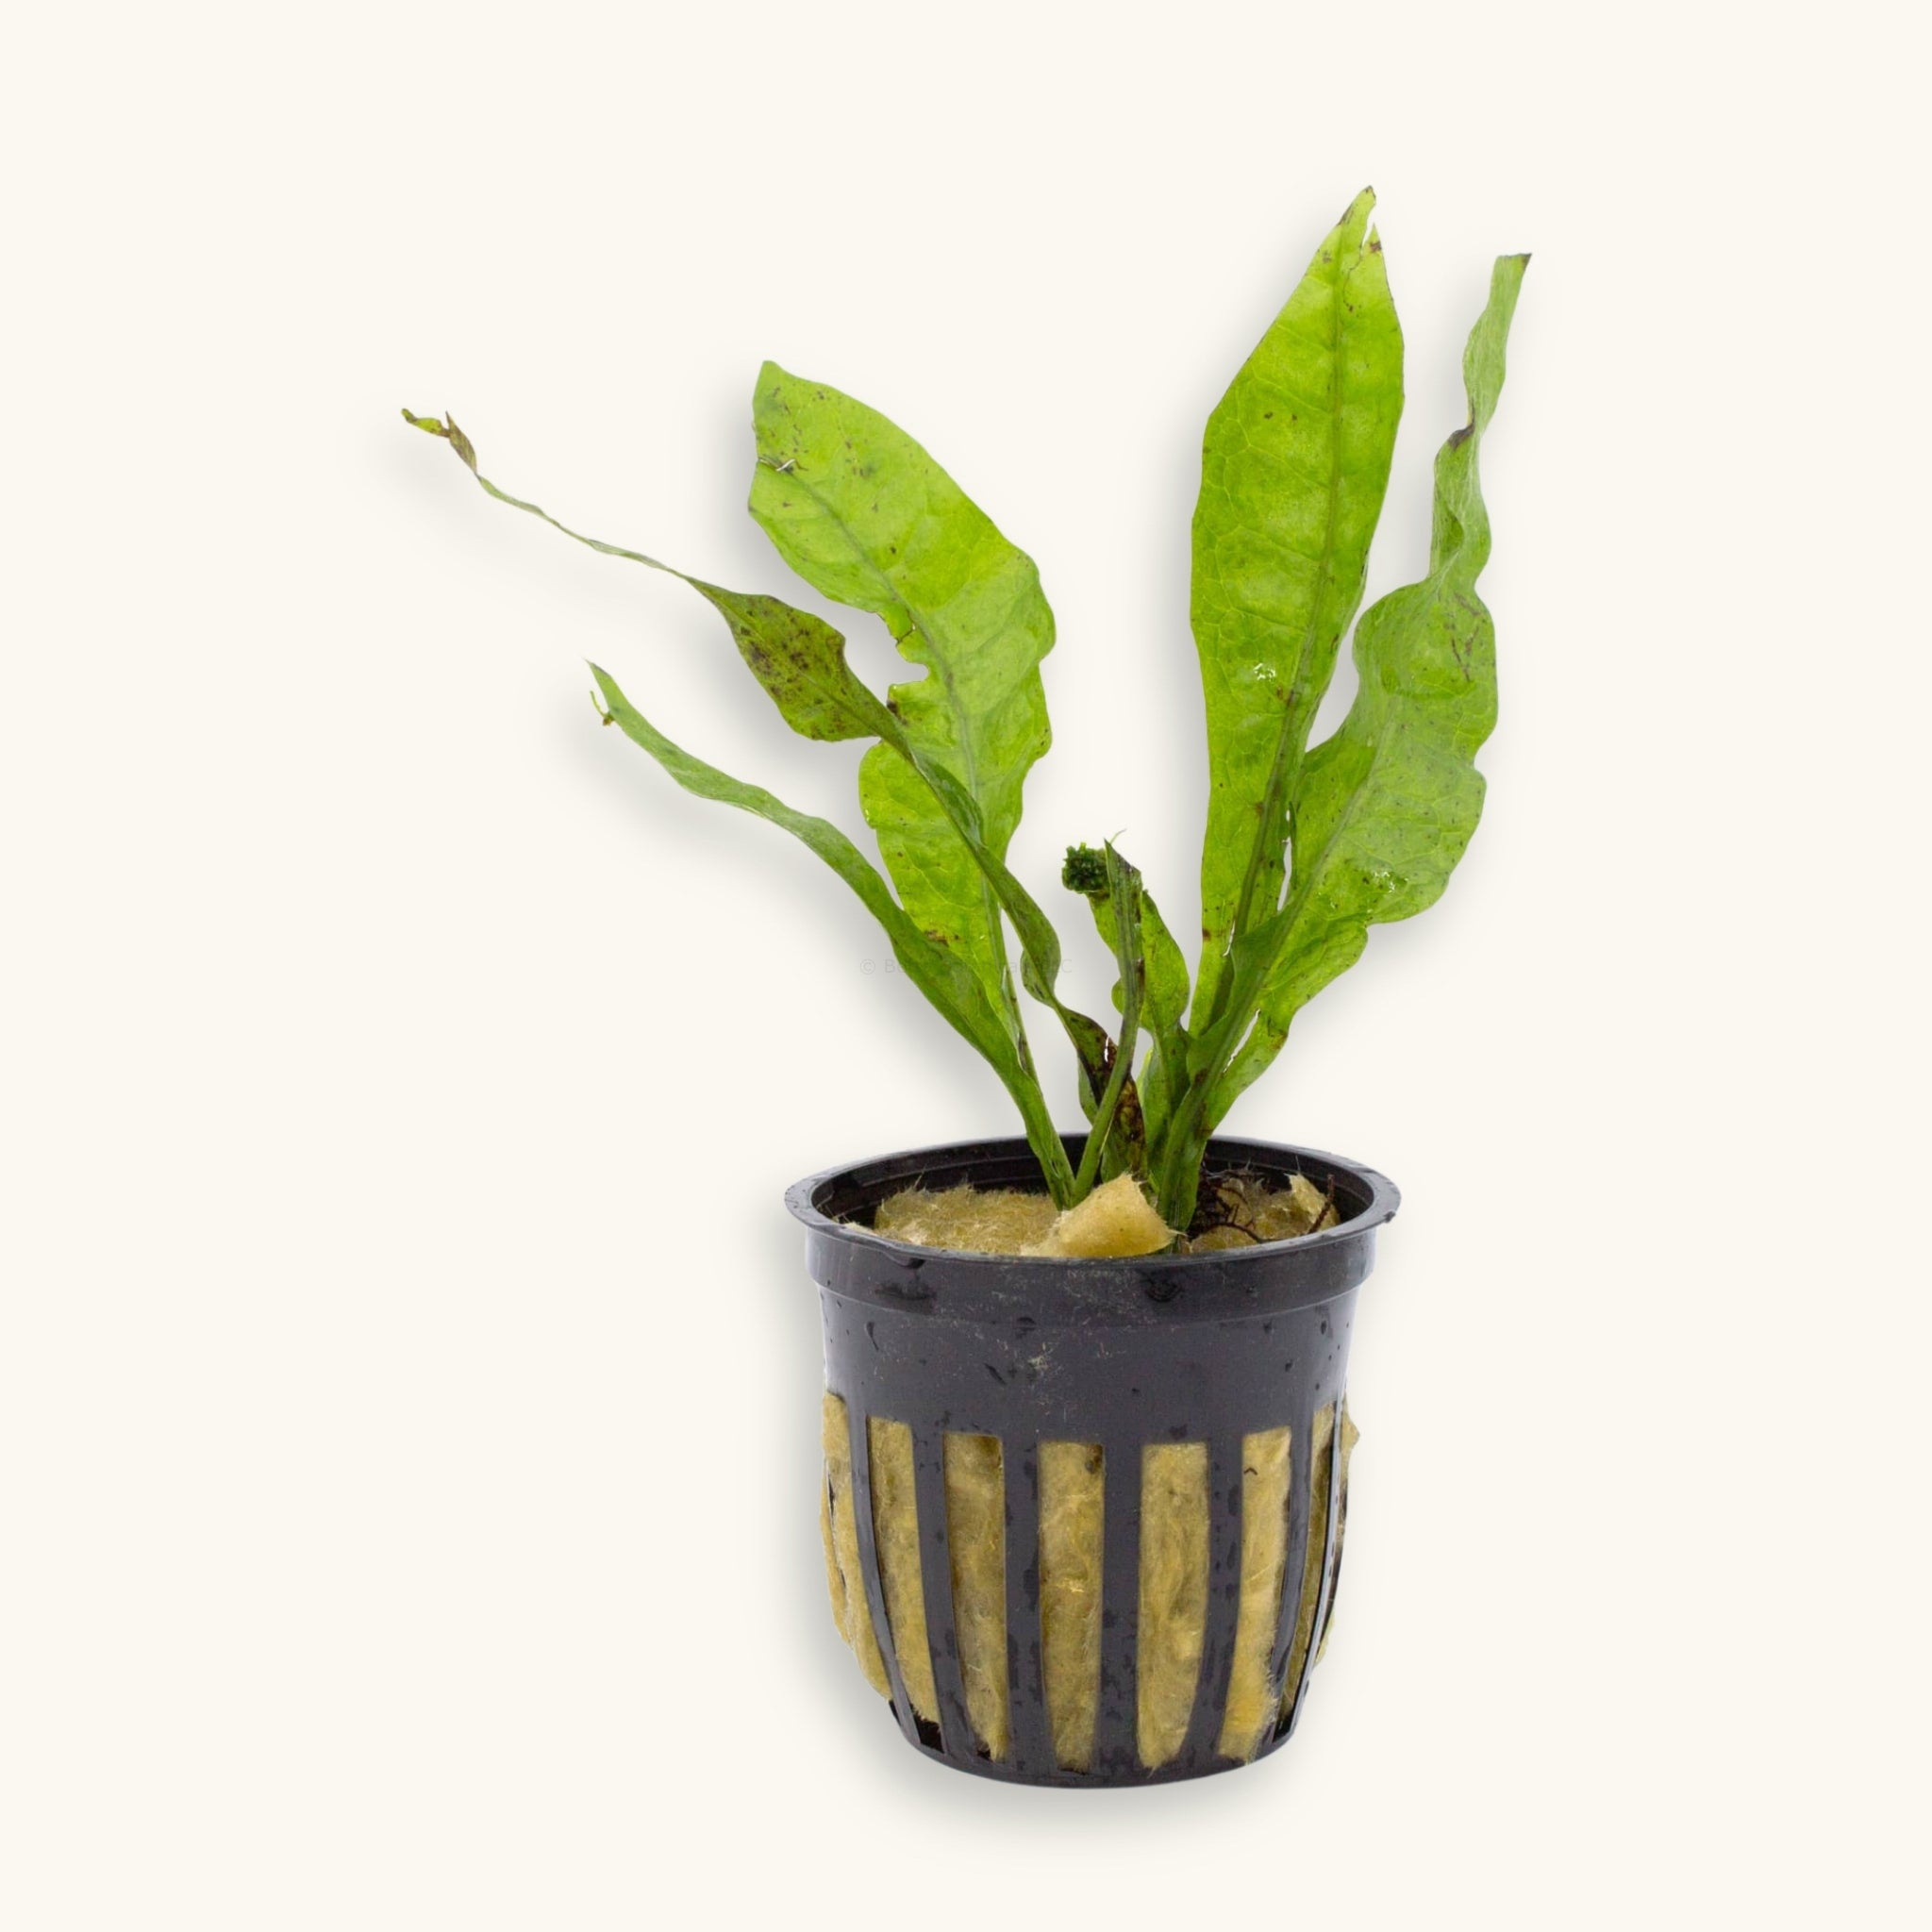
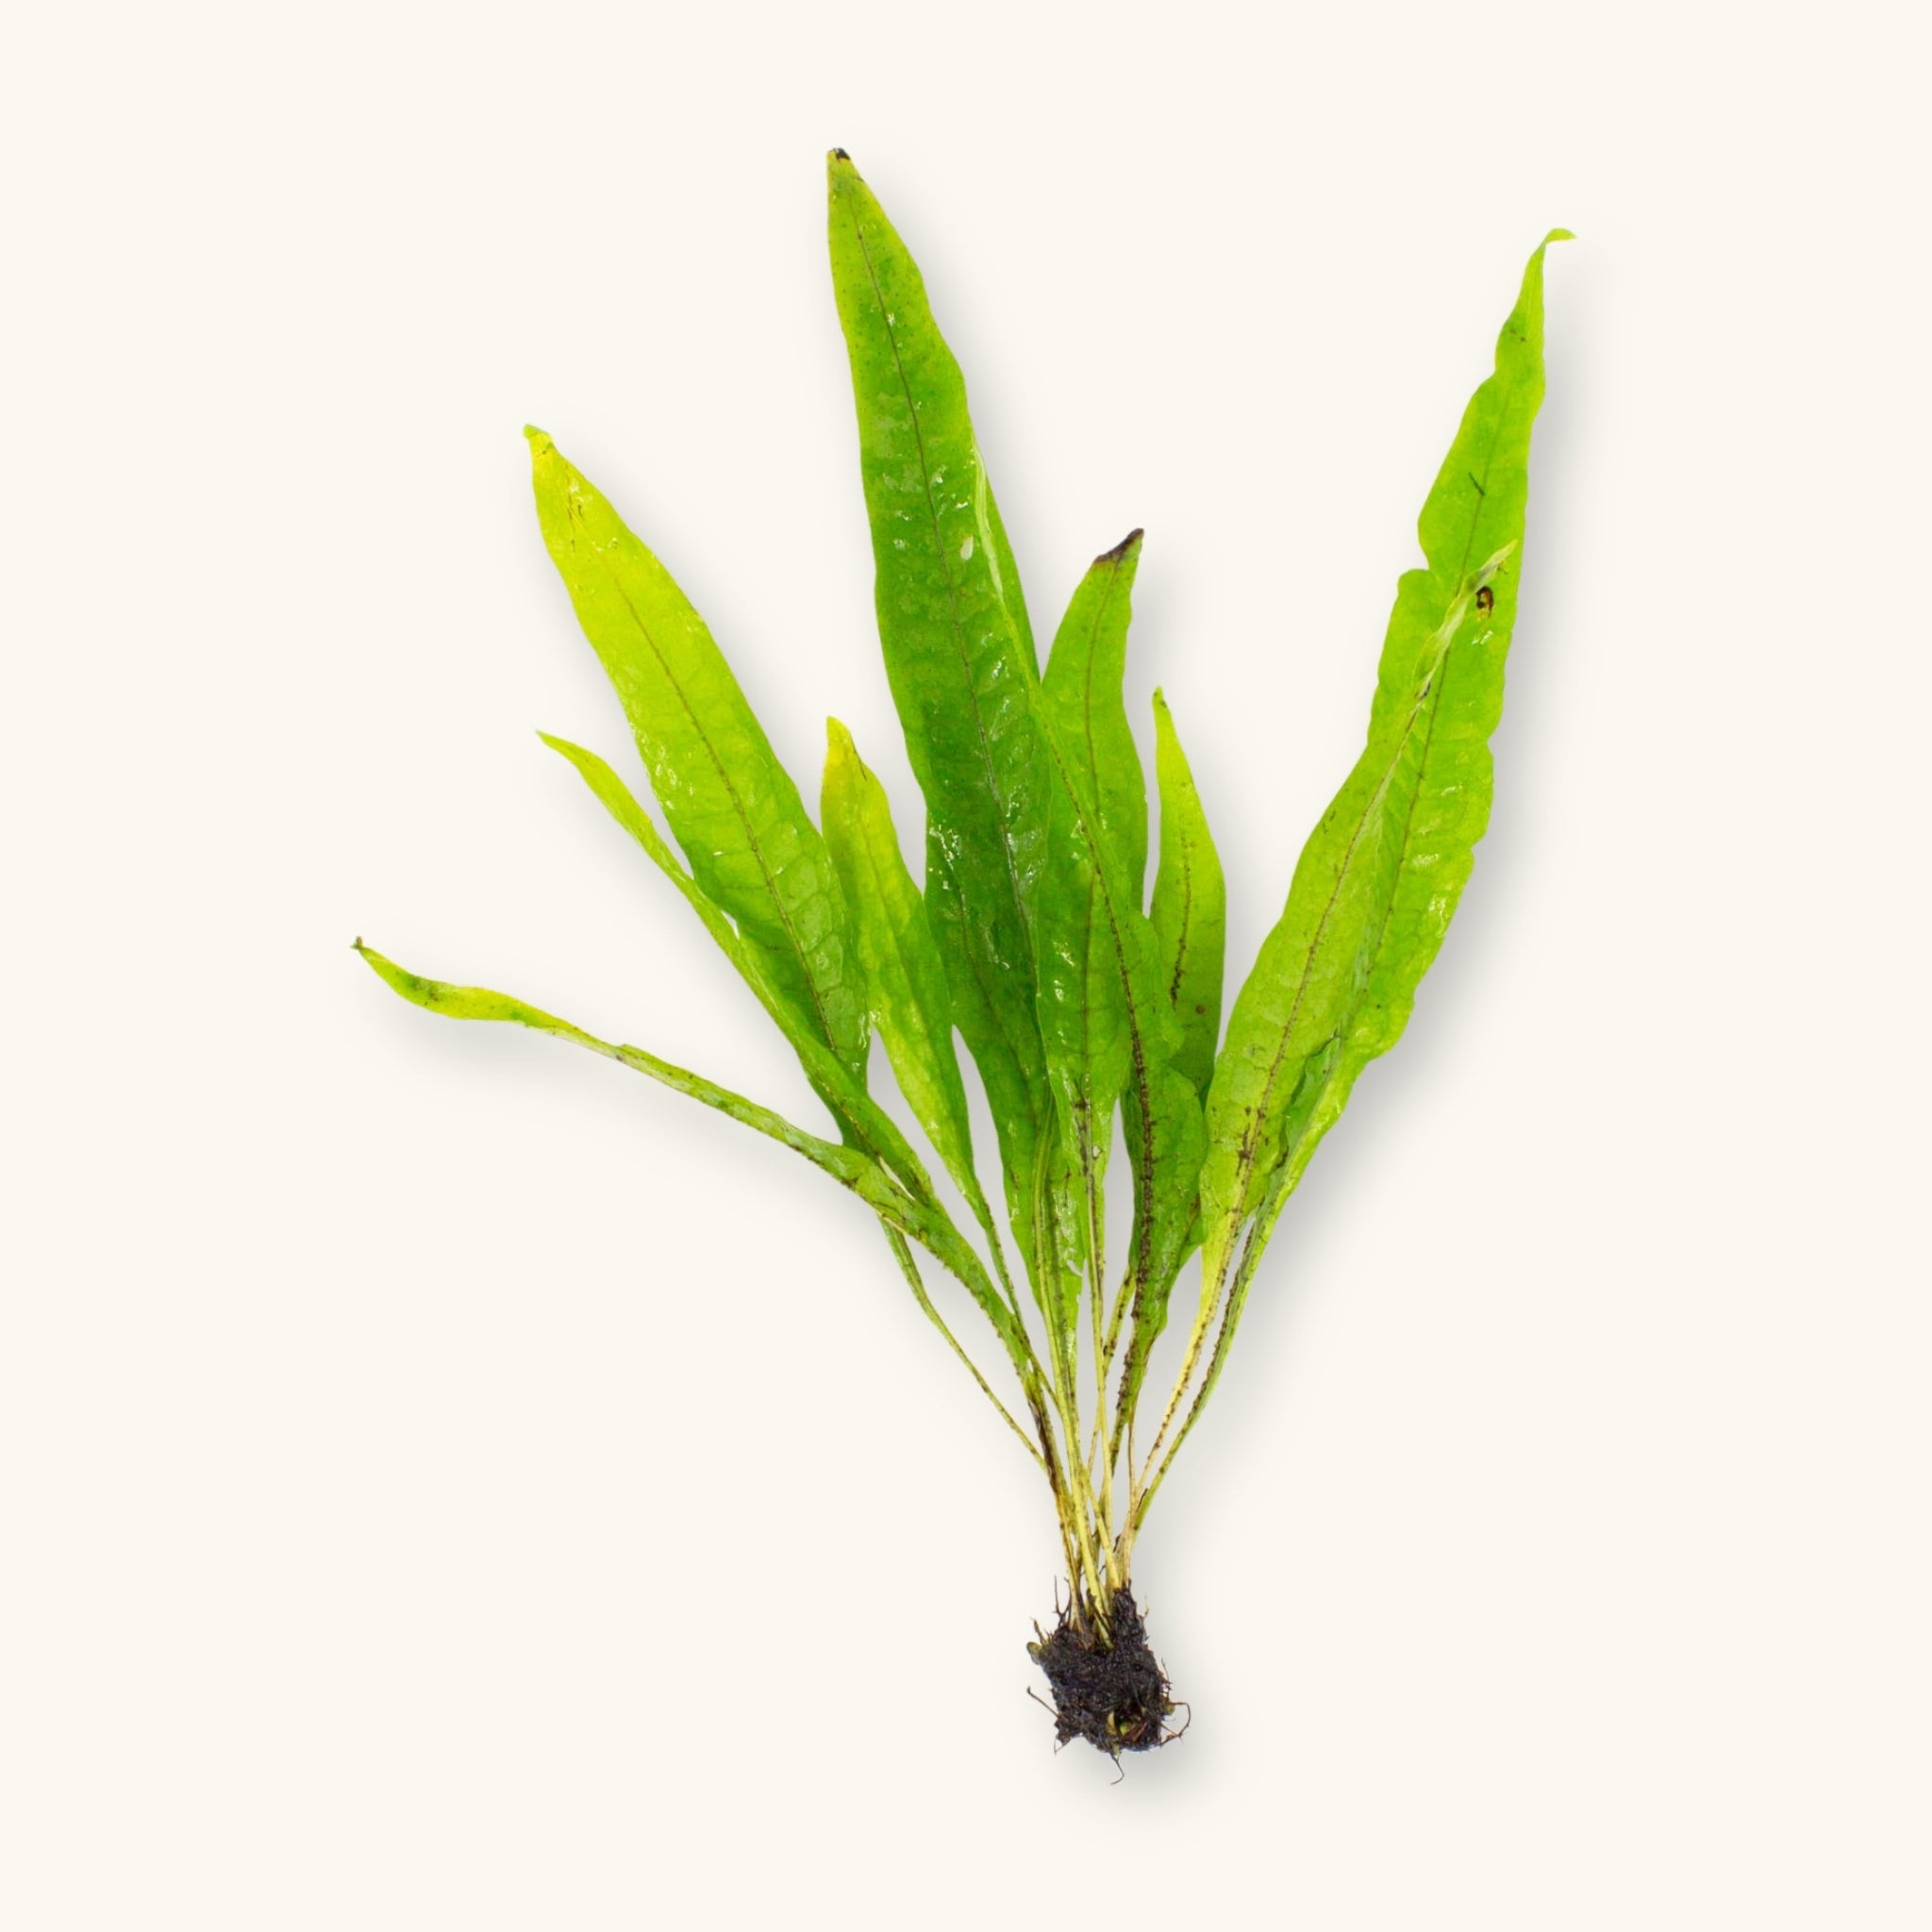
Java Fern | Microsorum pteropus
Step 8
8. Preparing & Integrating Botanicals
Our Botanical Preparation Guide walks you through cleaning, boiling/soaking, and waterlogging. However, below are the key methods that matter most once you’re ready to add them to the tank.
Key Method: Botanical preparation mimics the dilution that happens in nature. Wild habitats have huge water volumes; aquariums don’t. Pre-treating (and pacing additions) gives your system a gentler, safer integration of new materials.
Adding botanicals is not a one-time event. It’s a slow, ongoing visual and sensory relationship with your aquarium. Each addition nudges chemistry, microbes, and aesthetics—and makes your home smell really nice. ...And just like nature, it should unfold gradually.
Preparation is all about ensuring your botanicals are ready to contribute without introducing unwanted excess sugars, bird shit (lol, but seriously), or surface contaminants.
How to Add Botanicals Gradually
Think of adding botanicals like seasoning a dish—more isn’t always better, and timing matters.
Start with a small selection of 2-3 botanicals per 5 gallons of water volume, just enough to lightly dust the substrate or frame a piece of driftwood. Observe your system’s response for at least a week before layering in more. This gives the microbial communities time to adjust and prevents sharp swings in water chemistry, oxygen demand, or clarity.
Over time, you’ll develop and understand your ecosystem’s rhythm, adding a few leaves here, a seed pod there. This mimics natural allochthonous inputs of materials to your aquatic ecosystem. Remember 'Allochthanous' from the beginning of this guide?
al·loch·tho·nous/əˈläkTHənəs/adjective
- Geology: (of a deposit or formation) having originated at a distance from its present position.
- Biology: introduced from a different environment, habitat, or geographical area.
Avoiding Common Pitfalls
- Never skip preparation. The aquarium is a closed system and not an acre of water. Preparation dilutes residual sugars, excess tannins, and surface contaminants.
- Avoid adding too much at once. A spike in beneficial bacterial activity can reduce oxygen levels, especially in smaller or poorly circulated aquariums. This looks like fish gasping and shrimp congregating near the water surface.
- Monitor water clarity and parameters as your botanical load increases. Slight clouding is normal. Sudden crashes and gasping fish at the surface are not. Your system is ready for more botanicals once the biofilms subside and the white, cloudy haze in the water becomes a 'clear tint'.
Embrace Variation and Decay
No two botanicals behave the same way—and that’s a feature, not a flaw. Some leaves melt within days. Others curl and go through intense goo-phases, only to then hold their shape for months. This patchwork of decay is what makes the Botanical Method Aquarium come to life.
As items break down, they’ll create microhabitats that support shrimp, biofilms, fry, and fungi. Let these processes unfold. Resist the urge to vacuum them out or replace them too soon.
In time, you’ll start to see your botanicals not as decorations, but as active participants in the life of your ecosystem.
Step 9
9. Cycling Your Aquarium
You could cycle a Botanical Method Aquarium using traditional approaches—fishless cycling with an ammonia source, seeding with filter media, or starting with hardy livestock. But in this methodology, the addition of botanicals and detritus also plays a critical role in fueling the cycle.
Key Method: Treat the cycle as a gradual hand-off to nature. Track ammonia, nitrite, and nitrate, but also watch the subtler markers of maturity—biofilm subsiding, fungal blooms stabilizing, and water holding a clear tint. Clear tint = stable beneficial bacteria.
Here’s how botanicals influence cycling:
- Leaf litter and seed pods break down, and the beneficial bacteria they colonize can release low levels of ammonia.
- Fungi and heterotrophic bacteria quickly colonize new surfaces, establishing the microbial groundwork.
- Nitrifiers arrive, establishing the nitrogen cycle.
- Surface area is the biggest benefit that botanicals provide in a cycling aquariums, which naturally speeds up the aquarium's nitrogen cycle.
Our blog post on cycling an aquarium is a good resource to grasp the nitrogen cycle. But at its core, the Nitrogen Cycle is a bacterial process by which the most toxic compounds (ammonia) released by the life forms inside the aquarium are consumed and broken down by nitrosomonas bacteria into either gases (anammox reactions) or less harmful compounds (nitrates), which can be consumed by plants or removed via water exchanges.
A fishless cycle is the best way to establish your Botanical Method Aquarium. If the tint of the aquarium gets so dark that the reagents of your test kit cannot be determined, the best method I’ve personally tried and seen is that the botanicals will condition in the water, growing biofilms, causing a white haze to appear in the water. Once that white haze subsides and you are left with a “clear tint”, the aquarium is ready for its first inhabitants. The wild thing is that the Botanical Method Aquarium can often cycle within 5 days because of the increased surface area of botanicals and natural compounds that benefit beneficial bacterial growth.
Don’t Panic About Biofilms or Cloudiness
A slight haze during the early cycling phase is normal. So is the sudden explosion of white fuzzy fungal growths on new botanicals. These are signs of life—evidence that colonization is happening.
Over-cleaning or prematurely removing these materials slows the process and reduces biodiversity. Let nature do what it does best.
Step 10
10. Monitoring & Maintenance
A Botanical Method Aquarium isn’t a set-it-and-forget-it system, but it doesn’t demand constant intervention either. Instead, it rewards attentive observation and small, intentional adjustments. Once your aquarium is established, the bulk of your maintenance revolves around monitoring water parameters, observing the health of your livestock, and responding to ecological shifts, not chasing perfection.
Key Method: The Botanical Method Aquarium evolves on the scale of months, not days. Practicing patience and due diligence pays off. The final form of these ecosystems is shaped by slow, cumulative changes, not overnight transformations.
The #1 rule with the botanical method aquarium: don’t vacuum the substrate. The leaf litter bed and substrate bed are home to complex assemblages of life. Disturbing them can have negative implications for the food web and the stability of the aquarium. Detritus worms, fungal networks, and other microfauna often tunnel through the substrate, helping to oxygenate it, and disturbing this via a quick gravel vac sets them back. Plus, the detritus and leaf litter are all colonized by beneficial bacteria and fungi, helping to stabilize the aquarium, and removing them not only impacts this, but also takes away someone else's source of food.
Water Parameters: Let Nature Stabilize, But Stay Aware
Your system should naturally trend toward stability, especially once biofilms and fungi take hold. But regular monitoring helps you spot subtle changes before they become problems.
Test weekly in the first few months, then bi-weekly or monthly as things mature:
- pH – A gradual drop from tannins and microbial activity is expected. Unless your Botanical Method Aquarium is set up purposefully to have hard water.
- Ammonia / Nitrite – Should remain at zero; spikes signal a fish loss or overfeeding.
- Nitrate – A useful bioload gauge; low levels are fine in low-tech setups. Keep this number below 20ppm.
- TDS / Conductivity – Gives a broader view of dissolved organics and trace minerals; helpful for shrimp or wild-caught species.
Pro Tip: Stability matters more than chasing exact numbers. A slightly low pH is less of a problem than one that swings weekly.
Water Changes: Gentle, Not Aggressive
In most Botanical Method Aquariums, a 10–20% water change every 2–4 weeks is enough. The goal isn’t to strip away excess nutrients, tannins, or detritus—but rather mimic the natural dilution which occurs in nature from rainfall. This dilutes hormones released by plants and fish, further preventing TDS creep.
- Avoid vacuuming the substrate aggressively. A 1x1” section per 5 gallons at most.
- Use dechlorinated water with a similar temperature and TDS.
- Stirring the substrate or over-cleaning can release pockets of trapped organics—please avoid this.
Botanical Decomposition: A Sign of Health
Leaves will break down. Biofilms will bloom. Pods will soften. These are not messes to clean, but milestones to celebrate.
- Remove only fully decayed or moldy material if you notice it smothering plants or clogging filters. Otherwise, leave the leaves be.
- Replenish botanicals gradually, maintaining a layered structure with different stages of decay.
- A general rule for adding botanicals is 2-3 botanicals per 5 gallons, added once per week or between water exchanges. We like to add botanicals and then watch for them to bloom with biofilms, and at the point where the biofilms subside, we then go and layer more on top to mimic the perpetual substrate that occurs in nature.
Livestock Health: Behavior is Your Best Gauge
More than test kits, your fish and invertebrates will tell you if something is off.
- Are they active and feeding normally?
- Do they forage in the leaf litter?
- Are there signs of breeding or territory defense?
A thriving system is full of small, slow behaviors: grazing, sifting, hiding, exploring. If those slow down, it’s time to investigate, not necessarily intervene.
Maintenance Mindset
Mother Nature has her rhythms. In the Botanical Method Aquarium, we aim to follow those within the confines of a glass box. Weekly glass wiping, gentle filter checks, occasional top-offs, and patient observation go much farther than rigid, scheduled tasks. Over time, you’ll learn your system’s seasonal behavior. It’ll tell you what it needs.
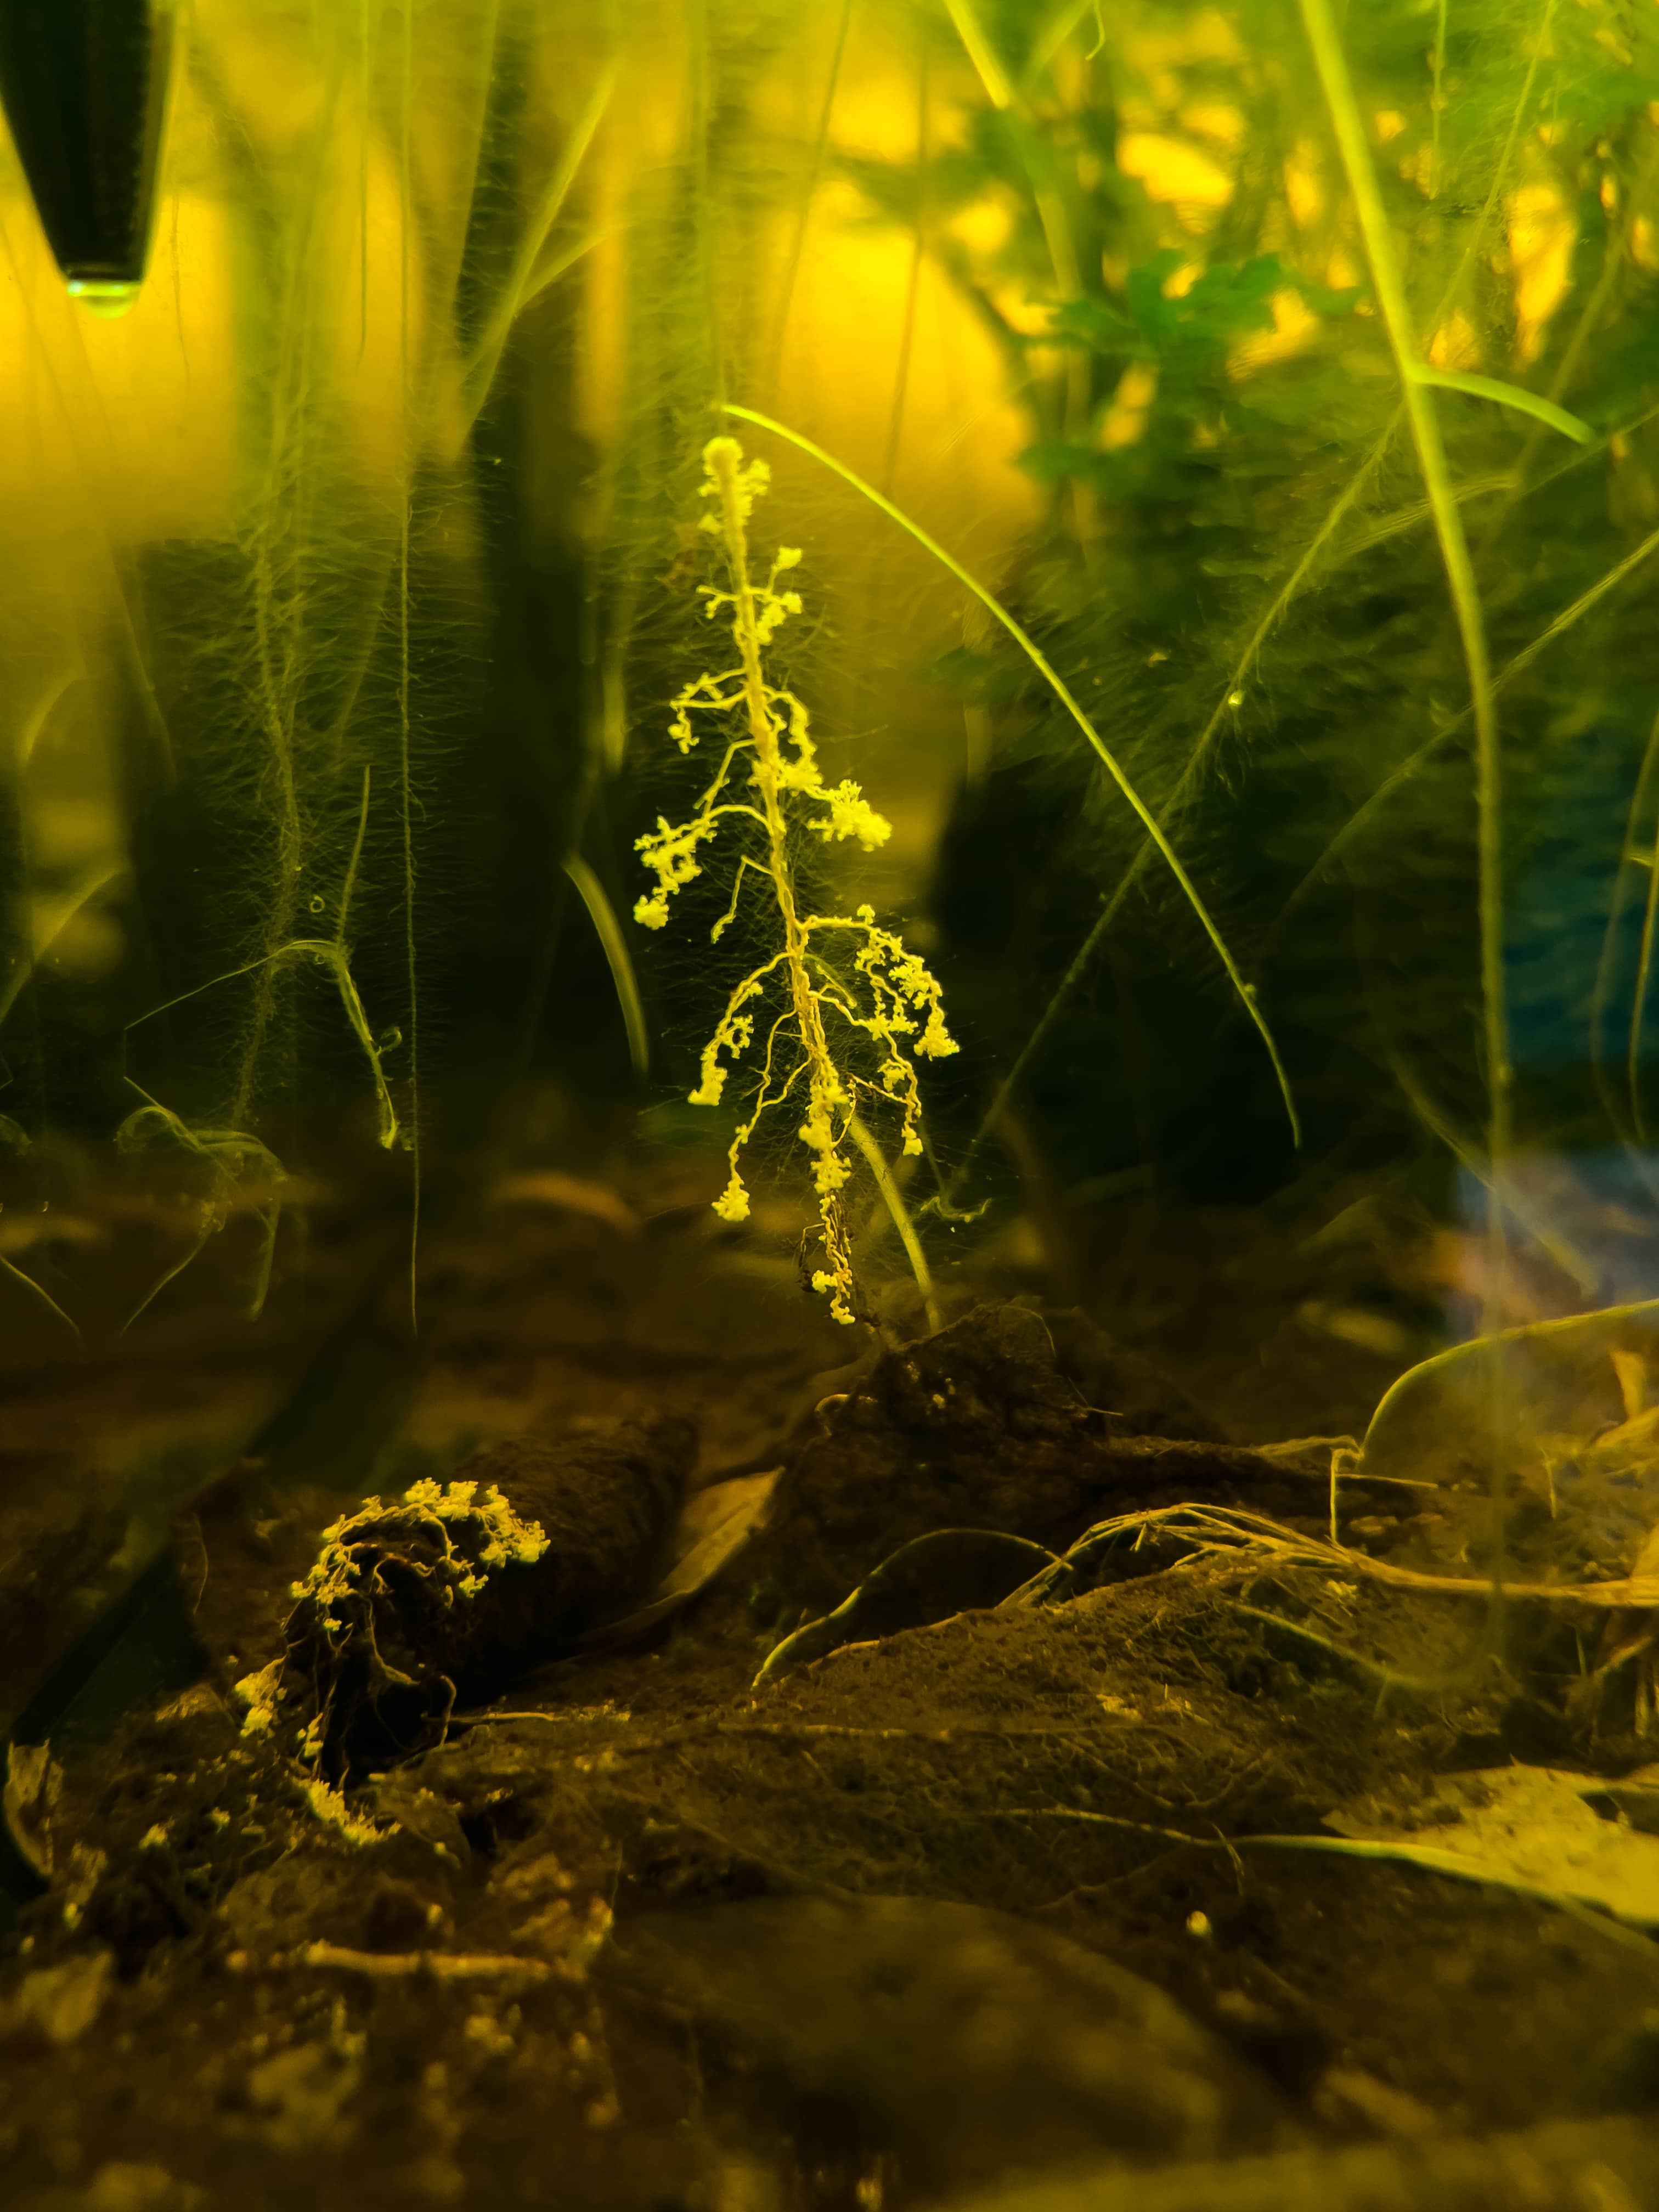
Aquatic Biofilms, Fungi & Hyphomycetes
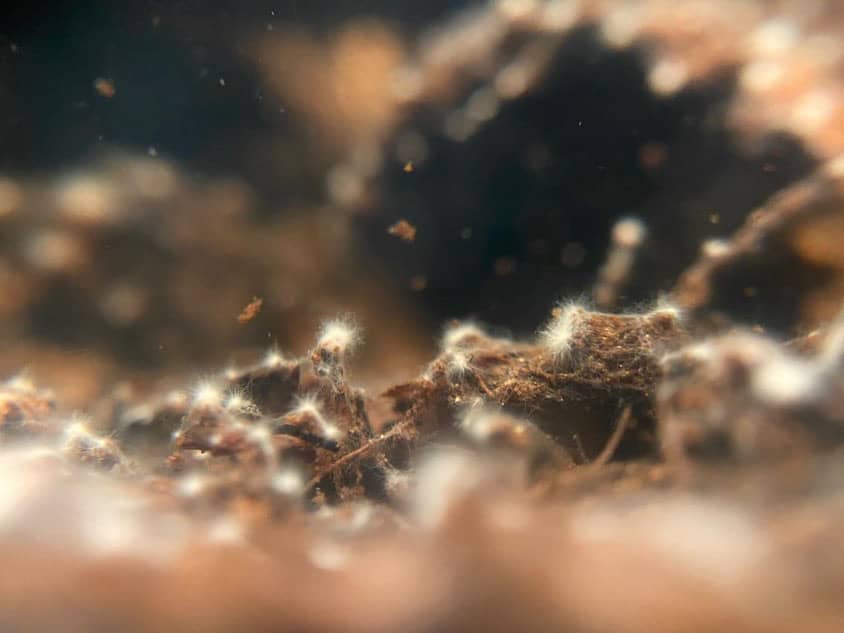
one
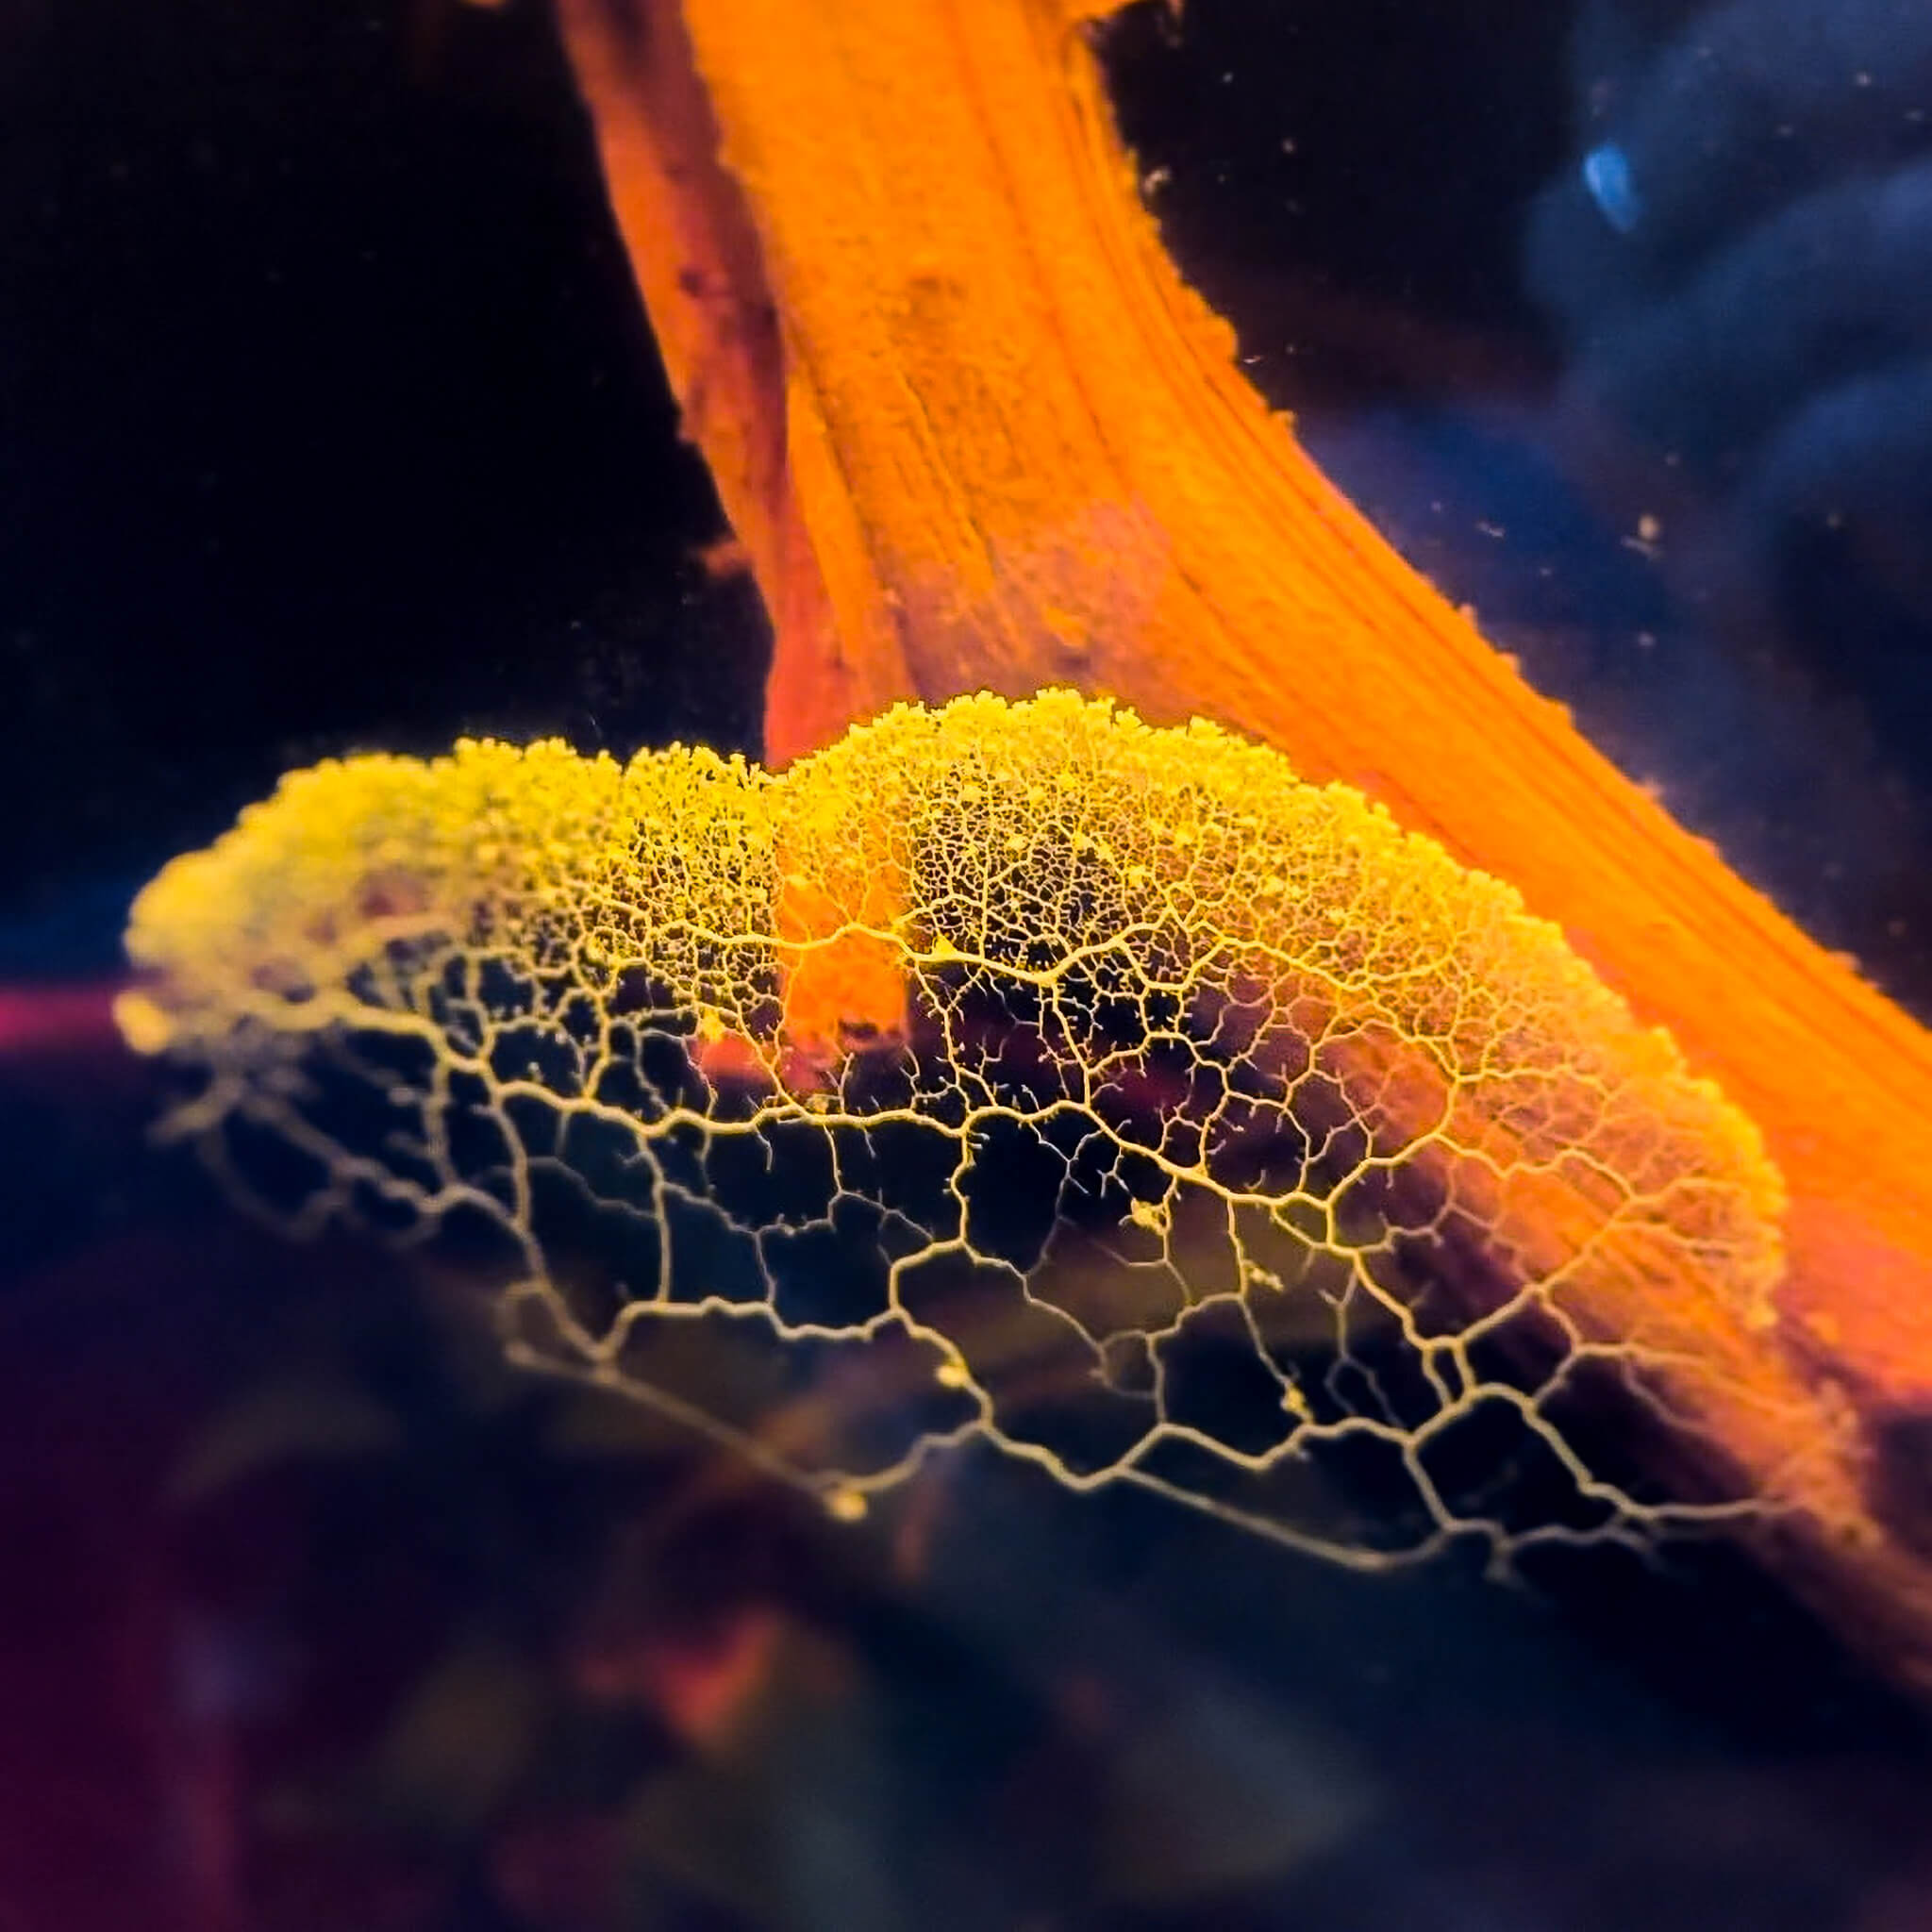
Myxogastria
Myxogastria, or plasmodial slime molds, include nearly 900 described species and were recently reclassified as protozoans rather than fungi. In aquariums, identifying the exact species is tricky—but what we often notice are their reproductive bodies forming on leaf litter or wood. These organisms pass through a mobile amoeboid stage before becoming the structures we recognize, reminding us that even the smallest decomposers have complex life cycles woven into the aquarium’s ecology.
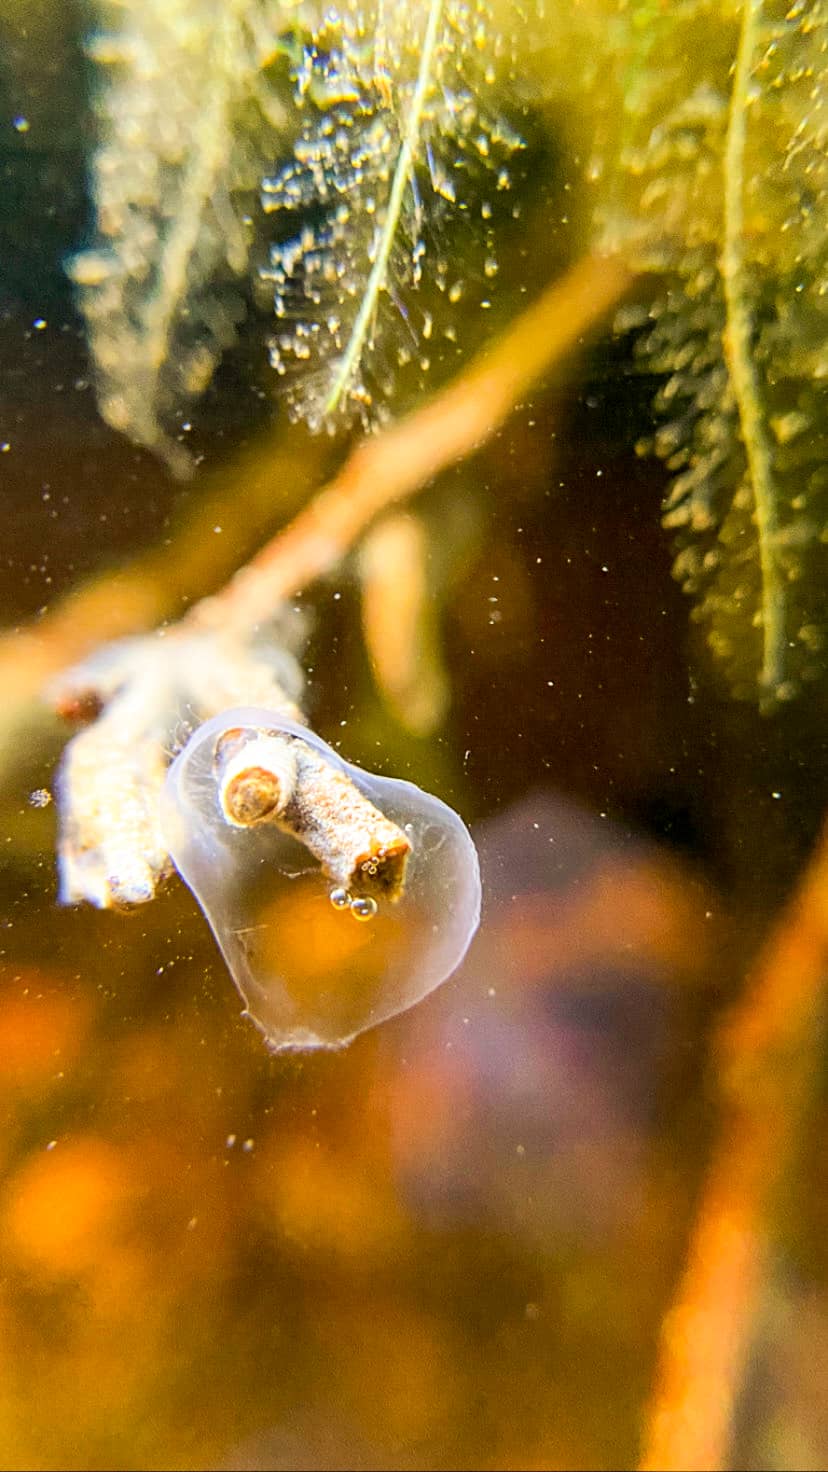
two
Biofilms
Biofilms are natural communities of bacteria, fungi, and microorganisms that thrive on leaves, pods, and wood. They form a slimy extracellular matrix—what we visually see coating botanicals—that protects the microbes while they grow and reproduce. In the Botanical Method Aquarium, biofilms break down complex plant matter into simpler compounds, making it palatable for shrimp, snails, and other invertebrates while fueling the microbial web that stabilizes the ecosystem.
three
Aquatic hyphomycetes
When fresh leaves and pods enter the aquarium, bacteria colonize first—but within days, fungi quickly dominate. Studies of leaf litter show that aquatic hyphomycetes can make up more than 90% of the microbial biomass, turning tough plant matter into fuel for the ecosystem. Though they often bloom visibly and then recede, they never truly “disappear.” Instead, they continue working unseen, forming the fungal backbone of decomposition in a Botanical Method Aquarium.
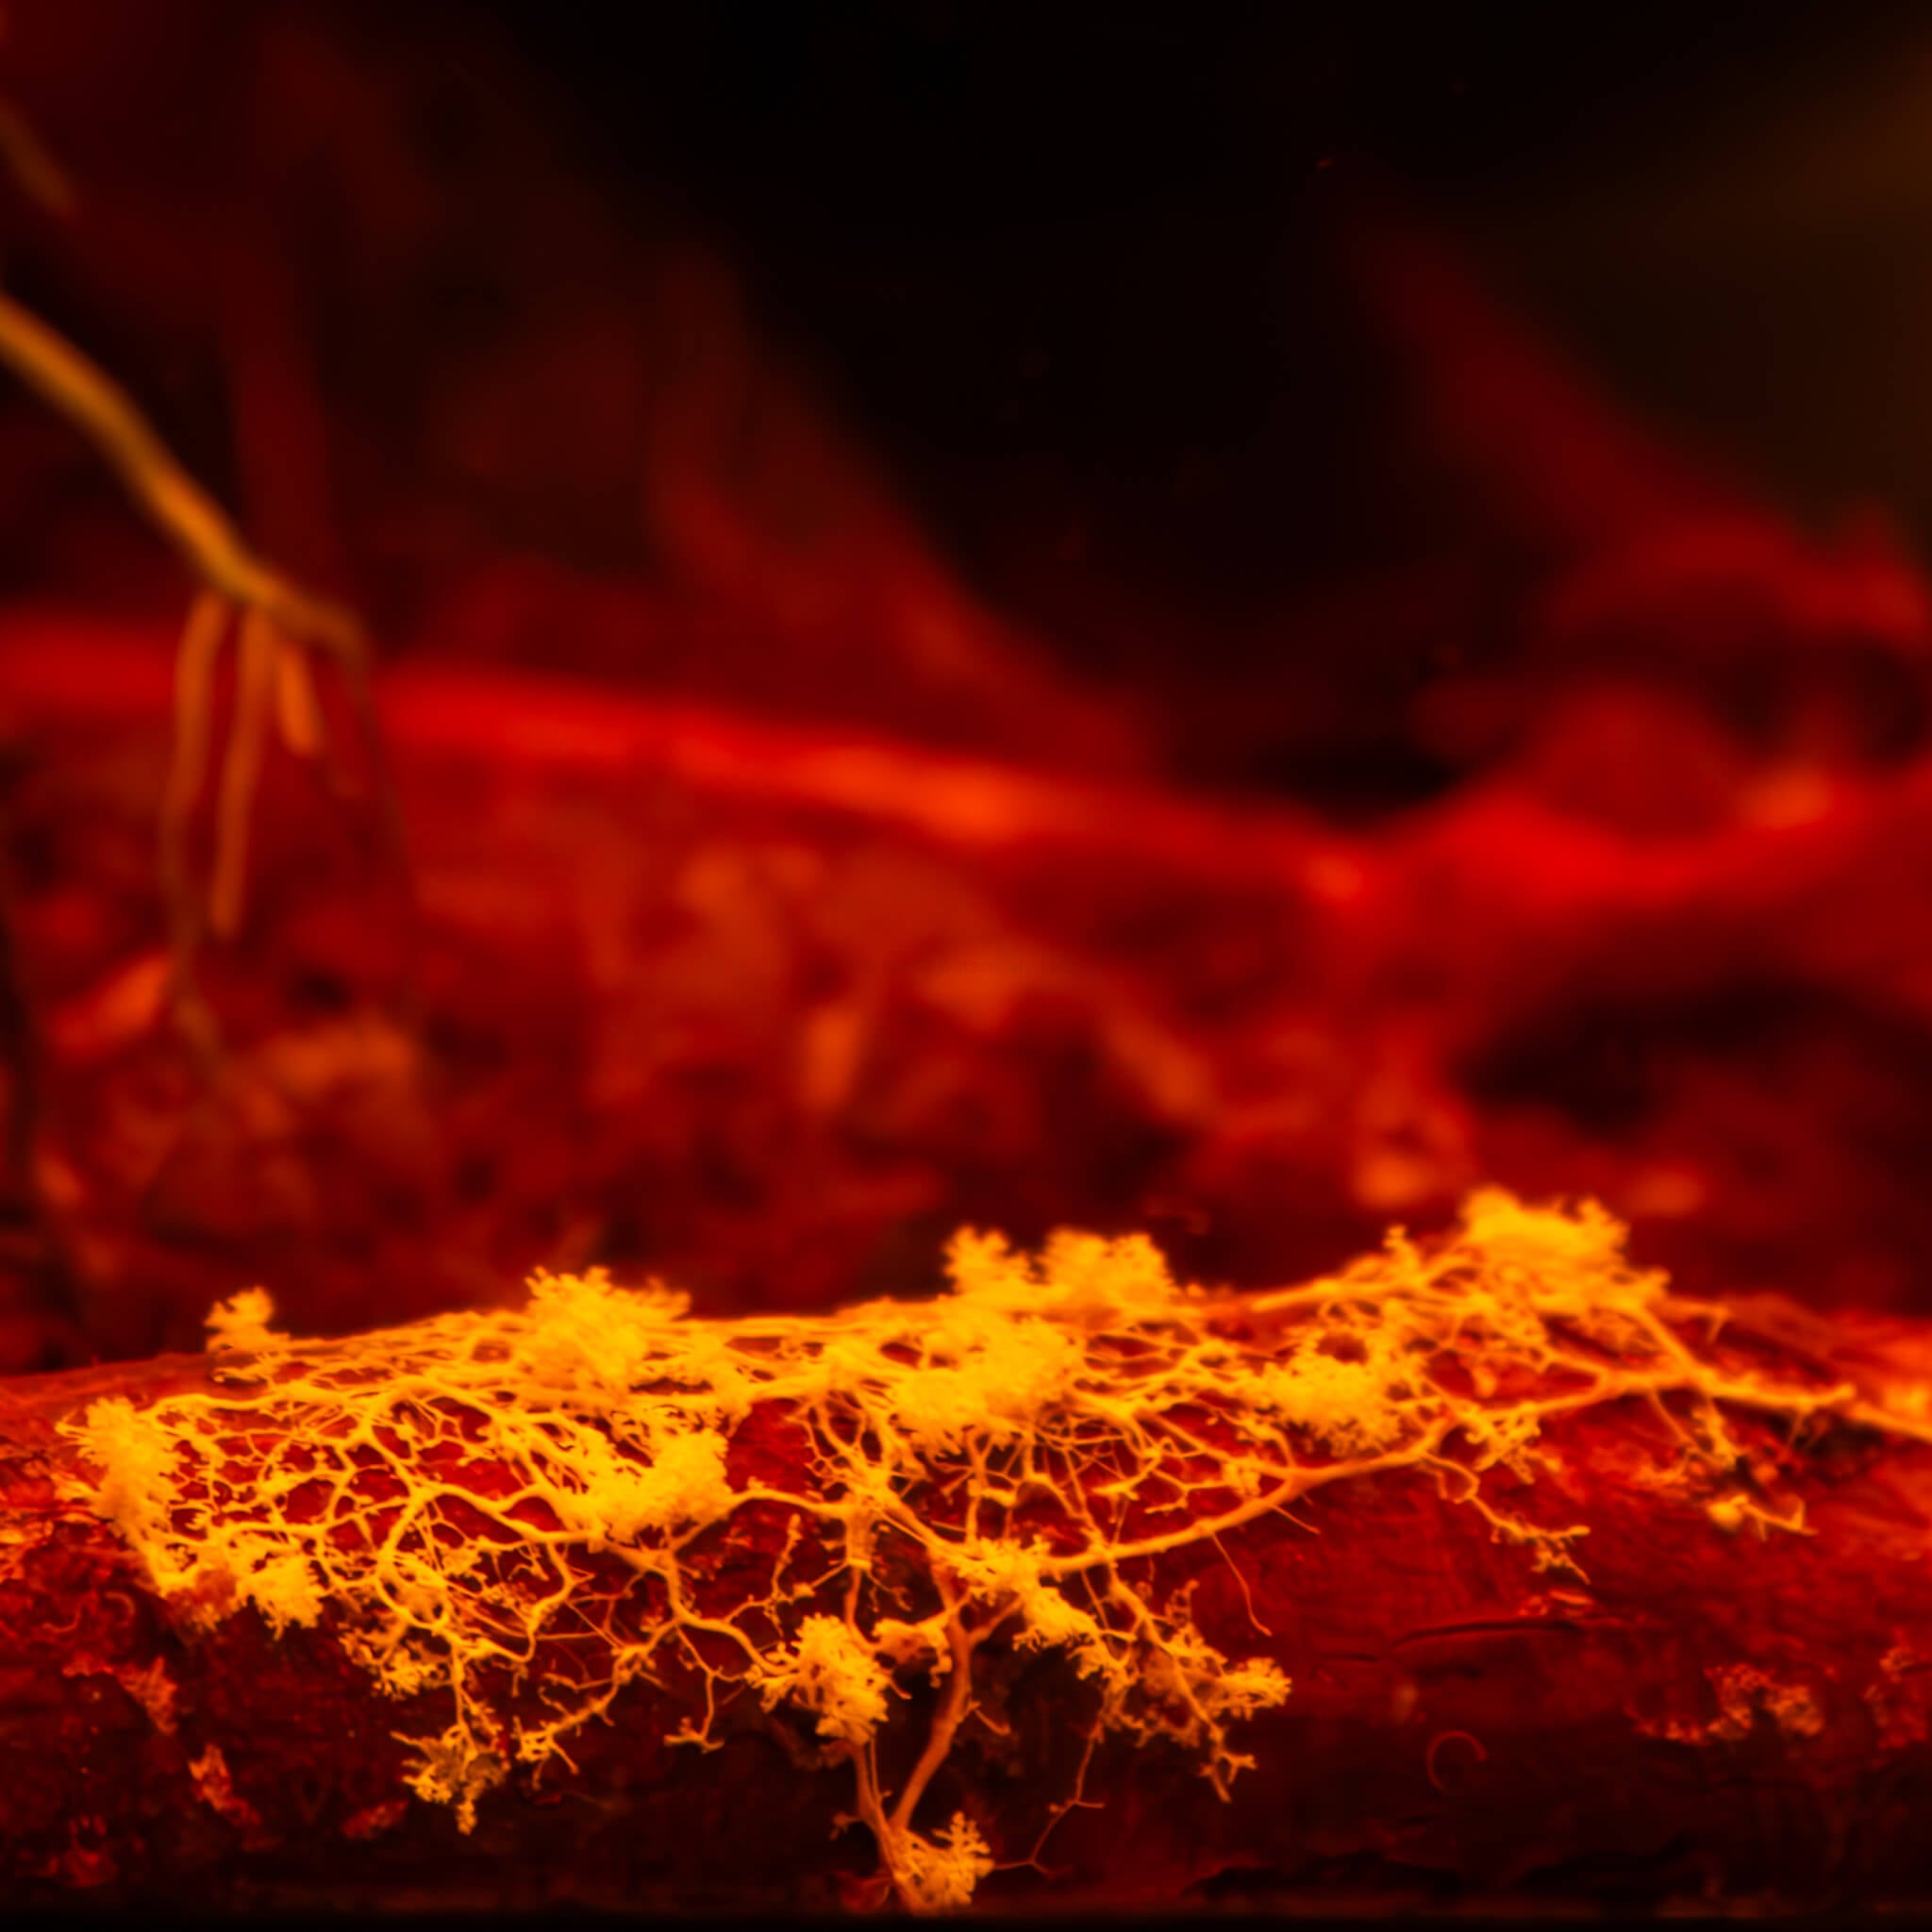
four
Myxomycetes
Also known as myxogastria, these plasmodial slime molds are sometimes seen “walking” across wood, leaves, or even substrate in the aquarium. Unlike fungi, which digest food externally, myxomycetes engulf microorganisms and decaying matter through internal phagocytosis. In the Botanical Method Aquarium, they quietly recycle compounds locked within botanicals and driftwood, contributing to the invisible cycles that keep the ecosystem balanced.
five
myxogastria as indicators
These “walking slime molds” act as primary consumers in aquatic ecosystems, breaking down detritus and recycling it into compounds that plants and microbes can use. When these food sources become scarce, they shift life stages into a flagellated amoeba stage, drifting through the aquarium feeding on bacteria until conditions favor growth again. Their presence is an indicator of a living, re-cycling system—one where decomposition and renewal are constantly at work.
Step 11
11. Stocking Suggestions
It’s wild, but the deeper you dive into the natural habitats of popular aquarium species, the more obvious it becomes: almost all of them evolved in environments shaped by leaf litter, submerged roots, and varying degrees of water tint. Integrating botanicals into the home aquarium is one of the most effective ways to offer these fish a taste of their native rhythms—and to witness behaviors like foraging, courtship, and nesting that rarely emerge in sterile setups.
Key Method: In a Botanical Method Aquarium, the livelihood of the inhabitants comes first, not the viewing pleasure of the aquarist. You’ll see more natural behaviors, but on Mother Nature’s terms.
All Betta species benefit from Botanical Method Aquariums. Some come from clear forest streams, others from tea-colored swamps, and many thrive among overhanging branches and emergent vegetation. Their adaptability means you can match the ecosystem—wood-heavy, leaf-laden, or lightly planted—to their specific preferences.
Characins and Tetras are among the most iconic freshwater fish, characins—especially the wide diversity of tetras—are perfectly suited for Botanical Method Aquariums. In their native South American streams and flooded forests, these fish navigate among drifting leaves and submerged roots, darting through dappled light softened by tannins. In the home aquarium, replicating these conditions encourages them to display the same synchronized schooling, bold coloration, and subtle social behaviors that make them so captivating.
Species like Cardinal, Rummy-Nose, and Ember Tetras thrive in these environments. The constant input of botanicals fuels biofilm and microfauna, which in turn provide supplemental nutrition that supports their health and longevity. The shaded, layered habitats created by leaf litter and branches help reduce stress, giving tetras a sense of security that allows their natural colors to intensify. Watching a school weave through leaf beds and root tangles not only highlights their beauty, but also underscores the value of recreating the ecological backdrop they evolved in.
Apistogramma are among the most rewarding fish for these ecosystems. Their complex breeding rituals rely on pod structures and tucked-away spaces for fry protection. Watching a female Apisto lead her brood across a leaf bed or a male defending a territory beneath a bark slab reinforces just how valuable botanicals can be.
Rasboras, particularly micro species like Chili Rasboras, fit beautifully into this method of aquarium. The constant production of biofilm and microfauna from decomposing botanicals provides a subtle but vital source of supplemental nutrition. They’ll spend their days navigating between layers of leaves, picking off infusoria, and resting beneath pods.
Surprisingly—or perhaps not, once you consider their omnivorous diet—goldfish also interact enthusiastically with botanical litter. They’ll nibble at softened leaves and graze biofilms, while the mild tannins may offer immune-boosting properties that help support their health. It’s not a conventional pairing, but it’s one that some aquarists have explored successfully.
Shrimp and snails shine in these systems. They constantly graze surfaces in search of leftover food, algae, and detritus—but in botanical setups, they’re offered something more dynamic: a steady stream of organic matter, fungi, and biofilm across multiple stages of decay. This diversity enriches their diet and supports better molting, reproduction, and health.
For aquarists starting their first botanical method aquarium, labyrinth fish like Bettas and Gouramis, as well as surface-breathing species like Corydoras, are excellent choices. These fish tolerate fluctuations in dissolved oxygen better than most, making them more resilient during the early stages when bacterial blooms or oxygen dips may occur.
Lastly, always select species based on your water source. A botanical method aquarium built using RODI water often drifts toward a lower pH, while one based on tap water may buffer more easily and remain closer to neutral. Understanding where your specific system sits—both chemically and ecologically—will help guide your stocking choices and ensure long-term health.
Pro tip: Document your water parameters before and after adding botanicals, especially if you’re planning to stock sensitive or wild-caught species.
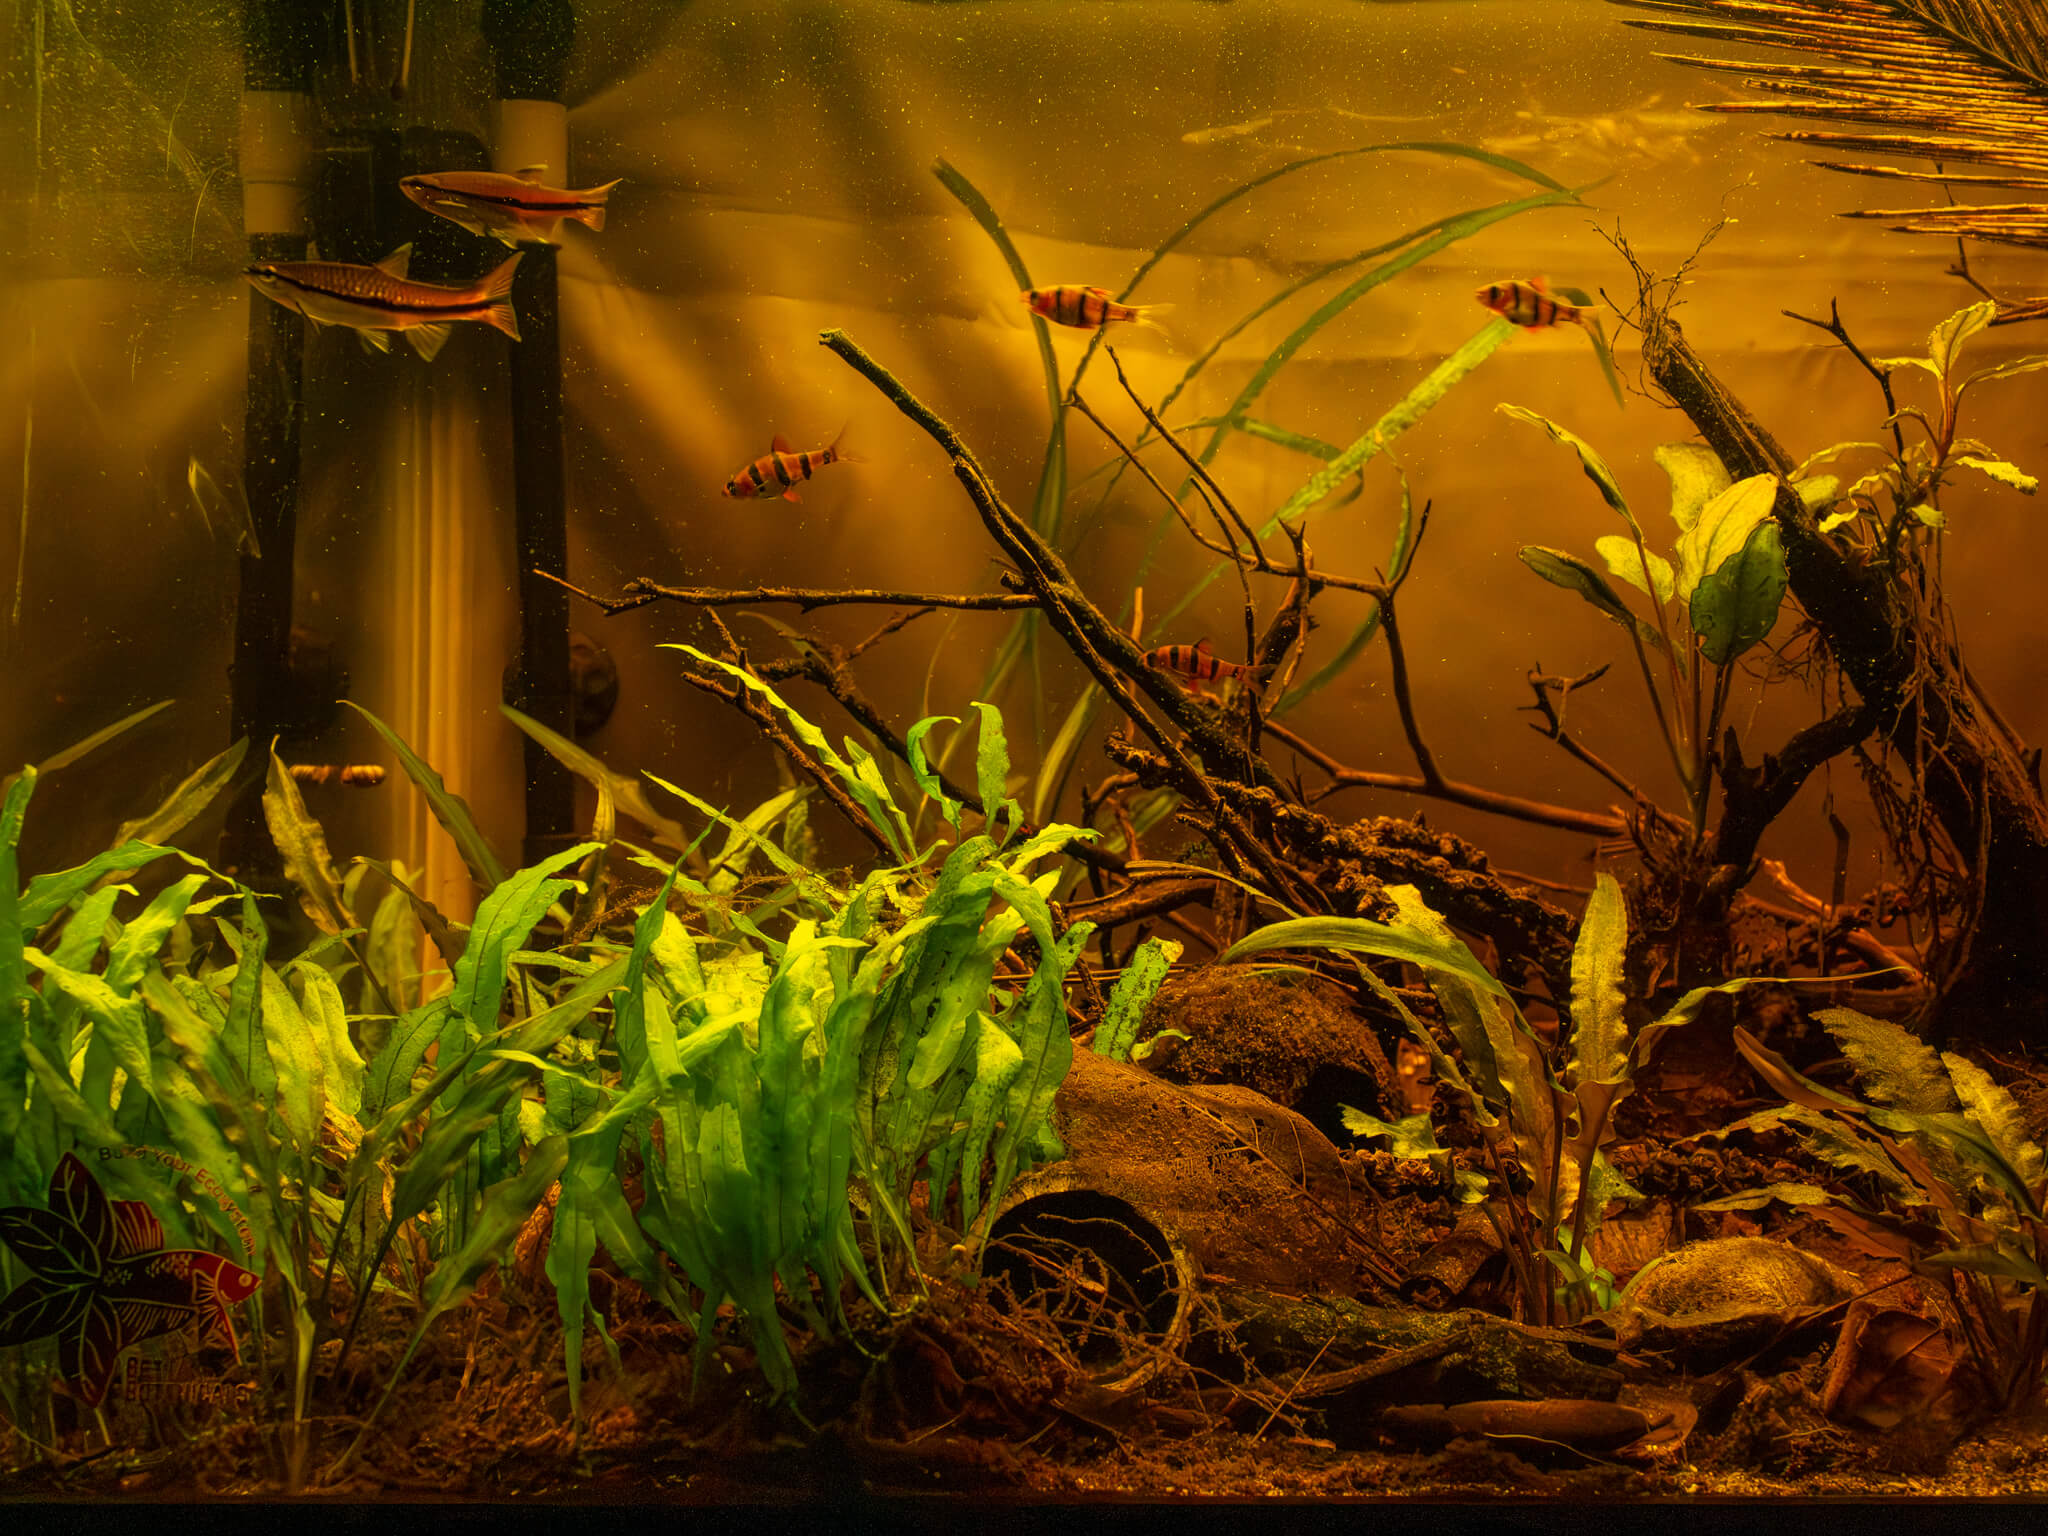
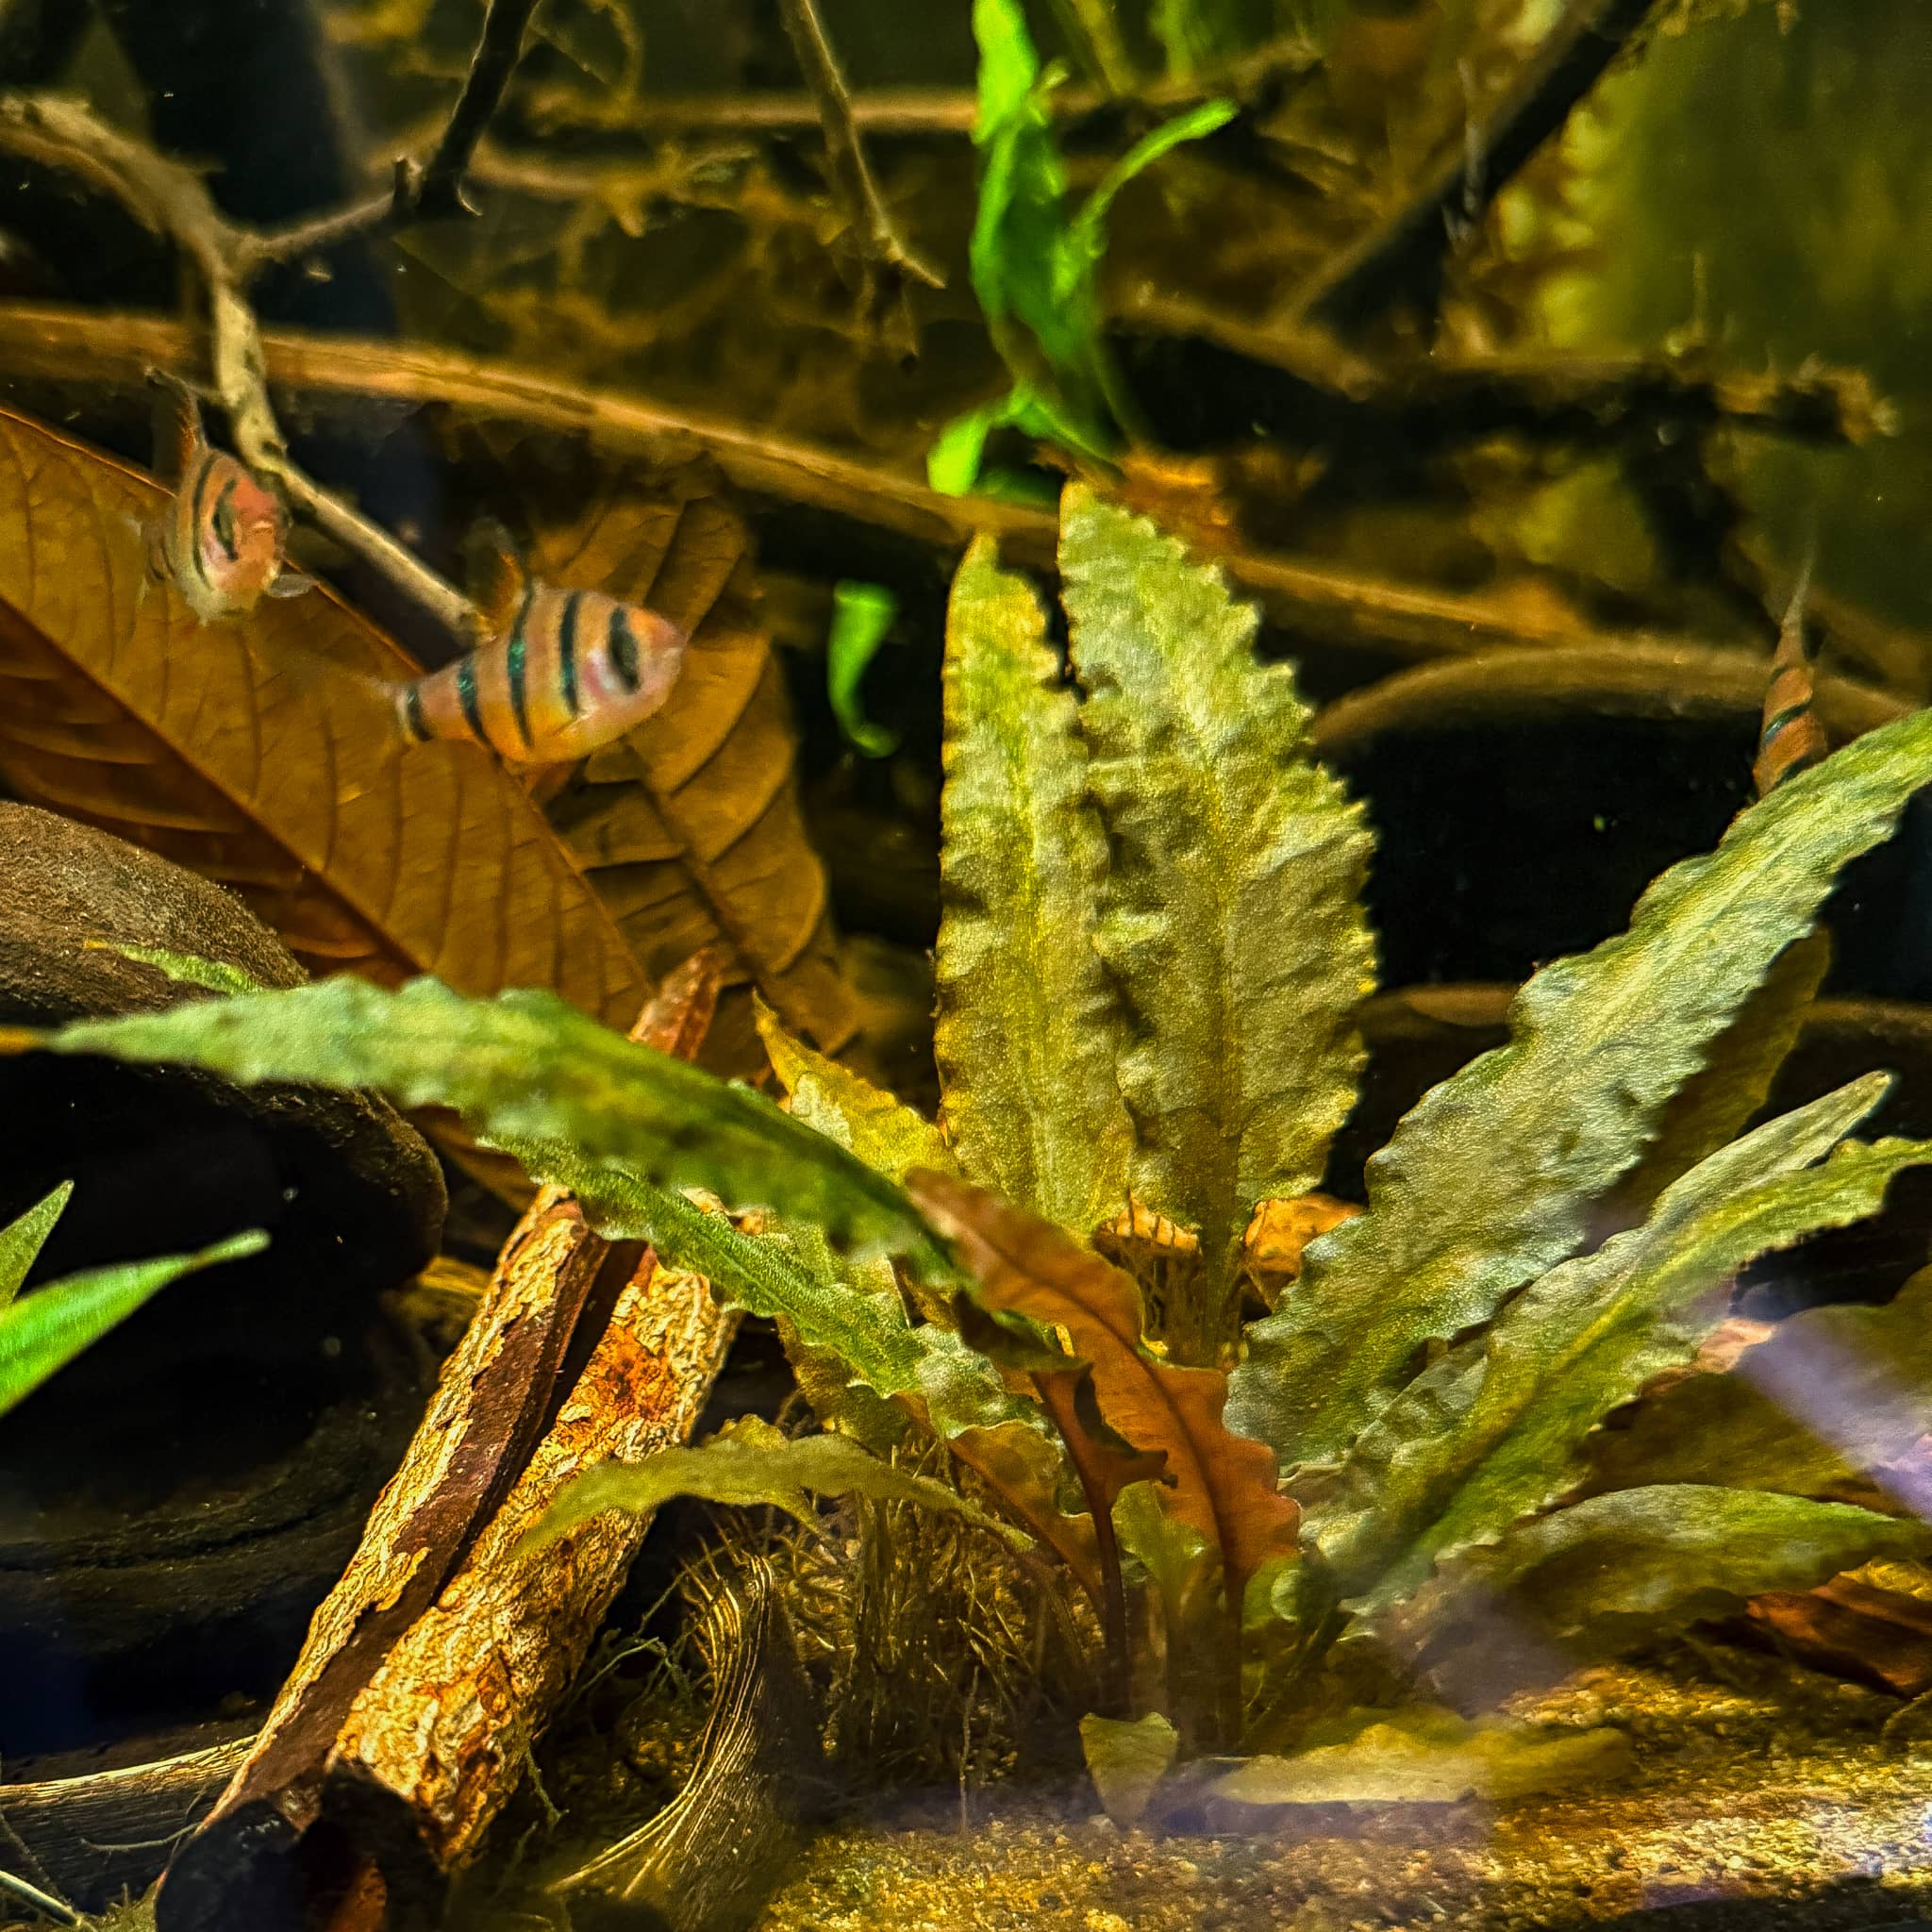
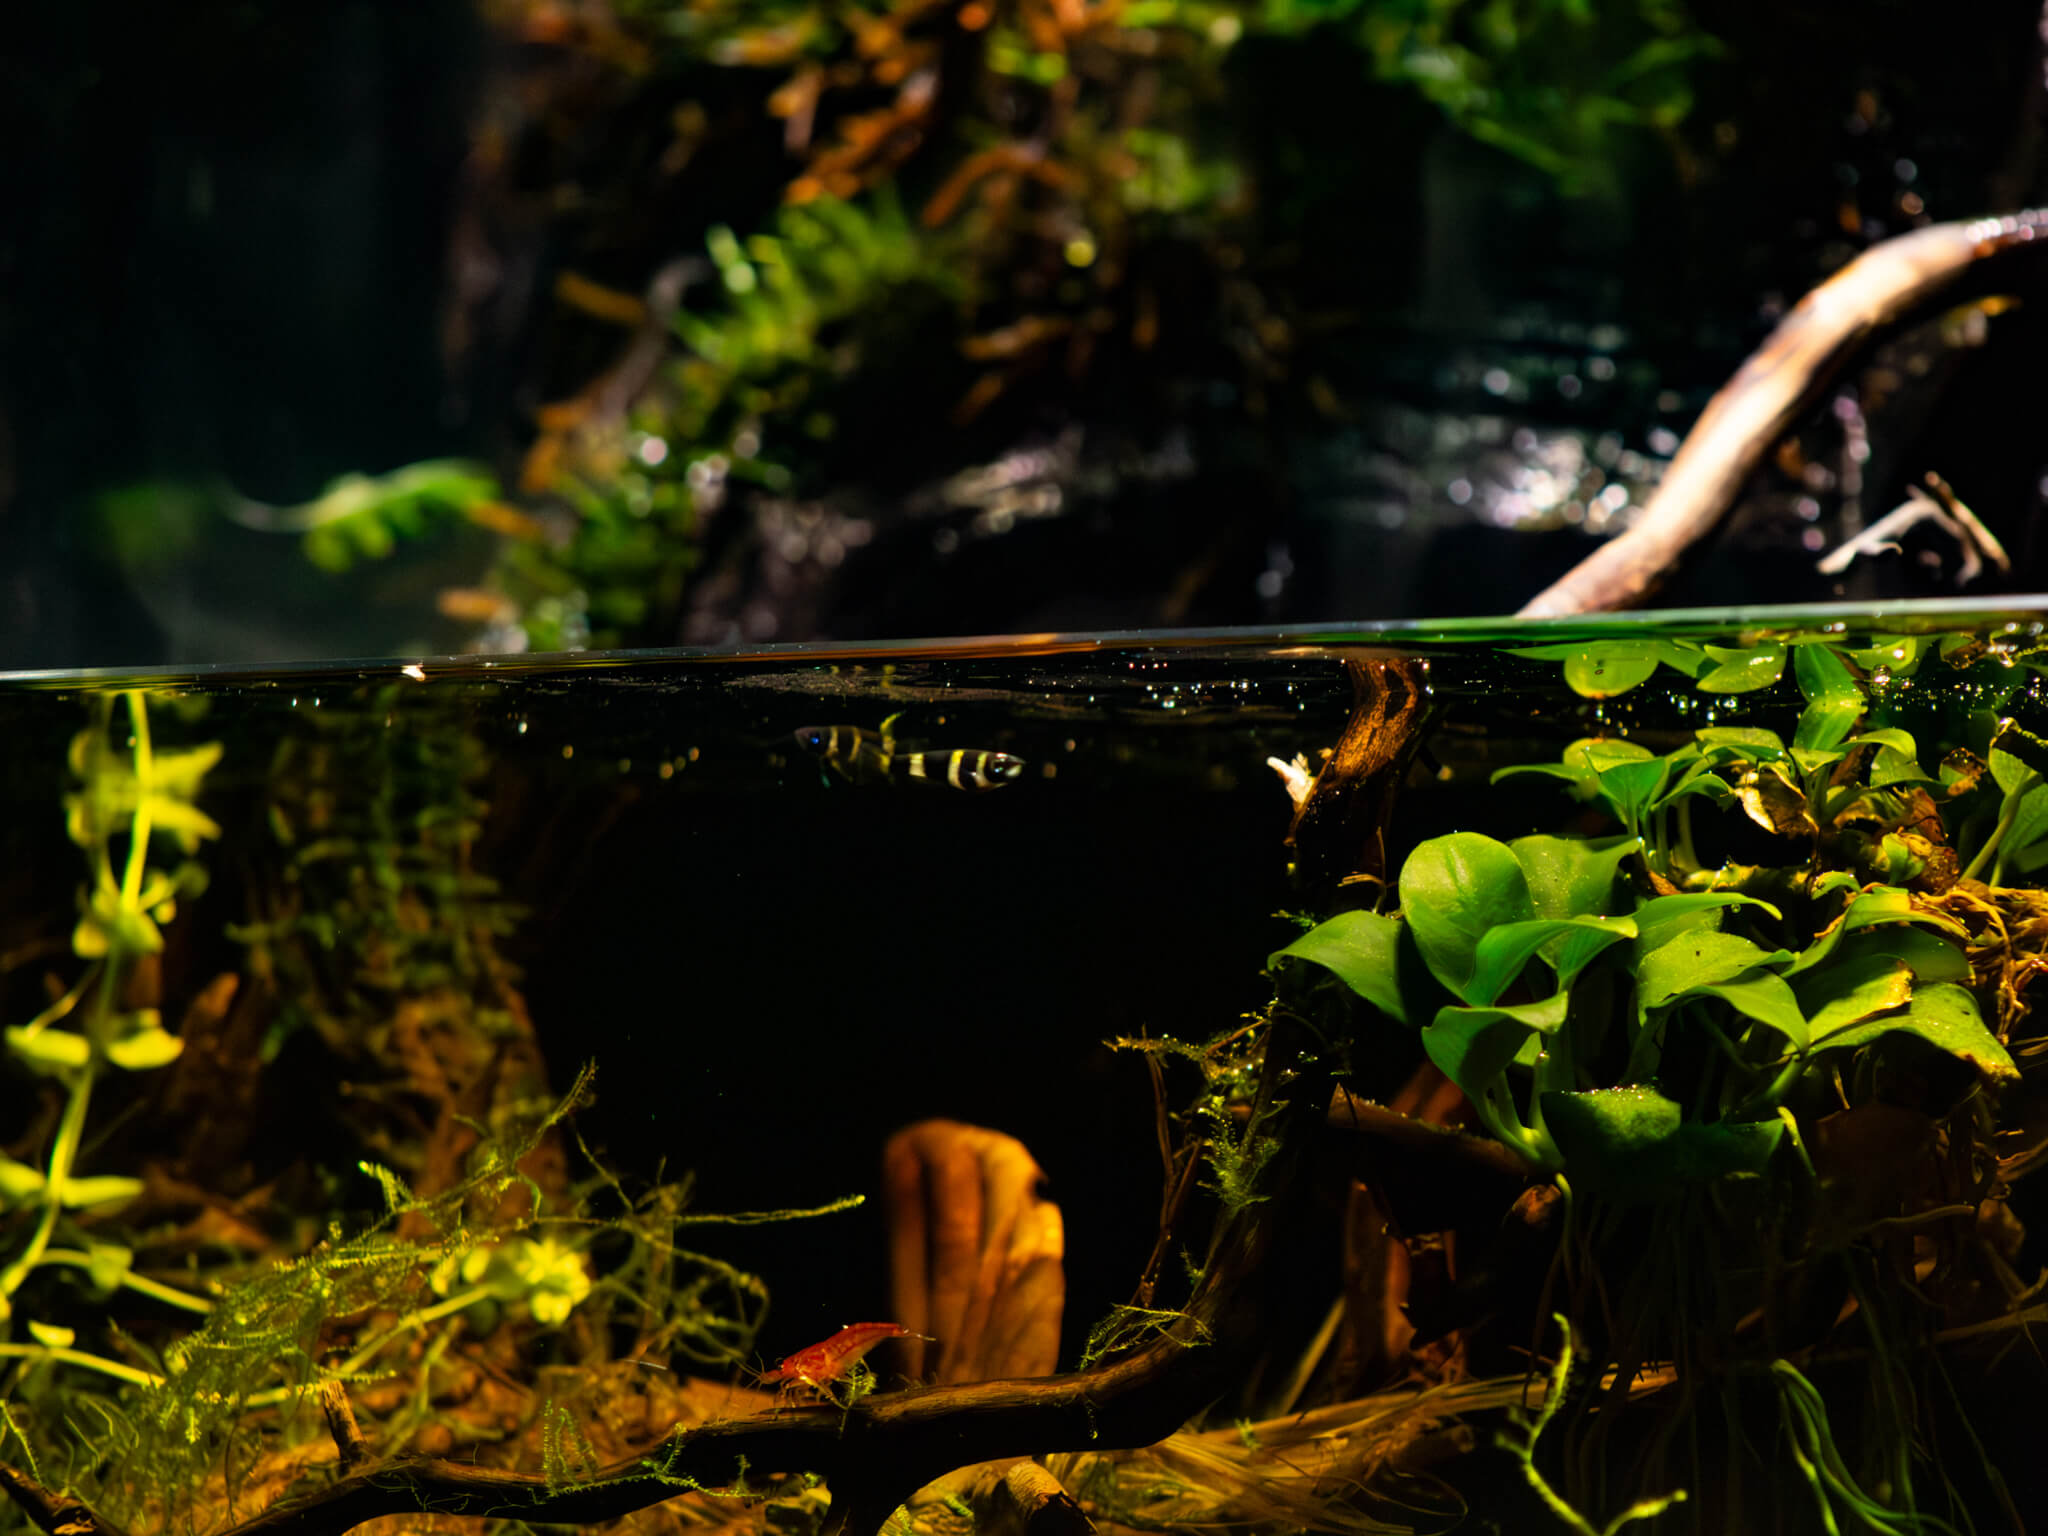
Life in the Botanical Method Aquarium

Popular beginner fish
Many of the aquarium’s most iconic fish evolved in blackwater habitats where leaf litter shapes both chemistry and ecology. Glowlight Tetras (Hemigrammus erythrozonus) are a classic example. Native to the Essequibo River—the longest river in Guyana—this species is most often found in shaded tributaries branching off the main channel. These forested streams are heavily stained with tannins from decaying organic matter, turning the water a deep amber. The conditions are soft, acidic, and biologically rich, driven by the slow breakdown of leaves and woody debris.
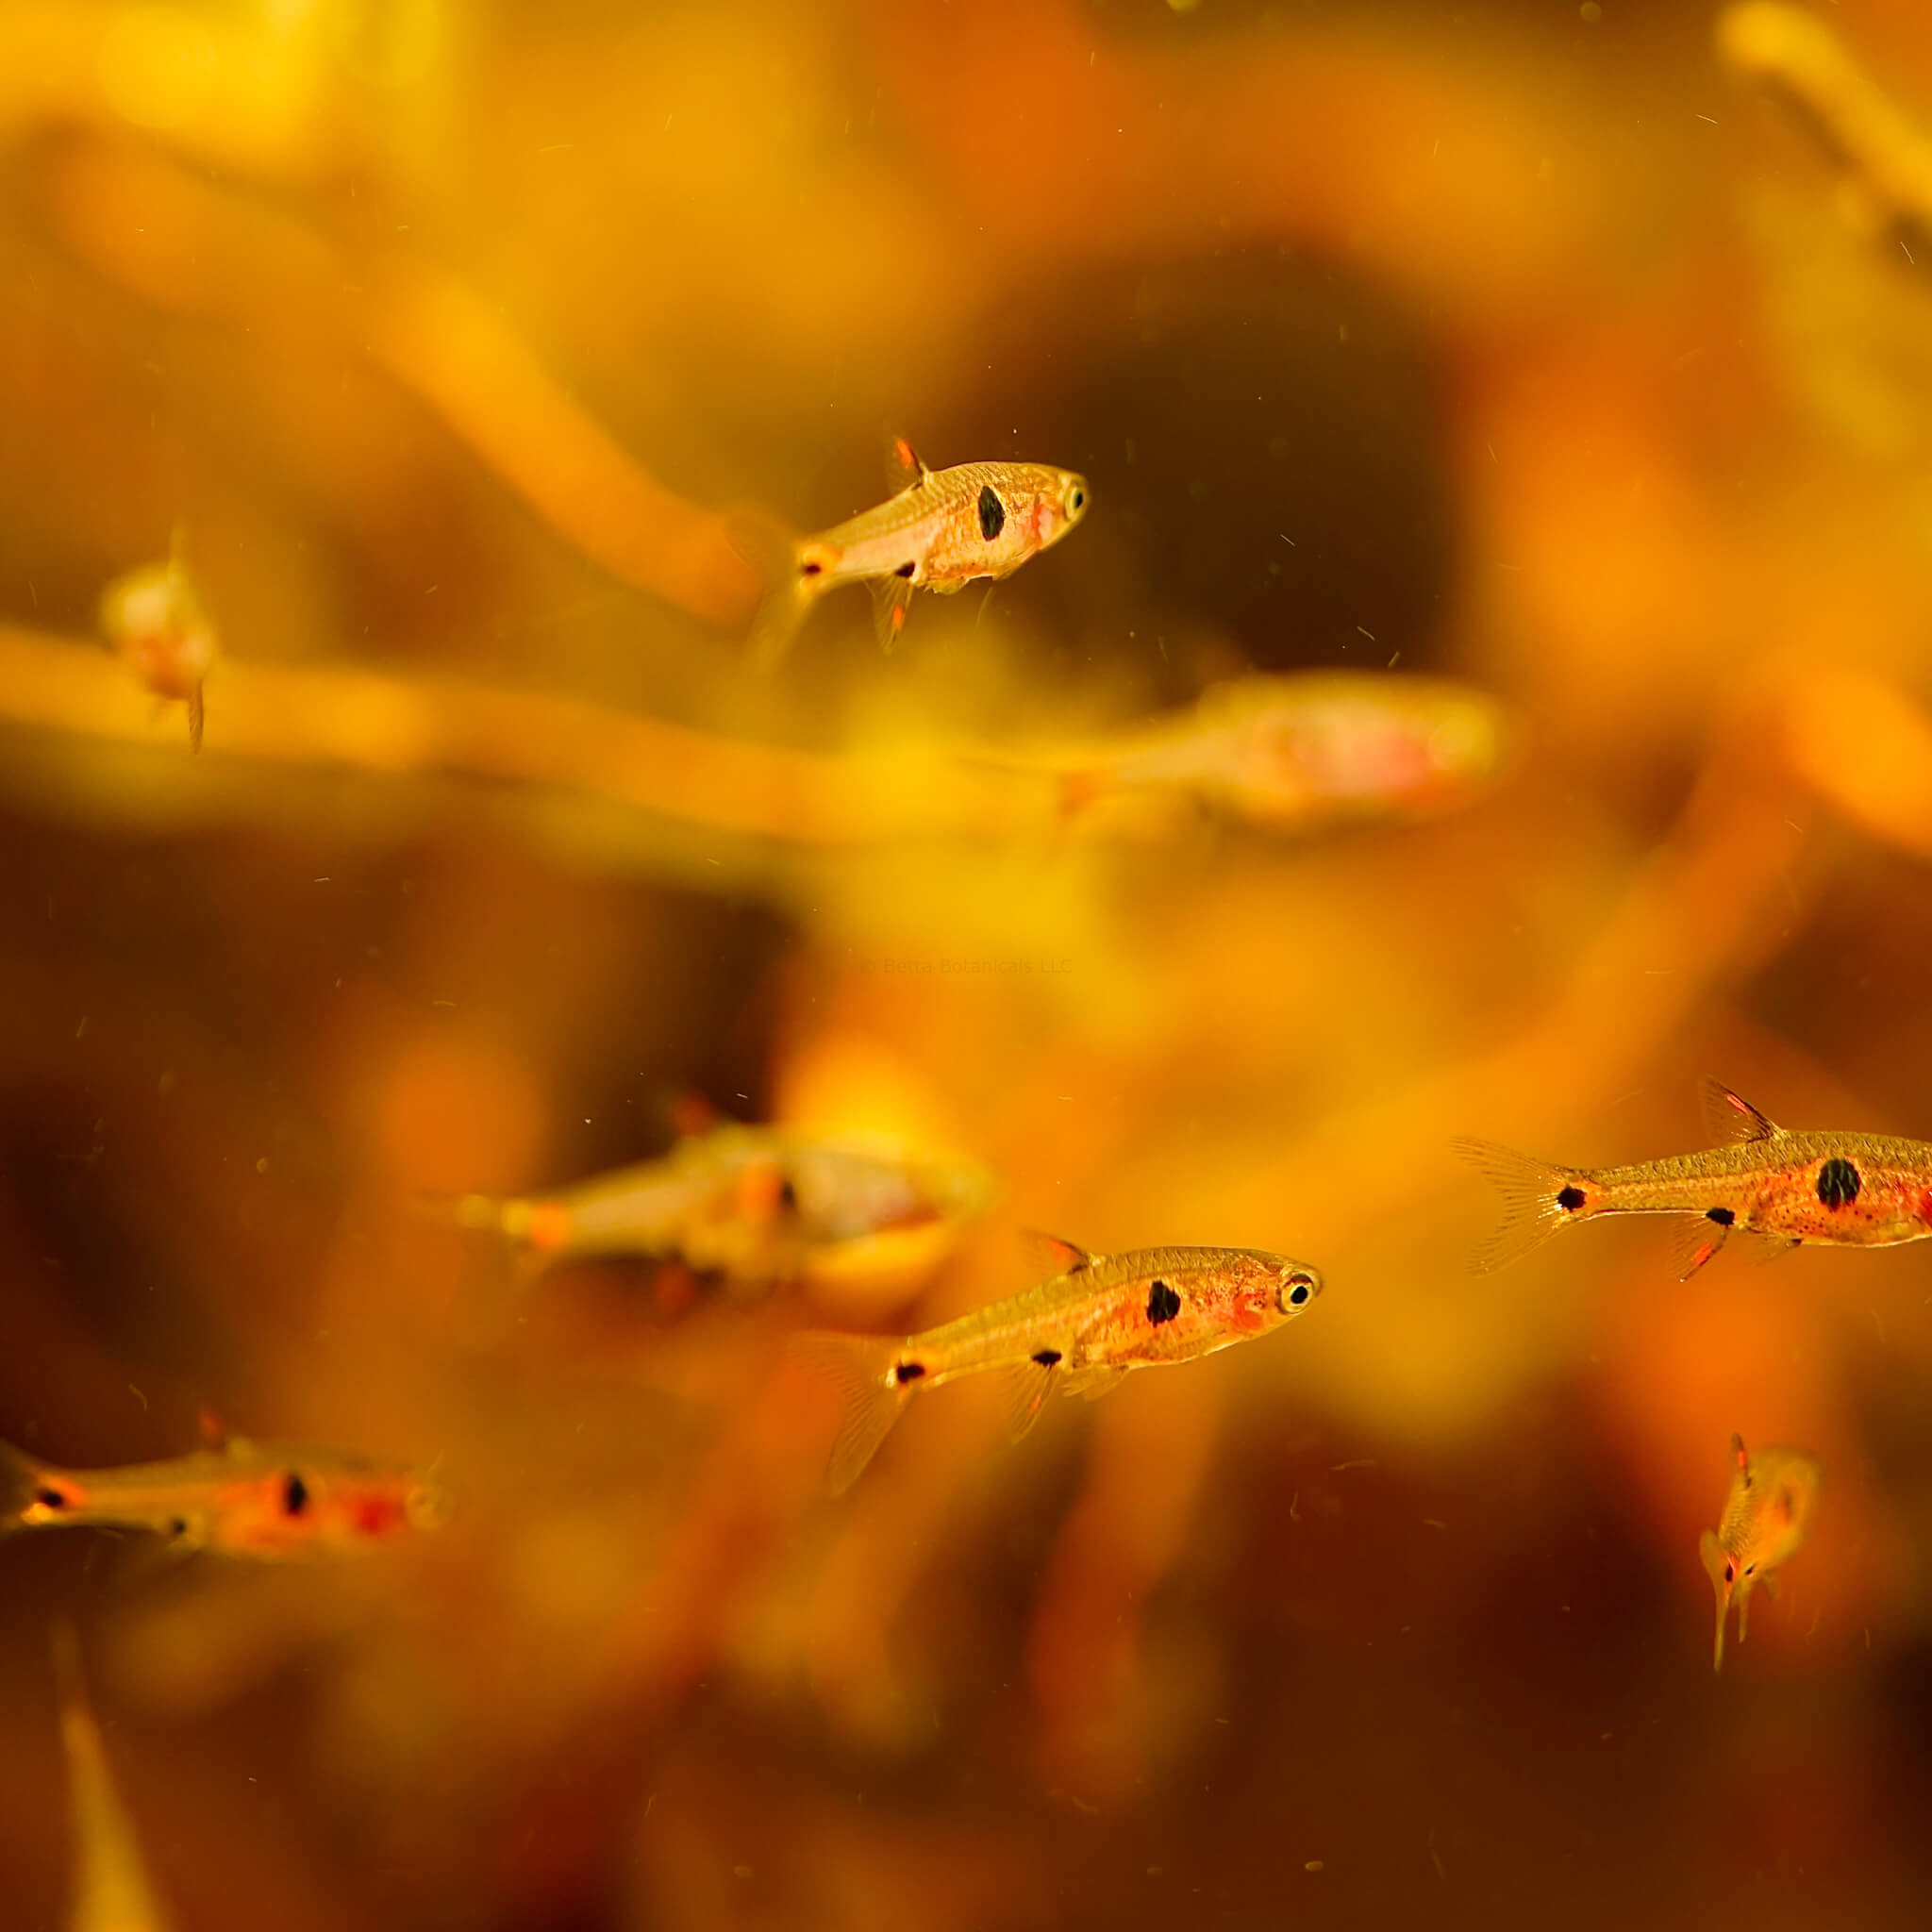
ideal for nano fish
Nano fish like the Three Spot Rasbora (Boraras maculatas) are perfectly suited to botanical aquariums. With tiny stomachs and a grazing foraging pattern, they thrive in environments where microfauna and biofilms provide a steady stream of supplemental nutrition. In the wild, they are native to swampy lowlands of peninsular Thailand. Within these habitats, dense vegetation, detritus, and leaf litter dominate, providing exactly the kind of biologically rich conditions that the Botanical Method Aquarium recreates.
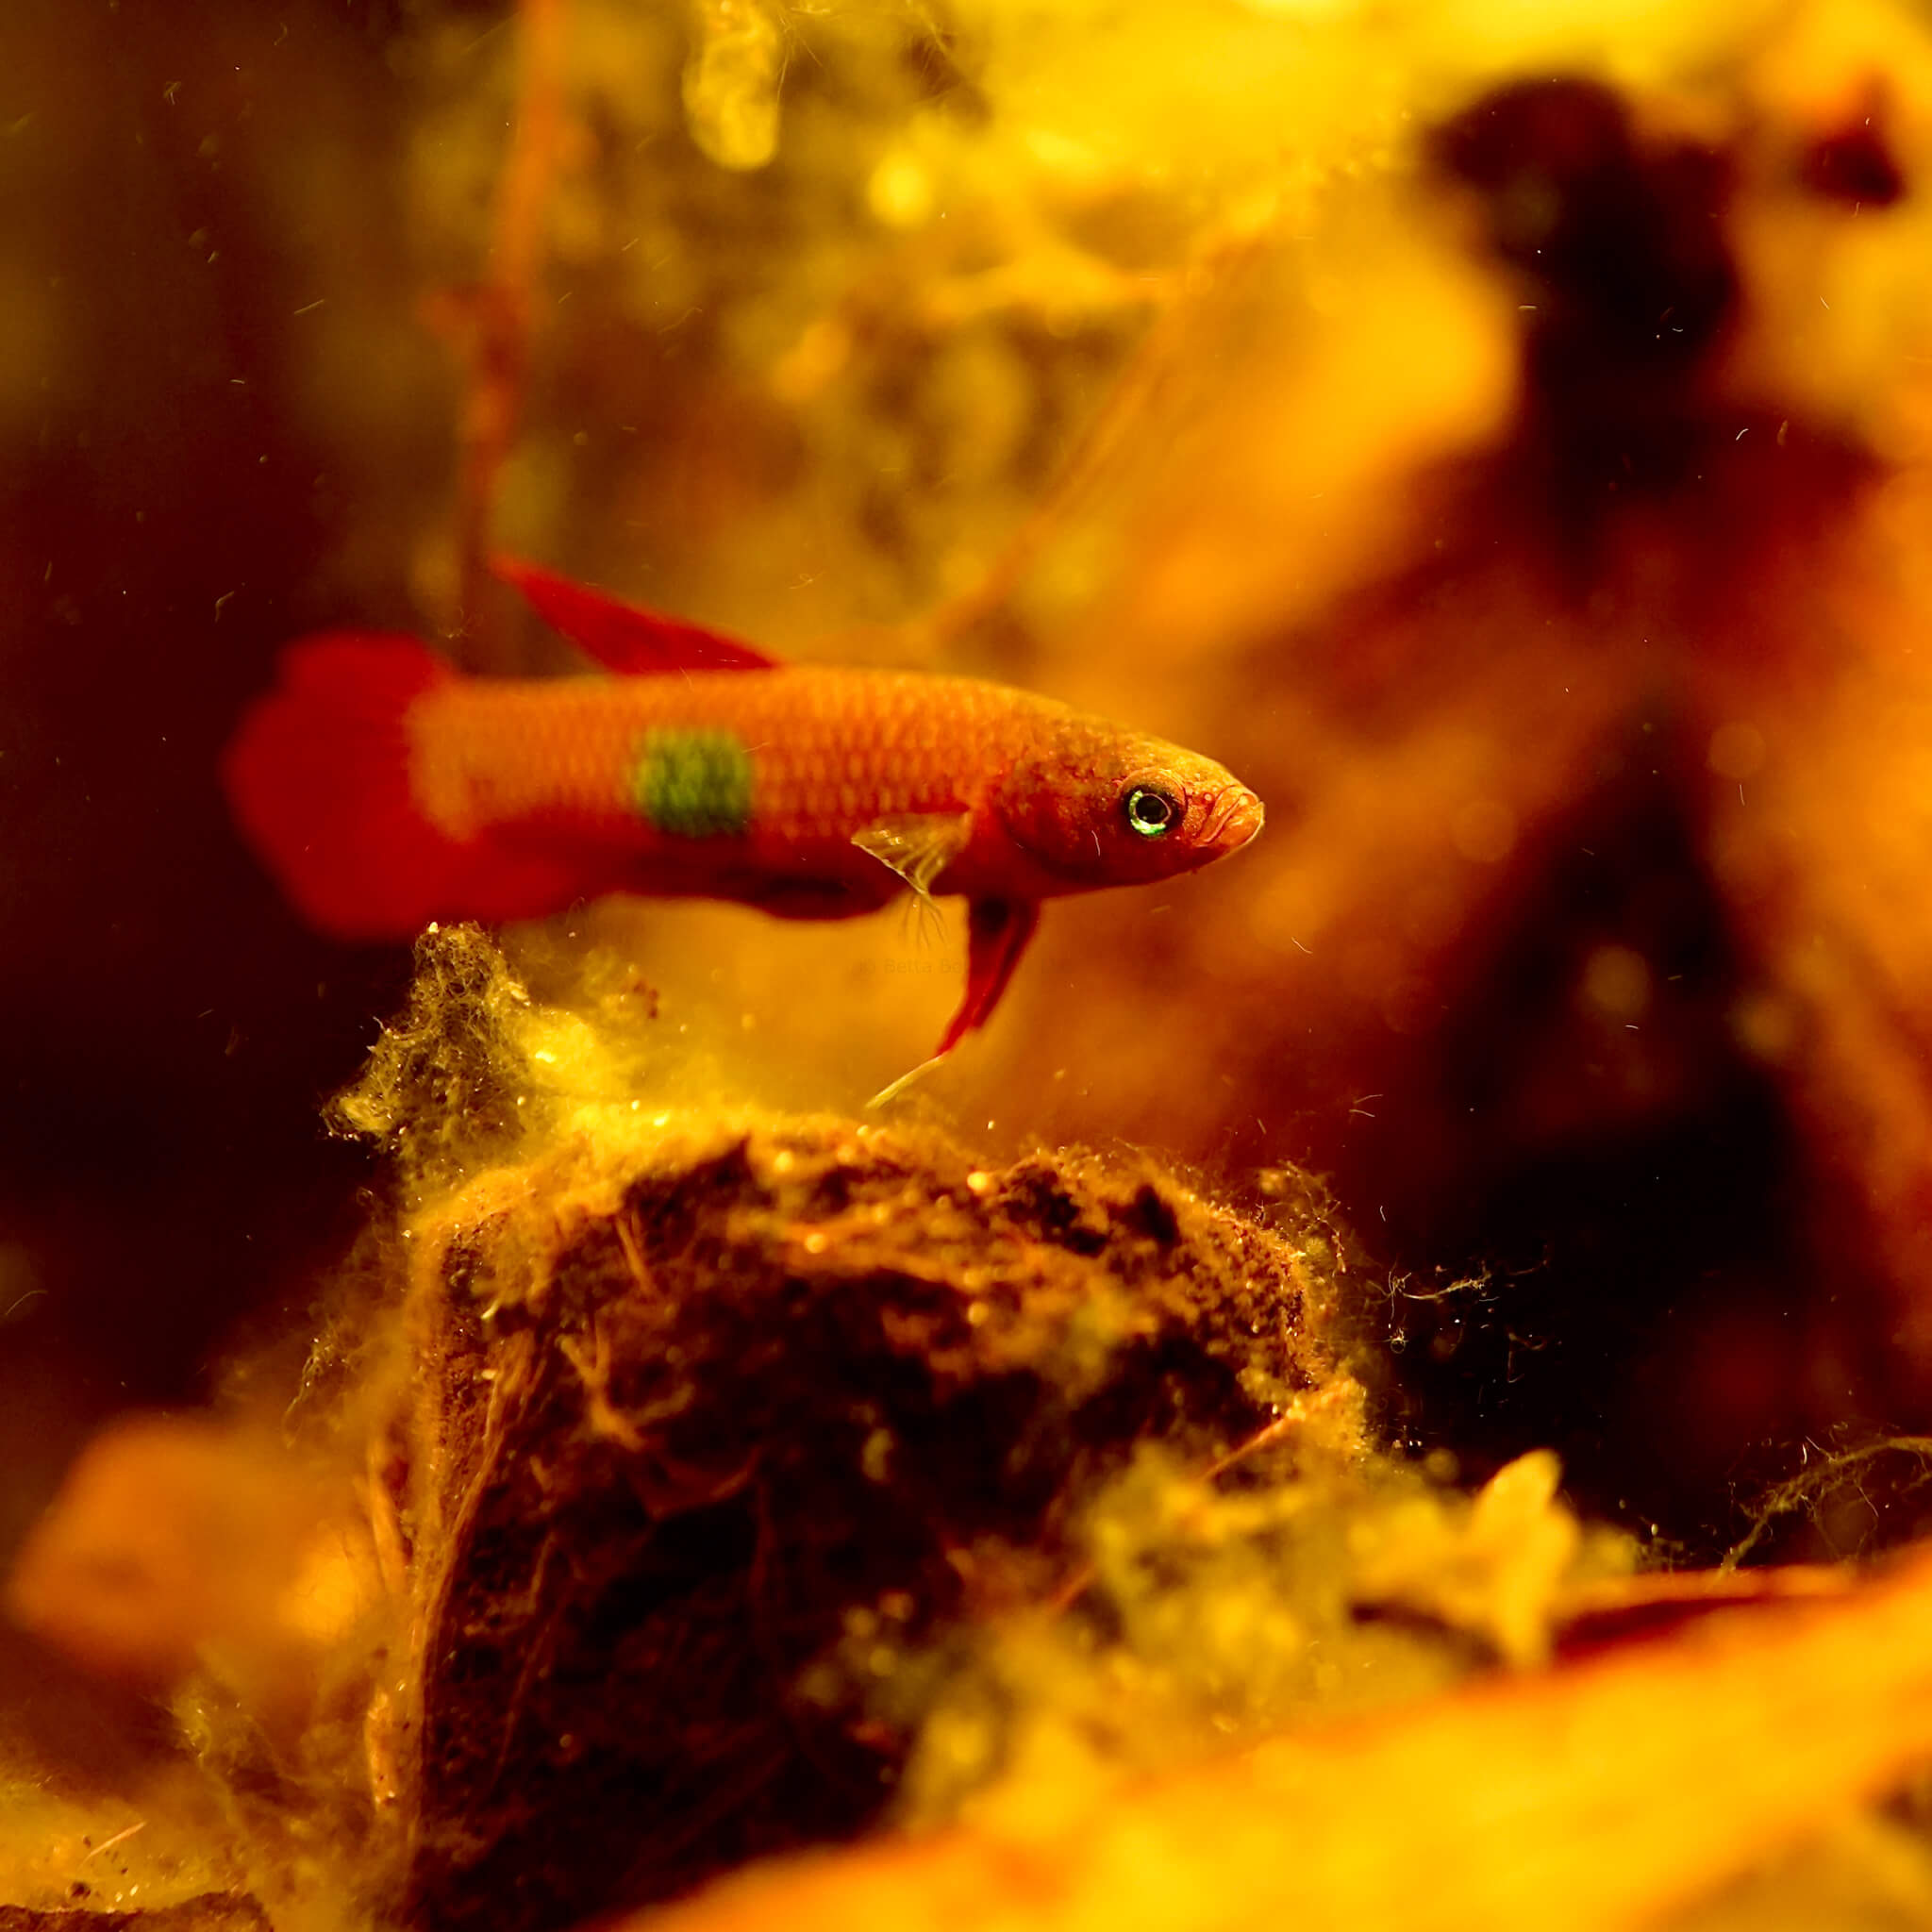
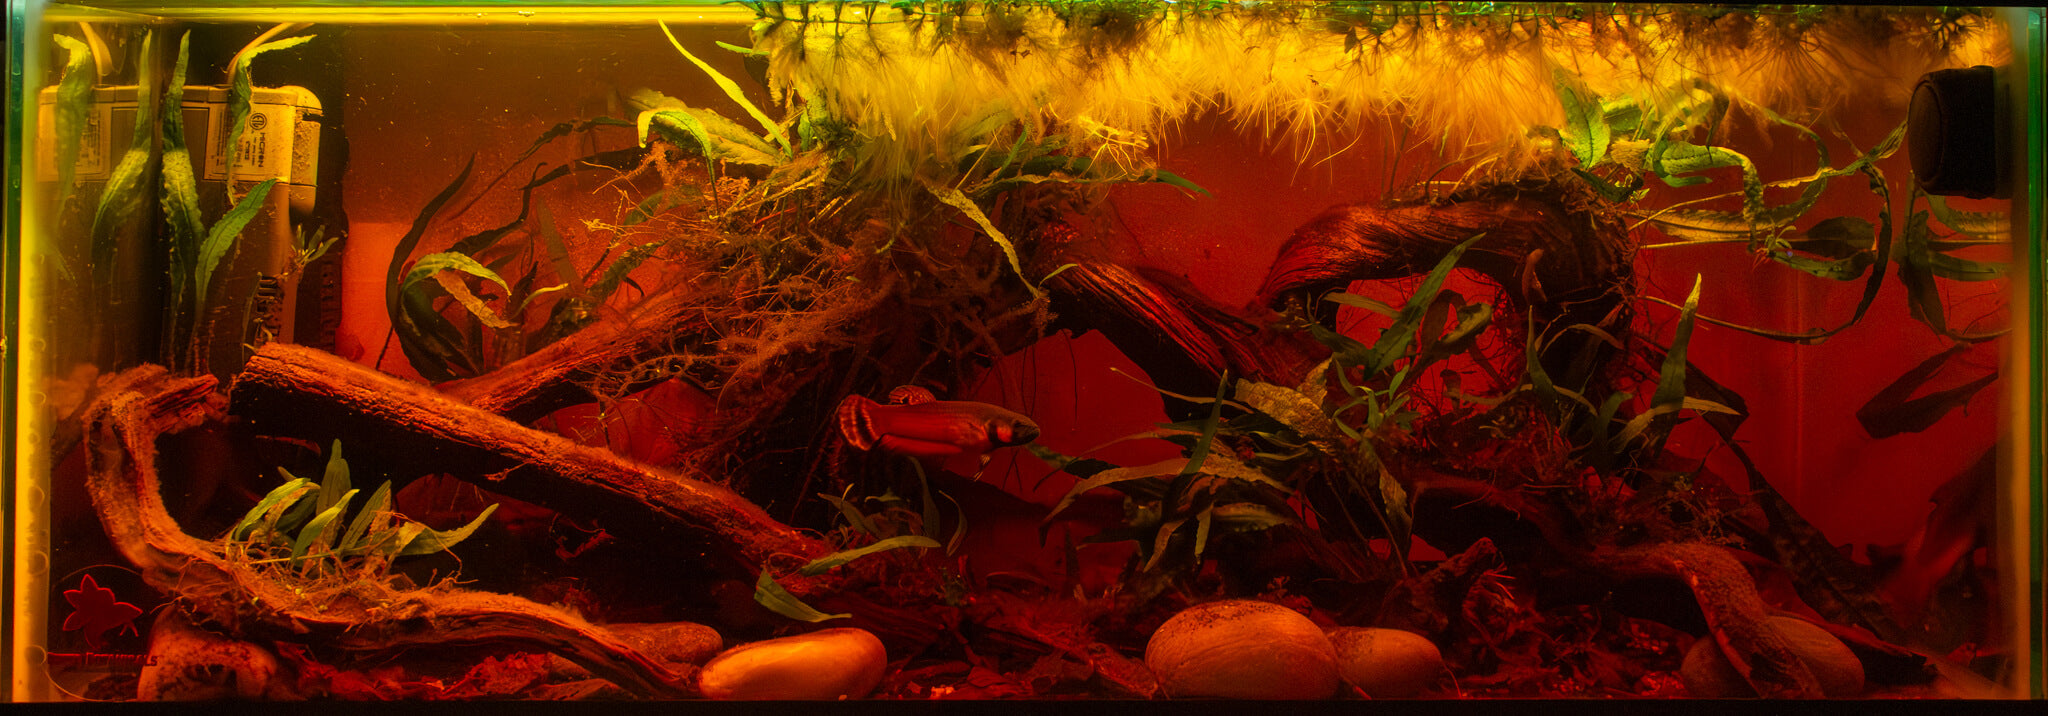
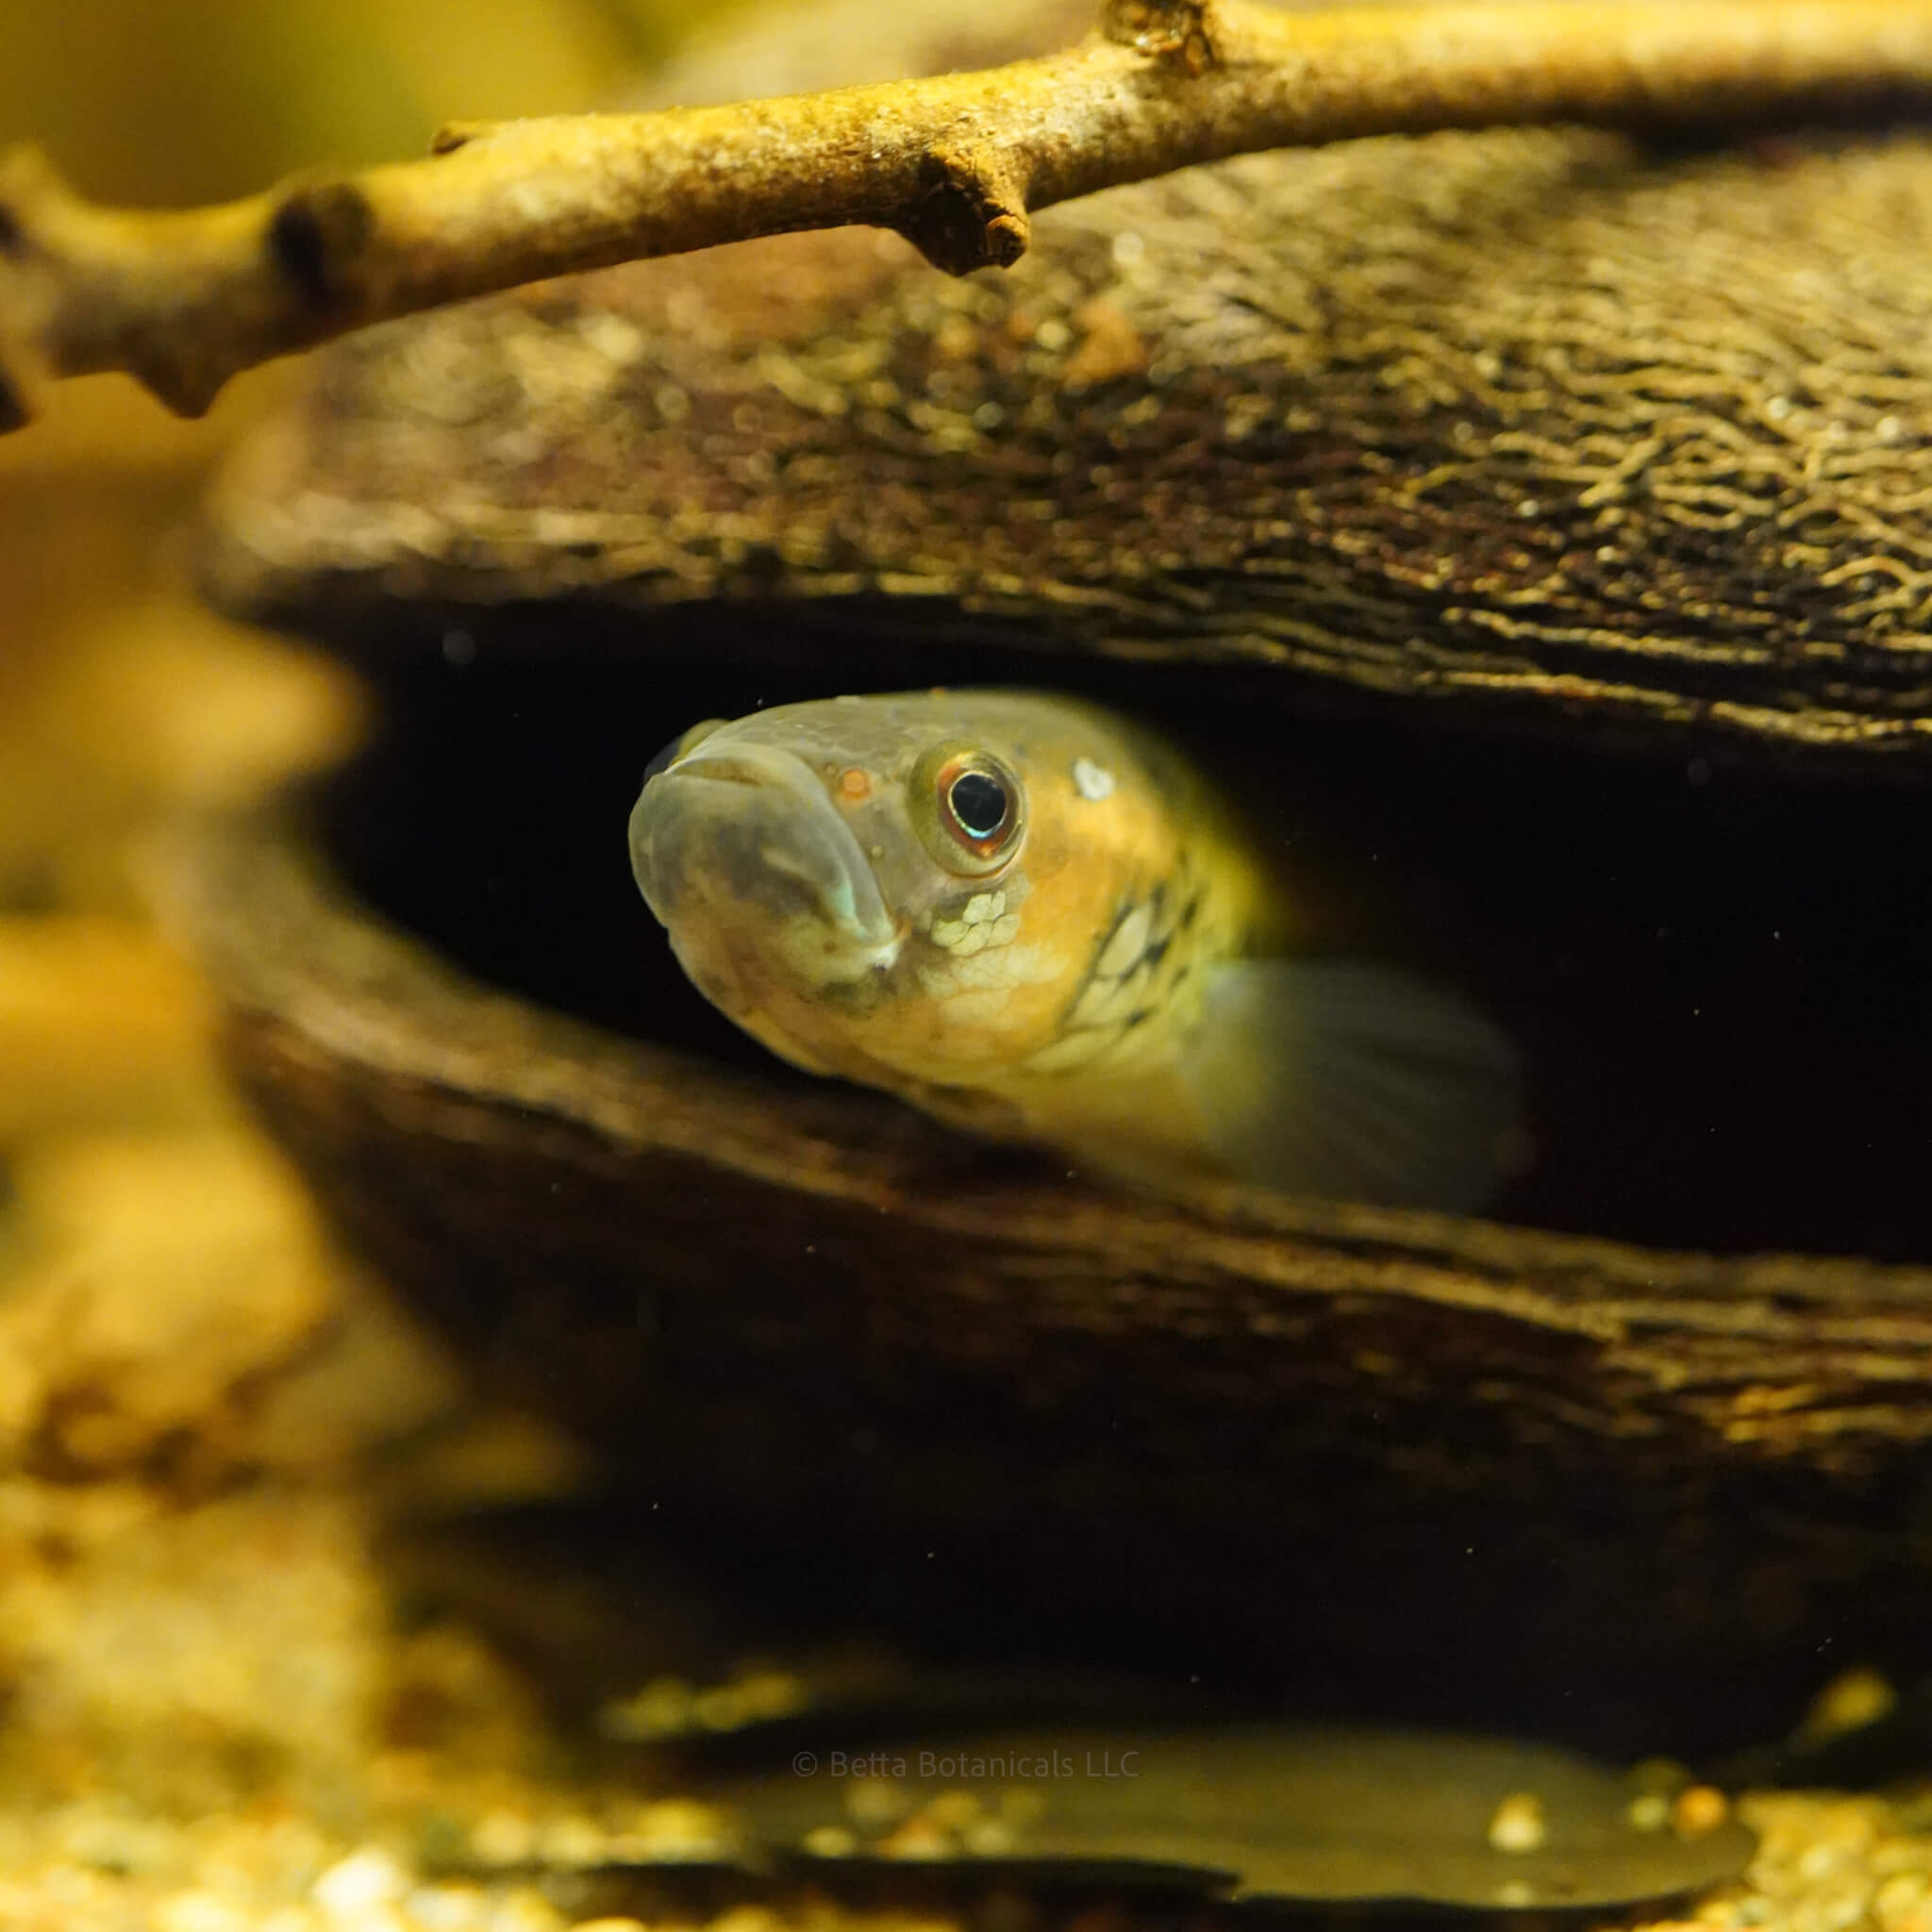
domestic & wild betta fish
Wild and domestic Bettas are perfectly suited for the Botanical Method Aquarium. Leaf litter provides them with territory, foraging grounds, and spawning sites, with floating leaves often serving as anchors for their bubble nests. In the wild, Bettas feed on macrofauna, which in turn feed on decomposing leaves. By recreating these conditions, you strengthen their connection to both their wild conditions and to the forest canopy that sustains them in nature.

Apistogramma
Apistogramma thrive in South American blackwater streams where leaf litter shapes nearly every part of their behavior. Females often select seed pods large enough to protect fry, yet small enough to exclude persistent males—the Savu Pod is a perfect example. When feeding, they sift mouthfuls of sand and detritus, extracting worms and microfauna sustained by decomposing botanicals. These natural rhythms are what make them such a rewarding species in a Botanical Method Aquarium.
Killifish
Killifish fit naturally into the Botanical Method Aquarium, where botanicals and detritus play a critical role in their short lifespans. Leaf litter and biofilms sustain newly hatched fry, while the microbial food web provides a steady supply of supplemental nutrition. The tannins released by botanicals strengthen slime coats and soften the environment, helping reduce stress. In these conditions, Killifish can thrive, displaying the full circle of their lifecycle—spawning, hatching, and foraging—within a system that mirrors their wild habitats.
Step 12
12. Common Mistakes & Pitfalls
The botanical method aquarium invites a slower pace, one rooted in patience, observation, and the gradual unfolding of ecological processes. But like any methodology, there are missteps that can derail stability early on. Most aren’t catastrophic, but avoiding them will set you up for long-term success.
Key Method: Build your system for stability, not speed. The botanical method rewards gradual change, deliberate actions, and letting the ecosystem dictate the pace—not the aquarist’s impatience.
Adding Too Many Botanicals Too Quickly
The most common issue in beginners is enthusiasm outpacing biology. Dumping in large amounts of leaves and pods all at once can overwhelm your biological filtration, trigger bacterial blooms, and cause oxygen dips—especially in tanks with low surface agitation or heavy stocking.
Start slow. Add a small handful of botanicals, observe for 5–7 days, and layer more gradually. This mirrors nature, where organic matter enters slowly over time.
Skipping Botanical Preparation
In the wild, a single leaf falls into hundreds to thousands of gallons of water, instantly diluted. In the aquarium, we don’t have that luxury—preparation (rinsing, boiling, and discarding the first soak water) is your dilution step.
Yes, some tannins are lost, but the trade-off prevents overwhelming the system and protects sensitive livestock like shrimp, wild-caught fish, and discus. Prepared botanicals integrate more smoothly and predictably.
Expecting Instant Aesthetics
These are not plug-and-play displays. Early stages often bring cloudy water, shifting leaves, and bursts of fungi. Many tanks are abandoned before they’ve even begun to mature.
Let go of the urge to constantly “fix” things. Beauty here is found in the changes, not in freezing the tank at a single point in time.
Incompatible Filtration
High-flow mechanical filtration or chemical media (like activated carbon) can strip out humic acids, tannins, and dissolved organics—key functional elements of the method.
Choose filtration that maintains gentle flow and preserves tint: sponge filters, low-flow canisters, or surface skimmers. Avoid chemical filtration unless correcting a specific problem.
Neglecting to Test or Track Water Chemistry
Botanical systems—especially with soft or RODI water—can shift pH over time. Without monitoring, you risk moving fish outside their comfort zone.
Test more frequently in the first few months, then scale back once stability is established.
Overstocking or Adding Sensitive Species Too Early
These systems need time for microfauna, biofilms, and water chemistry to settle. Adding a full bioload or delicate species early creates unnecessary stress.
Stock slowly, matching your additions to the maturity of the system.
Underestimating the Role of Detritus
In traditional aquariums, detritus is waste. Here, it’s part of the food web. Decomposing matter feeds fungi, microbes, and invertebrates, building stability.
However, be mindful of anaerobic pockets under dense leaf mats. Avoid disturbing established beds during water changes, and never aggressively vacuum the substrate.
Misunderstanding TDS and pH Changes
Botanicals can lower pH and TDS—but only in unbuffered water like RODI or very soft tap water. Hard water with strong buffers will resist changes, regardless of the amount of leaf litter.
If you need to lower the pH for species like Parosphromenus or wild bettas, invest in an RODI unit or purchase RODI water rather than relying on chemical pH reducers, which go against the method’s philosophy.
You can lower the pH and TDS of water using botanicals, which I do at home for my macrostoma. But to do this I start with RODI water and then I run a Fluval 107 Canister Filter full of macaranga leaves. alder cones, catappa bark, and seed pods continuously. If I started with tap water, or the water from my well with a TDS of 357 I would not be able to lower the pH. It is the use of RODI that allows the acids in the botanicals to lower the pH.
Final Thought
The botanical method aquarium is messy, but in a natural way. If you get my drift. This is mostly the experience of aquascapers with high-energy systems expecting to add botanicals and keep clean sand lines, algae-free plants, and detritus-free water. But in nature, Mother Nature has all of those things and more. A little algae on the plants is natural, detritus floating in the water kicked up by your corydoras is natural. It requires mental shifts away from much of the aesthetics we have been conditioned to expect. If anything, the Botanical Method Aquarium will teach you to expect the unexpected. Disregard the desire for pristine aesthetics, and over time, the definition will include the presence of detritus, algae, leaf skeletons, and detritus worms.
Step 13
13. Embracing Mother Nature's Process
A Botanical Method Aquarium isn't static. They are a living system that changes from week to week, month to month. Leaves darken and decompose. Seed pods soften, then slowly collapse. Biofilms bloom and fade. Tannins deepen, then mellow. These aren’t the signs that the aquarium is “failing.” They are proof that it’s working exactly as Mother Nature intended. The temptation—especially in the first months—is to intervene when things feel unpredictable. But ecosystems don’t flourish under constant human correction. They thrive when we give them the right materials, then hand over control to the processes they were designed for.
In nature, streams and flooded forests don’t get “reset” every few weeks. Leaf litter builds in layers. Organisms adapt to seasonal changes. Microbial populations rise and fall in sync with resource availability. By leaning into this natural rhythm, your aquarium will find a balance uniquely its own—one that can’t be rushed or replicated.
This is the part that often surprises aquarists: the more you allow the system to evolve, the more the aquarium begins to resemble its wild counterpart, not just in appearance, but in function. Detritus becomes food. Tinted water softens light and calms fish. Leaves transform to detritus, fueling a quiet but persistent cycle of renewal. Patience here is the key. Observation replaces intervention. Curiosity replaces control. And with time, you start to notice the subtle choreography between plants, animals, and microbes.
If you can embrace this process, your Botanical Method Aquarium will reward you with something far more compelling: a thriving, evolving ecosystem with a story that unfolds right in your living room. When you’re ready to start, all it takes is the first layer of botanicals. From there, the process unfolds on its own—one leaf, one pod—at a time.
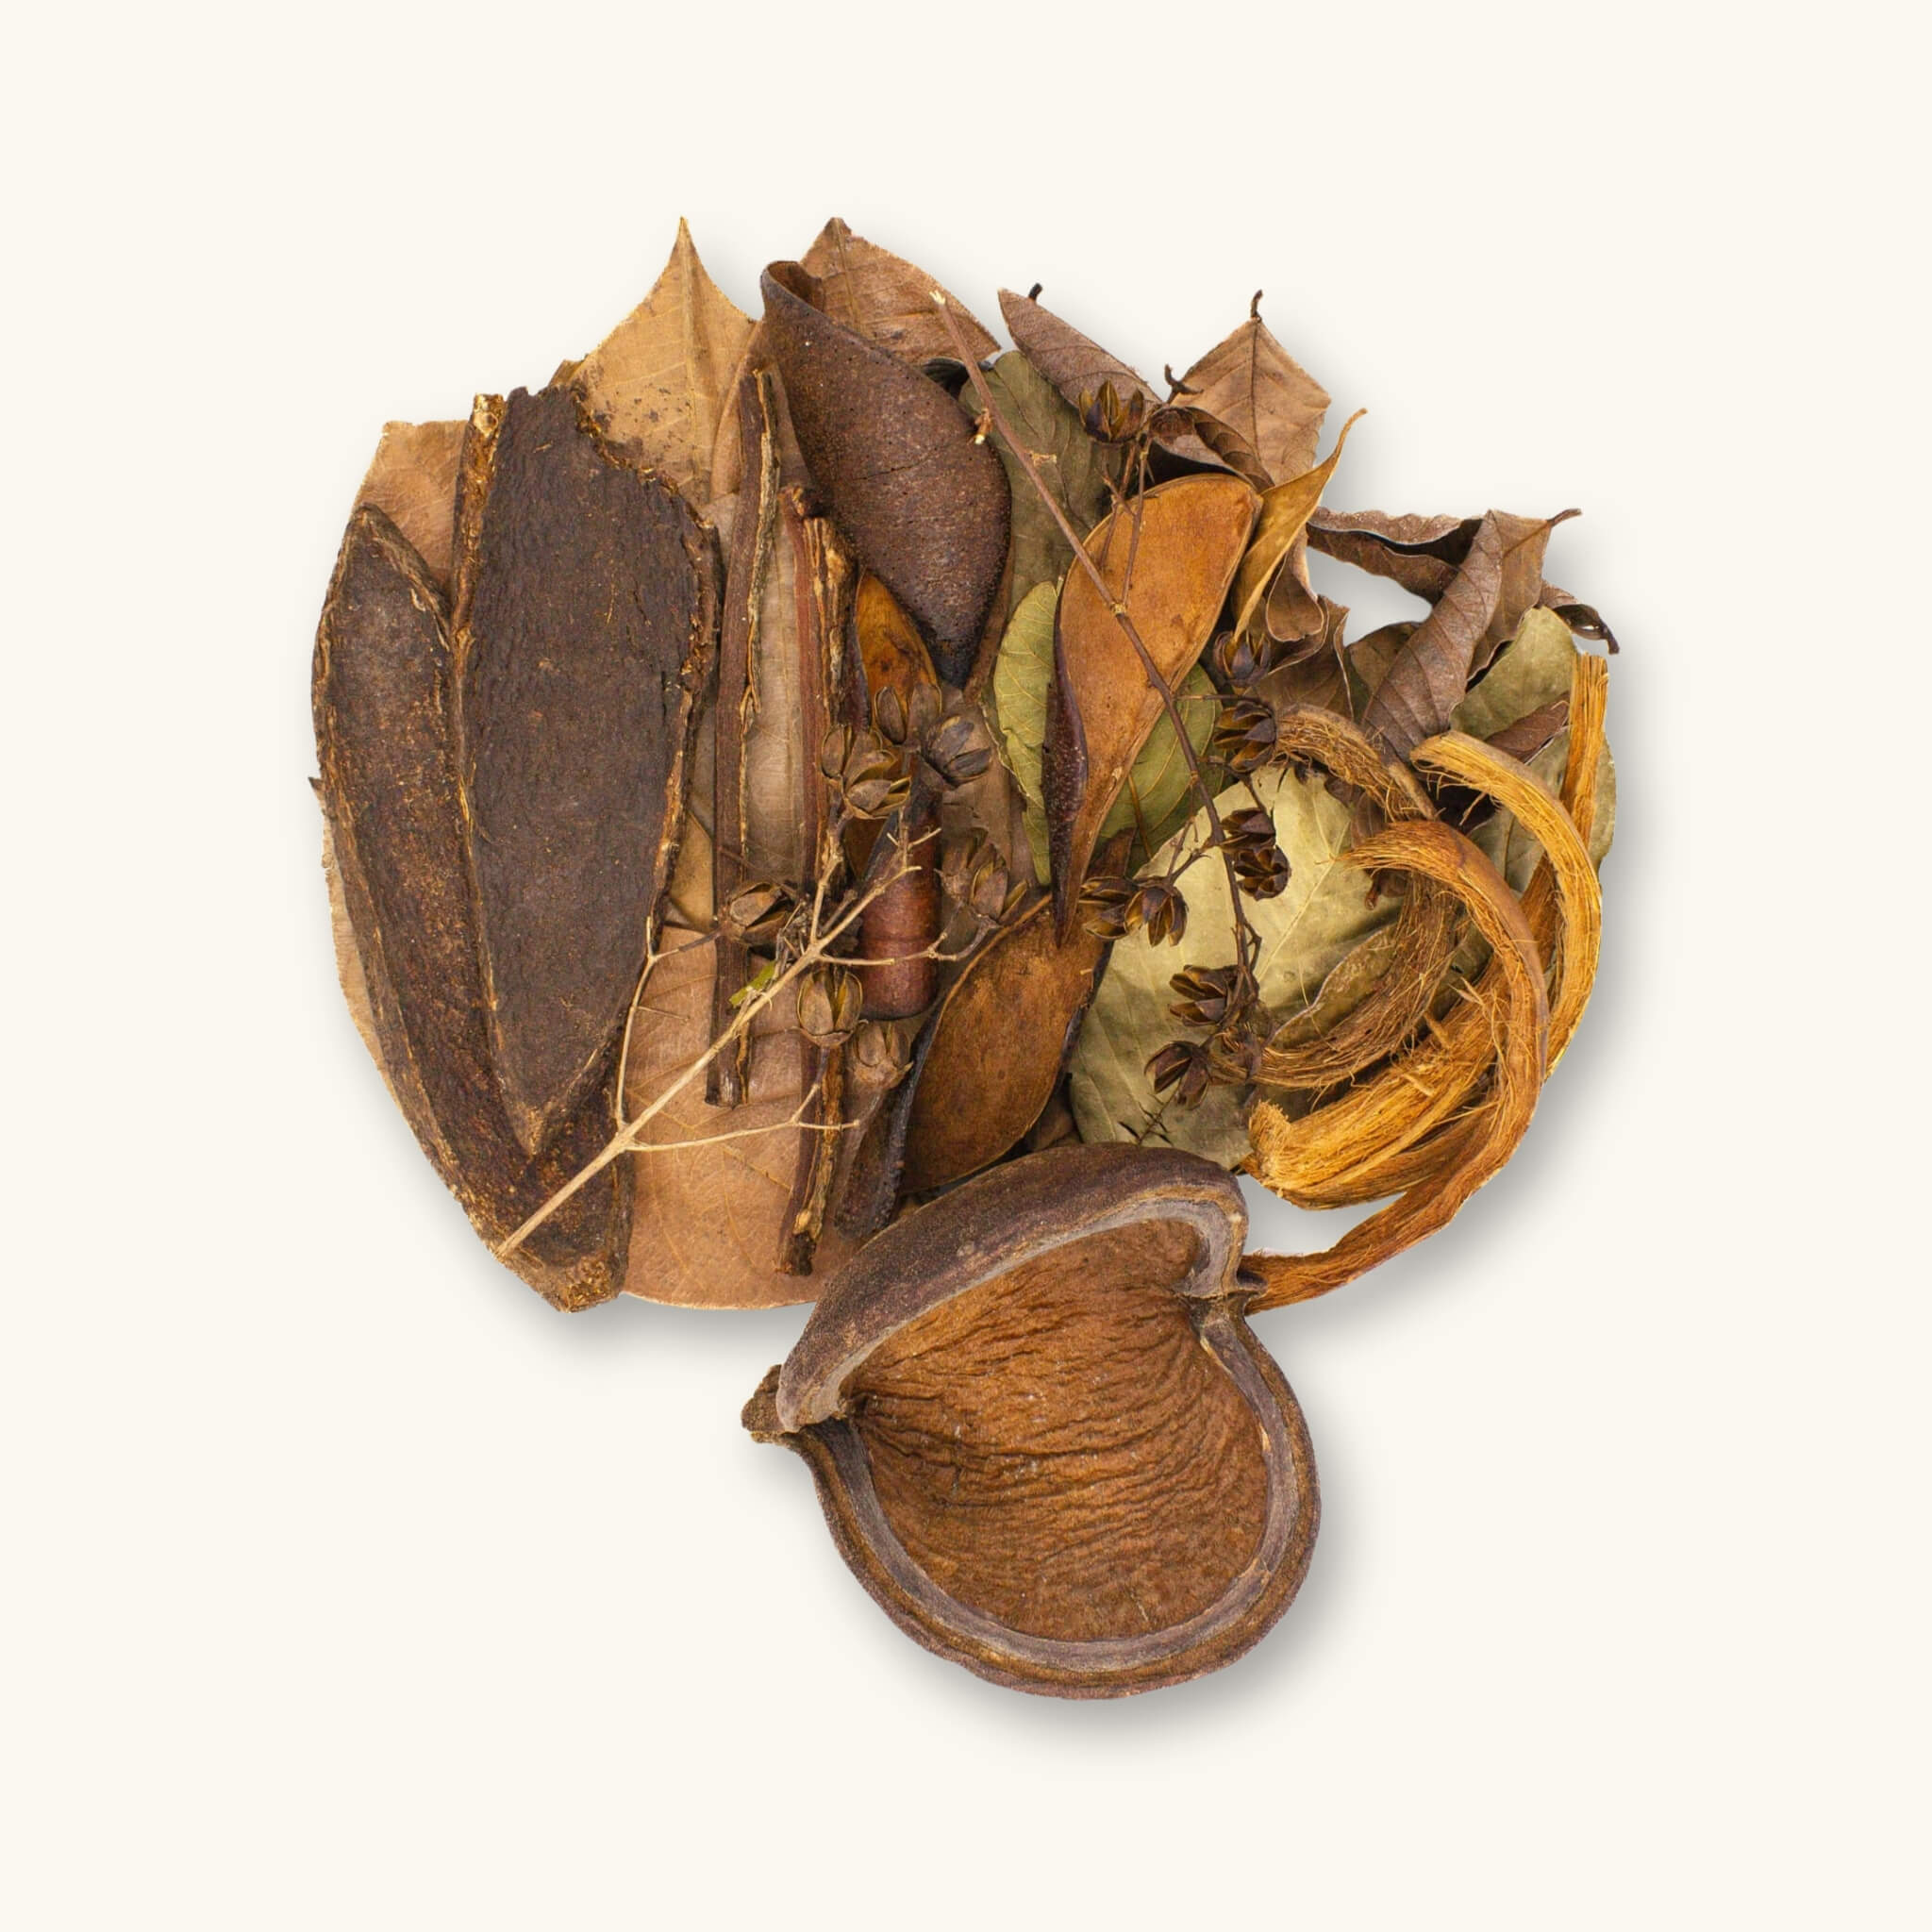
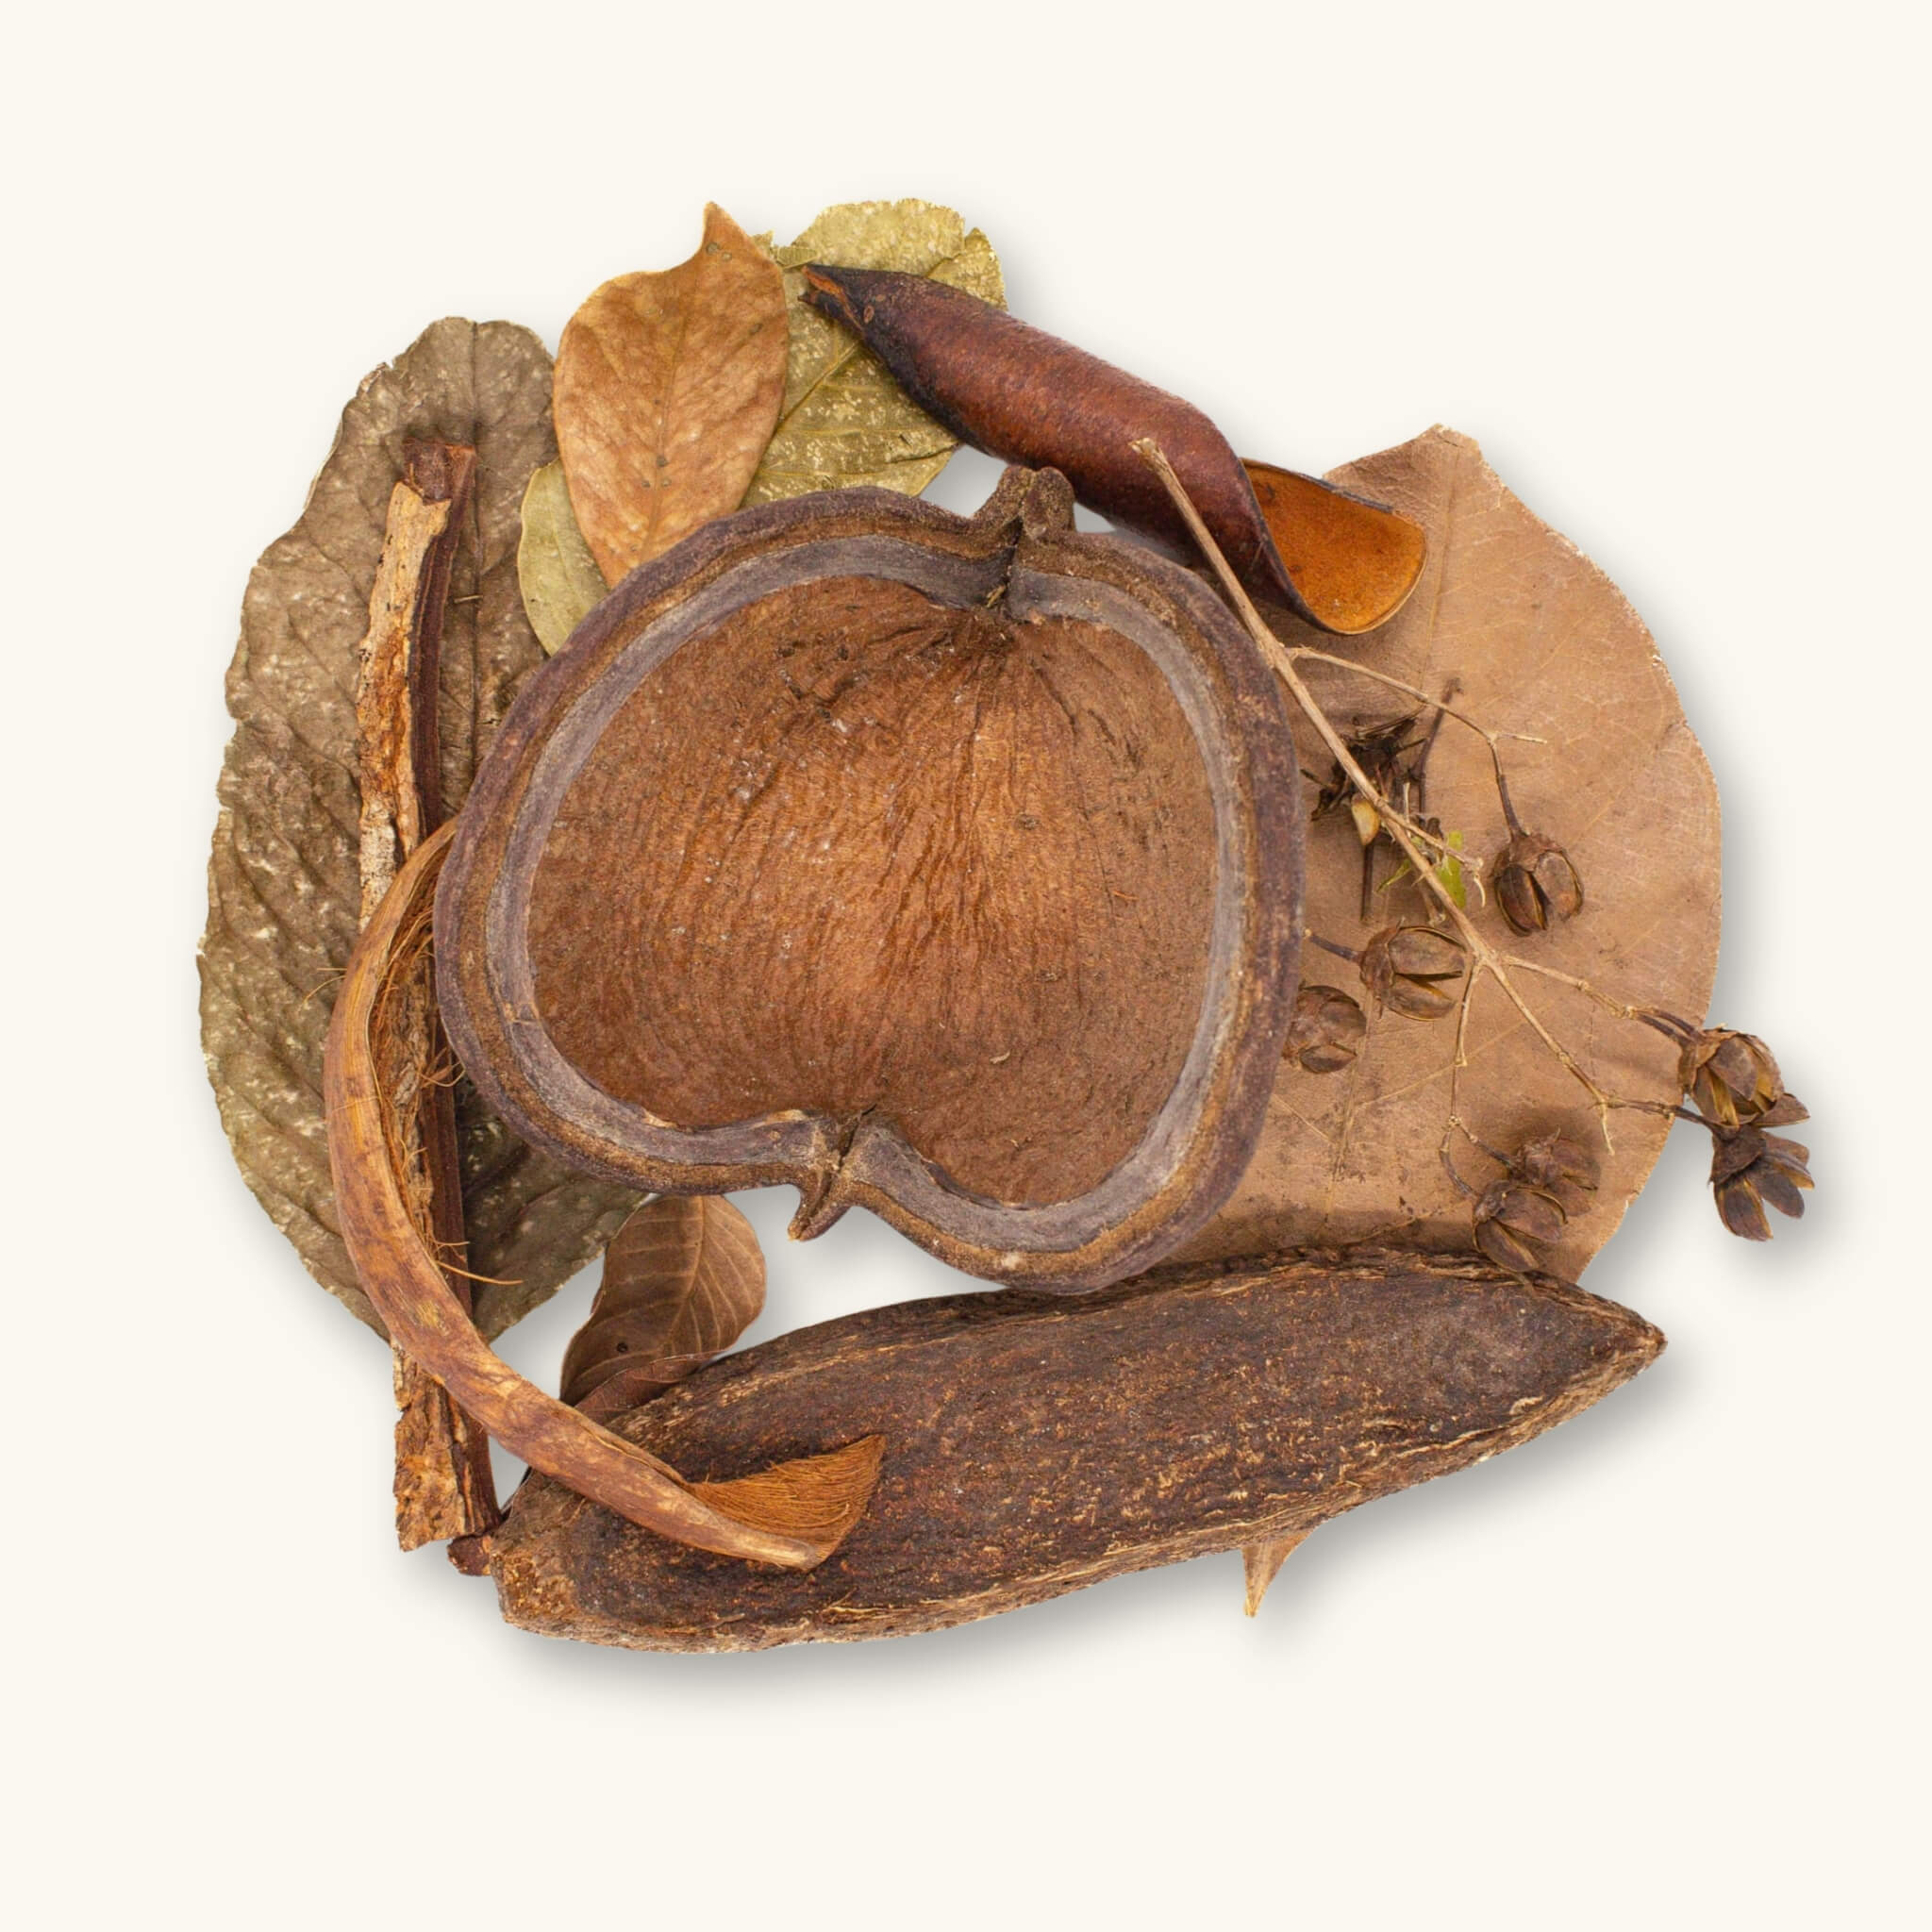
#TanninBae Beginners Start Here
These popular beginner botanicals help recreate a more natural environment.

Join the Movement
The Botanical Method Aquarium is one of the most authentic replications of nature we have.
It’s a living reminder that even the smallest ecosystems hold extraordinary complexity, beauty, and resilience.
Every curled leaf, every biofilm, every ripple of amber light is part of a story that began long before it reached your tank—and will continue as long as you allow it to unfold. By choosing this approach, you’re giving Mother Nature room to speak in its language, on its terms.
It may not always be neat. It may not always be predictable. But the imperfections are where the magic lives. The joy of this method is watching your aquarium become what it wants to be, shaped by the same rhythms and forces that guide wild habitats, with small tweaks to manage it within a glass box.
So as you begin—or continue—your journey, remember:
You are a steward, not a sculptor. A collaborator, not a controller. Your role is to set the stage, then step back and trust the processes that have sustained life for millennia.
Welcome to the Botanical Method Aquarium.